Which Cricut Machine Should You Buy? I can't answer that for you. It will completely depend on you, and what you want to do with the machine. We are all so very different - what works for me may not work for you. What annoys me may not bother you at all. All I can tell you is my experience with the machines.
I own and use both a Maker, and an Air 2.
If my Maker broke tomorrow, I would not miss it. There's a part of me that might actually be a tiny bit relieved to not have to keep using it. If my Air 2 broke tomorrow, I'd be at the store replacing it that same day.
Both machines use the exact same program - there is no difference in how Design Space works, other than once you click make it, the material and tool selections will differ.
================
My First Maker Was Defective
When my first Maker machine arrived here, I had been using an Air 2 for almost 4 years, and I use my machine almost daily. I was not new to this. But for the first week, I was so incredibly frustrated.
The rotary blade would cut 60% of a project, then flash a red error light.
The vinyl setting would cut right through the backing, sometimes for the entire project, sometimes just for parts of it. Using the washi tape setting would work better, some of the time.
For cardstock, I would have to change the settings constantly. Intricate Cardstock would cut well enough about 75% of the time, but that setting means it makes the cut twice, taking much longer to cut every project. And sometimes even on that setting, the machine would simply not cut properly. It would look like a design issue -
Exact same project. After several tries, different settings, etc., I finally just put the exact same mat into the Air 2, and it cut perfectly by simply turning the dial to cardstock.
I was starting to compile a list of "work around" settings - things like use the washi tape setting for vinyl, intricate cardstock for any paper project, etc, and I was incredibly frustrated that none of the settings on the maker actually worked for what they should.
When cutting vinyl, you should be able to just choose the setting for vinyl.
While in Hobby Lobby that week, on a whim, I bought another machine. I knew I could always return it - but I wanted to be sure this was truly a Maker issue, and not just a defective machine.
The 2nd Maker was HUGE improvement. Still not as good as my Air 2, in my opinion, but drastically better. I could cut vinyl on the vinyl setting, and cardstock on the medium cardstock setting. [The Light Cardstock setting never works for me, even when the cardstock I use is in well under the light weight range.]
I returned the first machine.
I heard from so many crafters during this time, telling me the different settings they were using as work arounds for the Maker, to get it to cut correctly. I had several users tell me that you just have to do practice cuts, for every project, to determine the correct settings first. I believe a lot of crafters are using defective machines, not realizing it really shouldn't be that difficult.
The top box was my first, defective, Maker machine. The bottom box is the second, much better, machine.
Lets be clear - in case you don't actually know me - I do not love change. Every change is likely to annoy me, because I find it inconvenient, and in general, I am impatient. I'm sure that this is a small part of the reason I do not love the Maker. But it's certainly not the only reason. Also also to be clear, I don't hate the maker, I just don't like it nearly as much as my Air 2. Perhaps after some time, when I finally use it for things like cutting felt, I will come to love it.
In general, I find the Maker to be a lot more hassle to do what the Air 2 does simply, and in many cases, better.
But this is not all me and my dislike of change. There are some quality control issues with cricut machines, and there's no doubt in my mind that many, many users are using defective machines, particularly Makers.
From the many, many messages I have received, I have no doubt there are a lot of defective Makers out there.
I Personally Would Not Purchase My Machine Direct From Cricut
If you buy from cricut, you have to call customer service and convince them its defective, then they will send you a new one. You may need to make several calls, email videos, etc.
The new one may be a different color - colors are not guaranteed for replacements.
If you purchase through a local craft store, or through Amazon, you can just return the machine, noting in the return that the machine is defective, and then buy a new one in the exact color you want. If something goes wrong with the machine 6 months down the road, the warranty is exactly the same whether you purchased it at Michaels, or from the Cricut website. Save your receipt, just to be safe.
TIP - if you do have to call Cricut Customer Service and you are having a difficult time getting the representative to understand your issues with the machine, hang up and call back. You are almost guaranteed to get a different representative when you call the second time. Experiences with Cricuts customer service line vary greatly - some have great experiences, some terrible. Sometimes all you need is to call back and get a different representative.
===============
Comparing The Machines
There's a chart on the cricut website that compares all the features of the different machines. I think our instinct, for most of us, is to just buy the "latest and greatest". But with cricut, the latest may not be the greatest.
Just because the list of features is longer, does not mean it will work better for what you want to do. And that is the key. What works for me may not work for you. You will have to figure out what works best for you personally, I can only tell you what works, and what does not work, for me.
For me, I ruled out the 3 line of machines immediately. The only real difference with the Air 3 and the Maker 3 [There is no Maker 2 ] is that they use Cricuts new line of "smart materials", so you can cut without a mat, making longer and 1 inch wider cuts, if you buy cricut smart vinyl. I do not ever use cricut brand vinyl, so I knew those machines were not for me.
The Joy is a miniature machine at a full sized price. For me, that makes no sense. But I know that some love their Joy machines, and I know of two women in particular who purchased them for their mothers to make cards in their assisted living facility, where space is limited.
===========
The Tools That Are The Same
The real differences in the Maker and the Air 2 machines come down to the tools.
The Writing Feature in the Air 2 and the Maker is identical.
Print then cut is also nearly identical - although the Maker can do print then cut on colored cardstock, the Air 2 can only do print then cut on white paper. [There are work arounds to use colored papers in the Air 2, but they are tedious and the results vary.]
Design Space is the same for all of the machines.
===================
The Tools That Are Different
==================
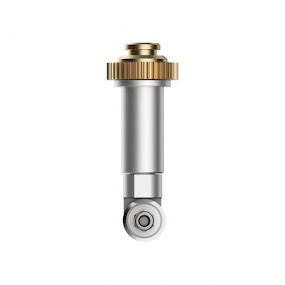
The Scoring Wheel, vs The Scoring Stylus
The Scoring Stylus from your Air 2 can be used in the Maker. There is no need to purchase the additional $25 scoring wheel.
On the Air 2, the scoring stylus goes into the pen slot.
With the Maker, you just have to accept that scoring will be an annoyance. Whenever possible, use the dashed cut lines on a project rather than any scoring tool at all.
For the first month that I had the Maker, I used the stylus, because I already owned it. But every single time, I would forget to change the tool in the settings, so every. single. time. I would have to eject my project, edit the tools to select the stylus, then start again.
There is no way to tell the Maker that the stylus is your default choice. It will default to the scoring wheel, and if you have not installed the scoring wheel, it will give you an error message that forces you to eject your mat and change the selection.
So I ordered the scoring wheel.
The scoring wheel goes in the same slot as the blade. To use the scoring wheel, you need to remove your blade, replace it with the scoring wheel, insert the mat and your project will be scored, then you have to remove the scoring wheel, replace it with the blade, and your machine will then make the cuts.
Imagine this process with any project from 3dsvg, or Dreaming Tree... the Heirloom Tree Project would require me to switch the blades out 28 times, for the 14 mats. No thank you. I'll stick to the scoring stylus, which can be put in the pen slot, no need to remove the blade to use it. I just have to remember to change the tool in the menu, when using the Maker.
----------SCORING TIP-----------
If your scoring stylus is not scoring hard enough, place a second score line directly over top the first, so it scores twice. For many projects, it may be worth purchasing a manual scoring tool, and not using the cricut machine at all. But for some projects, you can simply let the machine cut the dashed score lines, rather than use a scoring tool.
=================
The Rotary Blade
The rotary blade is the number one reason I purchased a Maker, And I have barely used it. I do hope to work a bit more with felt, and I'm hopeful that it will make this machine worthwhile for me.
I'll use the rotary blade to cut leather this year too - I've heard it does that well. But I've also cut many, many pairs of earrings using my Air 2 and the regular fine point blade.
I know others have looked at the Maker for cutting quilt pieces. The Maker certainly can do that. Each piece of fabric would have to be placed on a mat, fed into the machine, pattern loaded in design space... I can see this for some applique, but for most quilt projects, cutting by hand is going to be SO much faster and more efficient than using a Cricut. I've seen a few baby quilts cut with cricut, but they are all quite obviously a "see what cricut can do" post, something made once, not a feature to use often.
========
Engraving
Engraving Example from:
https://www.happinessishomemade.net/cricut-maker-engraving-tool/
With the Maker, you can engrave, if you purchase the engraving tip. You can actually engrave with the Air 2 , but I have never tried it. Cricut does not make an engraving tool for the Air 2, but Chomas does, and I know several who have used it successfully.
For me - I have no great interest in engraving. You can only engrave single line designs (same as when using the foil tip) and only certain materials, and it's just not something I have a real interest in, for myself.
The Chomas engraving tool that can be used in the Explore Machines was being used long before Cricut released the maker and it's engraving tool - but if your machine is less than a year old, you should be aware that if the tool breaks your machine, it will void your warranty. (After 1 year, you no longer have a warranty). I've never used this tool myself!
==========
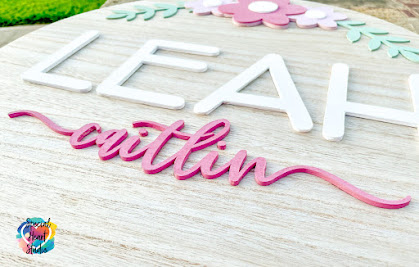
The Knife Blade
Special Hearts Studio, one of my favorite designers, made this beautiful name sign with her Maker, using the knife blade. It can be done. See her tutorial here: https://specialheartstudio.com/how-to-cut-wood-with-a-cricut/
When looking at the differences in machines, many purchase the maker because it can cut wood. And it can - sort of. VERY very thin wood. It can take hours, or even days, to cut, and the failure rate is high.
Most of the wood projects you see on pinterest and etsy were made with a glowforge, or similar machine. [Glowforge is a brand, there are other, cheaper, options out there]
====================
Example using the Wavy Blade, from:
https://heyletsmakestuff.com/cricut-maker-wavy-blade-tool/
There are extra blades, such as the wavy blade, for the Maker. The wavy blade makes a wavy cut instead of a straight line. If I want to make a wavy cut, I just design my project to have wavy lines. With the wavy blade, you design with straight lines, and the blade makes them wavy. Personally I can't think of a single instance where I would need that blade - ever. There may be instances where it's super useful - I just can't think of any. :-)
=================
If I were to replace the Maker again , I'd either buy a second Air 2, or a Silhouette. I have no doubt Silhouette has the better software - but after spending years learning to work around all of Design Space's deficiencies, I haven't been enthusiastic about learning new software. Eventually I will, I just don't have the time or energy for that right now.
So why do I keep the Maker? Because I like the idea of cutting felt, and hope to use that rotary blade. That's really the only reason,
=================
Both of my machines are in an old office armoire. I found the armoire at a thrift store - it looks like something that may have come out of a hotel suite. It's deep enough that both machines can cut right where they sit.