

- Always attach your text (everything in your design that is the same color) to keep it together - and not jumbled - when you click make it.
- Cursive text needs to be welded. If you do not weld it, it will cut each individual letter separately, you want cursive writing to cut each word as one image - weld will make each word one image.
- https://wordmark.it/ Word mark it is a website that shows you your text in every font installed on your device. This makes it much faster to choose a font for your project.
- How to find, download, unzip, install and back up your fonts: http://fieldsofhether.blogspot.com/2017/12/all-about-fonts-text-in-cricut-design.html
- Where To Find LOADS of Free Fonts - https://fieldsofhether.blogspot.com/2020/05/where-to-find-loads-of-free-fonts.html
Often fonts are not named what we think they are, so when you try to find them in design space, you won't see it. Examples - the I Love Glitter font is actually MF I love glitter - so it starts with an M, not an I. The Skinny font (the font used for Rae Dunn knock offs) is THE Skinny, not skinny, so it starts with a T, not an s.
Spacing
- Design Space has what they call "kerned fonts". What exactly that means, I don't know. Their program still does not actually read font kerning properly, although it's way better than it was a couple of years ago!
- Most of the time now, DS does ok, and a font is "fine" just typed in the program.
- But you can download the free FontLab Pad program, it will read the text properly, naturally add ligatures (special fancy combinations built into a font - not the same as glyphs) if the font has them, and save as an svg. With fontlab pad, you do not even need to install the fonts - it can use fonts right from the zip files! Great if you are only using a font for one special project.

You will also find that for many fonts, even if you just adjust the spacing in design space, they still will not look like the examples shown by the designer. You miss out on a lot of the fun features written into the font, that DS does not read. Here is an example:

The font Garlic Butter - as displayed when typed in design space

The font Garlic Butter - as displayed when typed in almost any other program.
(in this case, it's how it looks in fontlab pad)
This is how the font designer intended the font to look.
- Group to move things around together in Design Space
- Attach to keep things exactly the way you see them in DS, when sending to cut. (if your letters or words are all out of order, select all & attach)
- Weld all cursive fonts, so that they cut as piece and does not leave cut lines between letters. Weld is now, in 2023, in a new menu called "Combine". Here's an explanation of all of those "Combine" options https://fieldsofhether.blogspot.com/2022/10/the-new-combine-menu-in-design-space.html
Group is really just for use while designing. It helps you move things around "together" Text is automatically grouped in each text box, as I showed you above.

Have you ever mixed different fonts, text, and graphics, then hit make it, and it's all over the mat?

If you want your design to cut exactly the way you laid it out, select all, and attach. then when you choose "make it" - it will keep everything in the same order and spacing.

When you select "attach", it will make everything the exact same color, because it will be cutting it all from one sheet. If your design has multiple colors, you select everything in each color and attach them individually. So select all of the red text and attach, then select all of the black text and attach, etc.

Curving Text In Design Space
- Use the Curve Feature, found at the top of Design Space
- CURVE FIRST. Do not weld first. Once you weld, you cannot curve.

Simply type your text, then click on the curve button and move the slider to adjust how much the text curves.
Slicing Text In Design Space:

You can slice text out of a shape. When the photo above cuts, it would cut a circle, with the words cut out of it. This makes a great stencil. Or it allows the background color to show
through the design.
If you type the word slice in a text box, each letter is it's own item. So "Slice" is FIVE items. The circle is the 5th item. Since you can only slice two items at a time, you need to select the word slice, and choose weld. Now the word slice is ONE welded item, and you will be able to slice it out of the circle, the second item. (In some recent updates, you may no longer need to weld text to slice. It seems to vary, by update. You may be able to slice without welding. If you cannot slice, try welding and see if that makes the slice button appear)

Only two items can be selected at one time to slice. As long as your text is ONE text box, you should see the slice button available. If it is greyed out, you likely only have one item selected, or more than two.

Attach Instead Of Slice
In both the examples here, you could skip the slicing and just attach. If you attach the text to the circle, it will all be the same color, and the text will cut out of the shape.
It's good to know how to slice, and there are times you will want to slice rather than attach - but for most basic projects, attach will work just fine and is quicker!

Offset In Design Space
This is a new feature in 2021, and it's really a great one! Prior to this year, to get a "shadow" behind your text, you need to use an outside graphics program, or a dual layer font. With the new offset option in design space, you simply select your text, or item, and click the offset button. It will create a shadow bubble behind the object or text. This is particularly great for making stickers, or any print then cut project! You can create an offset, then flatten to it, so the machine will only cut around that "shadow" and not each letter or part of your text. See more about offset here:
https://fieldsofhether.blogspot.com/2021/03/offset-text-has-arrived-in-design-space.html
About Those Glyphs (tails)
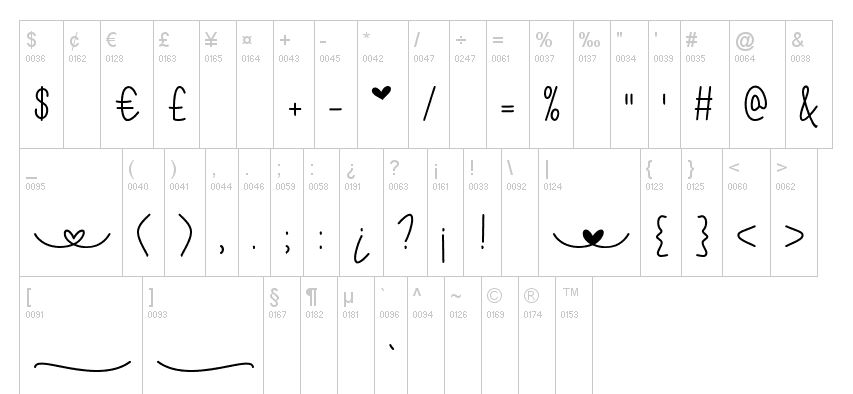
In the I Love Glitter Font, you can add a heart with swirls by using the | key. Or a plain solid heart by using an *.

In the Stea font, you can use numbers to create borders

And in fonts like Samantha, you open the character map and copy and paste the fancy versions into a text box:

detailed instructions on how to use the character map with fonts like Samantha are here:
https://fieldsofhether.blogspot.com/2019/02/how-to-find-use-glyphs-in-fonts.html
For ALL of these, you can use a character map. There's one built into windows, but it's hard to see, in my opinion, I prefer the free character map from maintype logic.
Writing Fonts For Design Space


There are special Writing Fonts in Cricut, that will write as text. Most are $5 or more. There ARE free alternatives, that work as writing fonts, without being writing fonts. I keep an updated list with examples, here: http://fieldsofhether.blogspot.com/2017/11/6-single-line-fonts-that-will-write.html (There are over 100 free fonts listed there, sorted by which pens they work with, all with links to download them)
- Often when you see a pretty font with lots of glyphs in Dafont, they are not included in the free version of the font. Sometimes they are though!
- A Cheat Sheet showing how to use some of the Free Fonts with "Easy Glyphs" no character map needed. http://fieldsofhether.blogspot.com/2017/09/fonts-with-tails.html
- My favorite character map - https://www.high-logic.com/font-manager/maintype (The free version works just fine, and does not expire)
In the I Love Glitter Font, you can add a heart with swirls by using the | key. Or a plain solid heart by using an *.

And in fonts like Samantha, you open the character map and copy and paste the fancy versions into a text box:

https://fieldsofhether.blogspot.com/2019/02/how-to-find-use-glyphs-in-fonts.html
For ALL of these, you can use a character map. There's one built into windows, but it's hard to see, in my opinion, I prefer the free character map from maintype logic.
Writing Fonts For Design Space
- Most fonts will write as a "bubble" - outlining the font
- There are a LOT of free ones that will work as writing fonts, See a long list of examples here: http://fieldsofhether.blogspot.com/2017/11/6-single-line-fonts-that-will-write.html
- A Bic pen will fit right in the cricut pen slot, no adaptor needed. A lot of markers will too! http://fieldsofhether.blogspot.com/2017/12/alternative-markers-for-cricut.html

To switch from cut to write, choose Operation, Draw, at the top of the screen. The black square to the right will change to an outline of a square - and you can click on that to change the color. It does not matter what color or pen size you choose - it's going to write with whatever pen you have in the machine.

If you choose the Write function in cricut, and put a pen in the machine, most fonts will write in an outline. The machine will follow the exact same path it would use to cut the text.
There are special Writing Fonts in Cricut, that will write as text. Most are $5 or more. There ARE free alternatives, that work as writing fonts, without being writing fonts. I keep an updated list with examples, here: http://fieldsofhether.blogspot.com/2017/11/6-single-line-fonts-that-will-write.html (There are over 100 free fonts listed there, sorted by which pens they work with, all with links to download them)


Pens that work in the cricut machines without any special adaptors -
http://fieldsofhether.blogspot.com/2017/12/alternative-markers-for-cricut.html
=======================

Where To Find Free Fonts By Style, By Type, And By Holiday
The Crafting With Fields Of Heather Font Index
And Tips & Tricks For Properly Spacing, Adding Glyphs, Organizing, Making Shadow Text, and more!
Thank you much for your help and advice on so many topics
ReplyDeleteHello, I am part of a Facebook group and shared your Blog there. The response to the information you shared has been enormous. There are so many Newbies there and you made the info so easy to follow. I'd like to thank you for taking the time to share your knowledge.
ReplyDeleteThank you so much for sharing!!
DeleteThank you!!! You've answered questions I didn't know I had! :)
ReplyDeleteThank you so much for all of this information. You have saved me hours trying to figure things on my own. I am new and have learned so much from your site!
ReplyDeleteThis was one of the best links I “clicked” in Pintrest. Thank you for sharing, I too am a newbie and you have helped me so much.
ReplyDeleteThanks for all the great information...and putting it all in one place too! I mainly use my iPad for designing with my Cricut. Is there a curve option on the app? I looked but didn’t seem to find it.
ReplyDeleteI had the same problem, apparently it isn’t available on an iPad, I checked with one of my FB groups and was told this. Maybe soon they will have it available.
DeleteThank you for your post about WordMark.it. Amazing. This is save so much time when creating designs
ReplyDeleteThank you, this has been so very helpful to me! I do have a question, all of my system fonts are not showing up in WordMark.it however they show up in Design Space under system fonts, do you know why this would be? I’m using an iPad.
ReplyDeleteYou have such great instructions! I'm so grateful! One question for you. If I do as you suggest, and write my text in FontLab, save as SVG, then upload, it seems like I can't curve the text. Am I doing something wrong? Thanks again!
ReplyDeleteUnfortunately, no. Since you are uploading an svg, it's not text that can be used as text in Design Space. You also cannot curve once you weld text in design space.
Deletethank you!!!! this blog is amazing. I knew some of this info on fonts, but still learned so much! I will come back to this as I use new fonts. Thanks so much!!!
ReplyDeleteThis is by far the BEST tutorial on weld, attach and such with the Cricut. Thanks for sharing the best information yet!
ReplyDelete