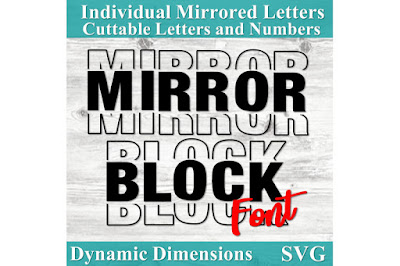
Stacked Text, Or Mirror Text, Designs have one solid word in the center, with partial outlines of the text above and below the image.
There are three ways to create these.
1. Use a font with an outline and the slice tool in Design Space, or
2. Use the free Stacked Text Generator - it generates a png, which can typically be switched to cut in Design Space, with no problems.
3. Download a Stacked or Mirror Font and type your text in the different versions of the font. Detailed step by steps and lists of fonts are included below.
Quick Links:
- Collegiate Font (FREE) used in this example
- Stacked Font Generator
==================
OPTION 1
Create Your Own With A Dual Layer Font
===================
When you download the free collegiate font, it comes with five fonts. You will type your text twice, once in a solid version of the font, and once in an outline version.
Free fonts with an outline version:
- Collegiate Font
- Bubble Double
- Varsity (the version of Varsity I have has several options, but I'm having trouble finding the one I have on Dafont )
The below example is a comparison of Design Space and fontlab pad, BEFORE the 2022 updates that fixed most of Design Spaces spacing options. I am leaving this example, because the update only fixed MOST of the issues - occasionally you will still run into this issue:
Normally weld is only for cursive text - so that it cuts out each word as once piece, without cuts between the letters. But when you are slicing, you can only slice two items at a time. To make the text one item, you weld it. (In unwelded text, design space counts each letter as a sepate item, even when they are attached in one word)
Before welding, you can see each letter listed in the layers panel on the right
The weld button is located on the bottom right of the design space screen.
After welding, you see "weld result", and one item, no longer a list of letters.
Step 3 - Slice
On your left in design space, choose the shape tool, add a square.
Click on the square to select it
On the bottom left of your square you will see a lock icon, click to unlock it
Now you can resize your square into a rectangle shape.
Layer your rectangle over the welded text,
Make sure you have selected both the text and the rectangle
Choose Slice, from the bottom right of your Design Space Screen.
Drag the extra pieces away, your Stacked text will now be split in half.
4. Repeat, at different heights
Insert the outline text again, or duplicate it before you slice, and slice it in 3rds, or 4ths, instead of in half, continuing to layer the slices until you get the look you want.
==================
OPTION 2
USE THE STACKED TEXT GENERATOR
===================
This site is a stacked font generator. Lots of options. It only saves as png (right click to save) but it's a simple transparent png that can be uploaded as a cut file in Design Space.
Type your text, choose the font from the drop down menu, choose Generate
DO NOT CLICK ON THE GREEN DOWNLOAD BUTTON
that is an advertisement.
Instead, right click on the image and save as.
That pencil beside the generate button has ALL SORTS Of additional fun options.
You can upload simple pngs to Design Space and cut them.
Choose "Cut Image" when you upload
If you want two colors, first duplicate, then contour
Then contour the duplicate, change your color, and layer then back together
==================
OPTION 3 - MIROR FONTS
===================
How these work is, each font actually contains several fonts, some half the letter, some the full letter, etc. You "stack" each layer of text in a different version of this font, for the looks below. You download the entire font, so you can use whatever text you would like, the shirts shown are just examples.
Short Stacked
=====================
My posts frequently include affiliate links
These in no way effect your cost, but may provide a small commission to me if you choose to purchase something once clicking on the link.
My posts frequently include affiliate links
These in no way effect your cost, but may provide a small commission to me if you choose to purchase something once clicking on the link.


No comments:
Post a Comment