Showing posts with label Cricut Quick Tip Cards. Show all posts

The Difference Between Commercial Use, Personal Use & Print On Demand

Commercial Use, Personal  Use, Print On Demand - Which Do You Need?

Please keep in mind that each site may have their own rules for using their svgs  - this is just a guideline for what the terms mean.

About Those "Lifetime Digital Access" Offers

At least once a month I receive a message about Scout and Rose and their Lifetime Digital Access.

The Scout and Rose website hasn't been around for a long time now - and just to be clear, I never recommended anyone purchase this package.  Quite the opposite...  I believe that once a site offers Lifetime Digital Access, they typically do not last much longer.  


TIP - Search Your Purchase History

 
Did you know that most sites keep a record of all of your purchases - and in most cases, you can re-download anything you have bought?  Here's how:

New Larger Print Then Cut Option In Design Space

 
The New Print Then Cut Options Are Here!

Only on the desktop version - not yet available on mobile. 
Must be using the Beta Design Space [Instructions Below]
Click on the Red Error Message in the layers panel, that's where you will find the new options to choose a larger size.

The Guide Operation In Cricut

The Guide Operation allows you to create sizing shapes for your projects, and text notes, that are not sent to the mat when you click "Make It"

The guide feature became available in:
Design Space for Desktop on version 7.6
Design Space for iOS on version 5.5

See more about how guides work, on the Cricut Website

======================
Find an index of all of my Quick Tip Cards, here:


Change Default Folder View in Windows 11

Every time windows 11 updates, it changes my default folder view, using "grouping", and changing my view to lists, on every folder.

This is not how I prefer to view my files.  I do not want them grouped.  And I want to view large icons.  

Fortunately, you can change the default view on all folders at once, pretty quickly.


First open a folder and set it up the way you want your default view to look.
For me, that means going to sort/group and selecting "none"

Then under view, I choose large icons.


Then I click on the three dots to the right, and choose options.  A box pops up.  In that box choose the view tab.  Then choose "apply to folders".

That's it - now that setting has been applied as the default for all of your folders.

====================


The Combine Menu In Design Space


The "Combine" Menu was added to Design Space in October of 2022

At that time, the  weld button changed to a "Combine" button, with a new variety of options.

When The Rename Option is Hidden In Design Space

What To Do When The  Rename A Layer Option Is Missing From Design Space

Renaming layers is especially helpful in this new version, as we no longer see the operation beside the item name.  

For instance, it no longer tells us, in the layers panel, if an item will cut, draw, or score.  So renaming  the layer can be helpful. 

 I can also add the material in the layer name.  For example, when making the floating acetate ornaments, I can name a layer "PC Acetate" to remind me that it is Print Then Cut, out of Acetate material.  

When using Windows 11, I find that the "rename" option, all the way at the top of the right click menu, did not always appear. 

 It depends on where I place my cursor when I right click. 

 If I place my cursor at the top of the group name box and right click, I will see the items at the top of the menu - and rename is the very top item. 

 If I place my cursor at the bottom of the group name box and right click, I will see the bottom of the right click menu, and the rename option will not be visible, since it is at the very top.


How To Quickly Recut One Missing Piece Of A Design In Cricut

Today I cut this design using some leftover scrap vinyl, and I misjudged the placing.  The bottom of the T was cut off.   It was quick and easy to recut JUST the T I needed - here's how I did it.

Quick Tip - Screenshot the colors panel

Tip - When I'm cutting projects with a lot of layers, I sometimes open the color sync panel on the right, make sure I combined as much as I could, and then I take a screenshot.

Then I click make it, and sort out my cardstock. The screenshot helps me to decipher subtle shade differences that can be difficult to figure out from the "make it" screens.

A lot of these complex mandalas - especially from Okadee - have SO many shades. I don't always have that many shades of one color in my cardstock collection.

Often I can combine a few - especially when combining projects. For instance, that scarecrow originally had more brown layers. When I looked at the color panel, I realized I'd like him to have more orange, so I drug a few pieces to the same colors used in the pumpkin.

If I didn't like a change, I just clicked the undo button. This project still has a LOT of colors, but it's more manageable than when I started.

Jennifer maker has a long post on how to change your project colors so they cut in the order you want them to cut - but that is too confusing to me, I want the mat to show me what color the pieces should be, so if I want to cut out of order, I simply click on the mat (from the cut screen, after choosing make it) and it cuts whatever mat is selected. The chart above tells you which order cricut will use when sending the project to the mat. It starts with the white and works to purple.

================

Quick Tip - Use Painters Tape To Keep Tiny Paper Pieces From Getting Lost

 
 When there are tiny pieces in a paper cutting design, I put them on painters tape and tape them to my desk.  The paper sticks to the tape, but removes without tearing.

Note - the glue is still wet on this, which explains the white smudges. Thankfully, this glue dries clear.  The design is 4 inches in diameter.

  If you look up at the right, in front of the phone, there's another piece of painters tape stuck to the desk surface - it's holding more paper pieces for another project.  I do this a LOT, and have never had an issue.  

Lazy Vinyl Weeding

This is not a tip - but rather an admission. As in, this is probably a bad idea, but I do it anyway, because I am impatient. :-)

When a design has a solid outline with a lot of little pieces to weed out, and I am using regular or permanent vinyl (NOT htv), I will sometimes pull up the solid piece - the part of the design I will actually use, then use my scraper to quickly remove all the little pieces, then carefully place the solid piece back down. You can usually see the outline on the backing of where exactly the vinyl should go - but sometimes it can be tricky to not stretch it a bit, or get wrinkles. That's why it's not really a great idea. But like I said, I am impatient, and it frequently works out ok for me. :-)

Here you can see small bubbles in a few places. I'm confident I can work those out easily enough when I transfer the design - but again, this is why this is not the way you should do this.

The SVG is free from:
This is different than reverse weeding.  Reverse weeding works really well when you are trying to keep all the small details - small lettering, etc.  You apply the entire design to the transfer paper, then remove then weed.  See more about that here:


I transferred this to a re-usable drink pouch , it transferred great, I had no problems removing the "bubbles" above.

See more about decorating these drink pouches - which come with straws and are perfect for wine slushies,-  here: https://fieldsofhether.blogspot.com/2021/06/decorating-drink-pouches.html

=================
Find an index of all my cricut quick tip cards here:


If Your SVGS Turned Into Edge Icons - Don't Panic


If your svgs now look like the Microsoft Edge Browser—Don’t Panic!

Nothing has actually changed, your svgs are still svgs, and they can still be uploaded the same as always.  All that has changed is that in the windows made Edge the default option to open the file when you click on them.

For a look at what files typically come in a download, and what they all look like, see the quick tip here: https://fieldsofhether.blogspot.com/2020/07/quick-tip-svgs-look-like-html-files.html

If you right click on any svg and choose properties, you can change the program svgs open in. You can not automatically open an svg in Design Space—it has to be uploaded.

Don’t forget—there’s an extension that allows you to see previews instead of the browser icon, too!


=============

An Index Of My Quick Tip Cards
Also a slideshow of them, & A printable pdf version

==================


Using Offset To Slice - Cut Out Text

Once you type your text, with the text box selected, look for the "offset" button at the top of the screen.

I used an offset of .097.  That seems to be my default for most projects.
Slice the offset from the base text.  

Offset also works on images - and easily creates backgrounds for stickers:


  Now you can simply select your project, create an offset, and flatten your images and text to the offset. 
 Once flattened, print your image, then put it in your cricut machine and it will cut just the offset, not each letter and individual piece.

Here's a project where this new feature will come in handy!
For this, which I made years ago, I used a print then cut hack that no longer exists.  NOW, with offset available, you can simply create the offset , slice that "shadow" layer from the last name, and then delete the offset shadow, leaving an empty space for the first names text to fit in.  I'll update the tutorial soon - here's the original:
=======================

How To Use Print Then Cut If You Do Not Own A Printer

If you do not own a printer, you can choose to "print to pdf" and print the pdf at your local library, or office supply store.   THEORETICALLY.  

Cricut says absolutely not.  And in the past year in particular, print then cut has been so finnicky, and often requires a  calibration, so  this may no longer work.  But it may still be possible.  No guarantee - especially since so much changes every week with Design Space.

After your project is printed, bring it back to your Cricut machine, open Design Space, Click "Make It" and then on the far right choose "I've already printed".

The first step in a print then cut project will be to "Send To Printer"

A printer dialog box will then pop up, asking which printer you would like to use.  The above screenshot is on a Windows Computer, it may look a little different on Mac, but Mac does have a Print to PDF option as well.
Remember that your project will print with a black box around it.  These are the registration marks cricut needs to know exactly where to cut.  You cannot just print any item with a black box around it - your project MUST come out of the Design Space App, so the app can tell the machine exactly where to cut.


The most common mistake with print then cut is not flattening to a shape.  Before you send your project to print, look at your layers panel and make sure you only see the items you want cut out individually. 

 If you see letter  in the layers panel, Cricut will cut out each letter of that text individually.  Flatten it to a shape if you only want the outline to cut.
======================

Quick Tip - What Is An SVG? (It's never an image in a facebook comment)


Not all files that you can cut with your machine are SVG files.  But SVG files are by far the easiest to work with, and should always be what you choose for a cut project.  

An SVG is a "Scalable, Vector, Graphic". When you upload an svg to design space, you can resize it as much as you want without it distorting. Or "Vector graphics are computer graphics images that are defined in terms of points on a Cartesian plane, which are connected by lines and curves to form polygons and other shapes. ".

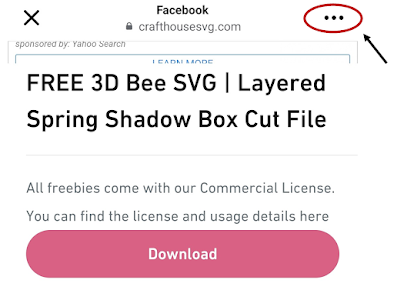
An svg will never be a photo in a facebook comment.  You may find a link in the facebook comment, which shows a preview of the svg, but that preview is not your svg.  (facebook is not capable of displaying actual svg files in comments)  Click on the link, go to the site, and download the svg, for the best results.  (Often on apple devices if you click on a facebook link it will not open.  You may need to open Safari, and then copy and paste the link.)

NOT an svg - If you see the options, on the left to "select and erase", you are not working with an svg.

An SVG will not need the wand, or background eraser when you upload it.  It won't even be an option in design space to clean up the image - those tools will not appear when you upload an svg.  Because they are unnecessary.

Not All Images That Will Cut Are An SVG

And, although there are exceptions to this one, each piece of an svg can be removed, or changed.  It will not be one flat image, but rather pieces that you can change.

What an SVG is NOT:
  • It is not a comment on a facebook post.  Although those may be (MAY) images you can copy and upload into design space, using the tools to clean them up to cut them - they are NOT svgs.   Frequently these images are stolen from designers, and distributed in facebook groups as "free svgs" or an "svg dump". If we, just for a moment, ignore the morality of this practice, we are still left with the fact that this is not an svg.
  • It is not a zip file.  One of the most common mistakes when trying to use free svgs is attempting to upload the zip file to Design Space.  When an svg comes as a zip file, which they frequently do, you will need to unzip the file first, then upload just the svg. There's a full "how to", including how to see thumbnails of SVG files here: https://fieldsofhether.blogspot.com/2019/01/how-to-download-install-svg-to-design.html
Here's the important tip - svg files look like html files.


====================