Only on the desktop version - not yet available on mobile.
Must be using the Beta Design Space [Instructions Below]
Click on the Red Error Message in the layers panel, that's where you will find the new options to choose a larger size.
NEW PRINT THEN CUT SIZES
OLD OPTIONS
A4- 8.3″ x 11.7″+ print then cut size is 6.75″ x 8.97″
Letter-8.5″ x 11″ print then cut size changed to 6.76″ x 9″*
NEW OPTIONS:
Legal- 8.5″ x 14″ print then cut size is 7.44″ x 9.88″
Tabloid- 11″ x 17″ print then cut size is 9.94″ x 13.2″
A3- 11.7″ x 16.5″ print then cut size is 10.52″ x 13.98″
Here's more information about the beta version:
First, if you are not using Beta, you can switch to it.
Open Design Space.
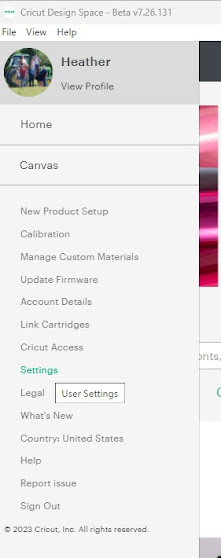
Click on the bars on the top left of the screen
Choose Settings from the drop down menu - it's more than half way down the list:
A box will then pop up:
There you can switch to "Beta", instead of Live.
===============
IMAGE TOO LARGE ERROR
==================
STILL A SMALL GLITCH - EASY WORK AROUND -
For me, in this beta version, there is a new glitch. Thankfully it is minor, and easy to work around.
Currently, if I add a small print then cut object to a project, and group it to my project (GROUP, not attach) - I get a message saying it's too large.
Even though most of the project is set to cut, because one tiny grouped element is print then cut, it is limiting the entire project to print then cut size, when that object is grouped with cut pieces.
Work around - UNGROUP the project before clicking make it.
Group/Ungroup should not affect the cut screen - this is a glitch. But at least it's a quick and easy work around.


No comments:
Post a Comment