Showing posts with label Dollar Tree Crafts. Show all posts

Rolled Paper Flowers & A Dollar Tree Pumpkin

Rolled Paper Flowers On A Dollar Tree Foam Pumpkin

Supplies Used:


============
Step By Step:
=============
I was using white flowers, so I painted the pumpkin first.  That's probably not necessary if you are using orange flowers, but these pumpkins are awfully bright orange, so a light coat of paint to tone them down a bit and make them closer to your cardstock color is never a bad idea.  Use a cheap paint!  I only used the Martha Stewart Chalk paint because I bought a LOT of it at 80% off, so I use it for pretty much everything right now.

While the paint dries, start cutting flowers.
I used the free svg found here:
(Scroll down, under the pink banner you will see the download button)
I sized the svg at 3.7 - exact numbers shown above

That allows me to fit 5 on a sheet of regular card stock.
I placed them on there, and attached, because Design Space does not always use the space as efficiently as I would like, if I allow it to decide where to place them.

You'll need approximately 60 flowers, so 12 sheets of card stock.   Once you click make it, tell cricut you want to make 12 copies of your project.

I also cut the vine
Free SVG Found here
Sized 4.94 x 2.615

If you have never rolled paper flowers before, it's not hard, but remember to roll from the outside in.  I am not very precise in my rolling, mine are rarely the exact same size, some are rolled tighter than others.  I roll tight, then allow them to loosen just a little before gluing them in place.

Then I stuck them into the pumpkin using a straight pin.  I could have glued them in place, but it's easier to move them around to fill the spaces better if you use the pins.  You could use pretty pins with pearl heads, too.

View of the bottom of my pumpkin
I worked from the top down.
It took me 57 flowers to cover my pumpkin.

I used a wine cork for the stem, it's hot glued to the pumpkin.  You could paint a wine cork too, cover it in fabric, or just a stick in it's place.

When I made this rolled paper flower wreath, I used tacky glue.  It worked - but hot glue works so much better, it's much faster with hot glue, because it dries so much faster.


=======================

Find More Cricut Project Tutorials Here:

https://fieldsofhether.blogspot.com/2019/04/cricut-step-by-step-project-tutorials.html

==========================


Dollar Tree Cookie Sheet Metal Flowers

This Flower made from Dollar Tree cookie sheets held up for nearly three years outdoors - one year on the porch, and two out in the open on a fence, before a storm blew it down and it was mangled under the trampoline.  I hadn't really expected it to hold up that well   - I was impressed!  

Decorating Dollar Tree Lanterns With Cricut (Using Free SVGS)

I've found these lanterns with the automobile supplies at our local Dollar Tree, several times over the years.  I don't currently see them listed on their website, but if you are lucky enough to find them in your local store, they make a quick, fun, kids gift.


Quick Links:
These are two sided, with text on one side, and a face on the other.

I put a box around the button to make it easier to find.

The box around the button is .98 wide by .75 tall


I made this project back in 2019, so unfortunately, not all of the svgs are still available. 

The Backhoe  one still is, and it is a favorite of mine, I use it on a lot of shirts for my grandsons!  Find it here:


=====================

Happy Birthday Charger Plate Sign

I have a built in cabinet in our dining room that we use as a buffet area for desserts.  I have charger signs for each season that I rotate, and now this one, for when we have birthday dinners here.

Quick Links:

I started with the grey wood grain chargers from the Dollar Tree, and painted one with brown paint, and one with white.  I rubbed some of the paint back off with a paper towel.
(The brown one will be for a Thanksgiving Design, the white one was for this project)

Often I use more of a dry brush technique - you can see those here:


For The charger template, I added a 12 inch circle in design space.  (Choose shapes, circle, then at the top of the page type a 12 into the size box.)
Then I created a second circle, 8 inches in diameter.

At the top of the screen I chose Align, Center.

Then I chose select all, and sliced the smaller circle out of the large.  Delete all of the center pieces.  

The text I want to fit on the rim of the plate goes on what is left of the circle.  The design for the inside section of the plate should fit inside that outline.


The hardest part of making this is all of the ungrouping, deleting, and attaching to piece the design together.   I used 4 different svgs - the truck, Lets Eat Some Cake, the party hat,  and the balloons.  Most of these were from LoveSVG, and came with several options, all of which had extra options to be deleted.  Don't forget to attach the text for Lets Eat Some Cake.  The connected parts are already welded, but the text that is not connected needs to be attached, so that it cuts as words and not letters you have to piece together.

Layer on your contact paper, for the truck and for the party hat - it is so much easier!  Put the truck on the transfer paper (I like the contact paper from the Dollar tree best, for transfer paper) and then add the tires, then transfer to the plate.


===============


More Dollar Tree Charger Ideas

Layered Paper Shadow Boxes (The Dollar Tree Version)


Cut paper designs, layered with pop dots in between, and a strand of lights at the back, form a lighted layered shadow box.

Supplies:

Thankful, Grateful, and Oh So Blessed Pumpkin Stack


Quick Links:
These are the pumpkins at the Dollar tree.
The stems are held on with toothpicks, so they are very easy to remove!
Remove the stems, paint the pumpkins antique white.
I painted one stem brown.
Then using the toothpicks that held the stems on, stack the pumpkins once again, placing the brown stem on top.

Each line of text is approximately 1 inch tall.
Fonts are

For transfer tape, I use contact paper from the Dollar tree. 
 (Not the duct brand  contact paper from wal-mart - that's too thin for my liking)


Quick, easy, and cheap!

===============
 Looking for more ideas?
Five Fall Projects To Make With Cricut


Find an Index Of Fall SVGS, and Project Ideas with Cricut, Here:


Dollar Tree Roll A Doodle - And A Team Version

Foam Dice, Dry Erase boards, free printables, and a bucket from the Dollar Tree, decorated with cricut, made this outdoor version of Roll A Doodle

Supplies:
  • Bucket or container from the Dollar Tree
  • Foam Dice From The Dollar Tree ( 2 for $1)
  • Dry Erase Markers From the Dollar Tree (4 for $1)
  • Eyeglass Cleaning Cloth from the Dollar Tree (for an eraser)
  • Free Printables (listed below)


The Bucket:


The Game Sheets:
I found these foam dice at the Dollar Tree while working on the Yardzee / Yarkle sets, and decided to put together a quick drawing game.  There are a lot of roll - a  - a doodle sheets already pre-done, a pinterest search will show you so many options!  The holiday versions look especially fun, and I will probably put some of those together for a Christmas party later this year!


But I wanted something that could work for a larger group at one time, in addition to keeping the  kids busy, so I created my own team version.  How It Works:


Split into  even teams.  ( 1—8 members on each team)  Agree on how many turns each player will take. (3-6)  Player One on each team rolls a die, then draws the corresponding shape on the dry erase board, then passes to the next player on their team, who then rolls the die, and adds their shape to the design. 
 Repeat until each player has had at least 3 turns adding a shape to the design.  (the fewer players, the more turns should be taken.  )  The team with the best picture made from the random shapes each player added to the design, wins.


If This Doesn't Taste Good - Blame Pinterest Cake Carrier (step by step)

 One of my favorite things about this is that although it's a Cake Carrier (From the Dollar Tree!)  bowls fit inside - so it could just as easily cover a salad as a cake.

Dollar Tree Travel "lego" building blocks box

A travel "lego" (these are the generic building blocks from the Dollar Tree) carrying case.
Step By Step How To, And Links To The Free Fonts & SVG

Ring Display - A Dollar Tree Project


Quick Notes:

  • This frame is from a thrift store, you could use a Dollar Tree frame instead - just remove the glass.
  • Two Packs of Foam Culers
  • Material roughly 2x the length of the frame.
I changed the material I was using - the larger print did not work well in this smaller frame - I liked a smaller patterned fabric better, and it gave me a chance to display some of my vintage flour sack material.

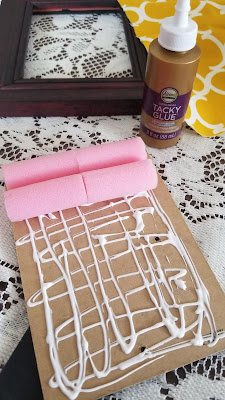
I removed the plastic frame, snapped off the end and stuck it into two pieces to hold them together.
Tacky glue to hold the curlers in place.
I stuck the frame over the top to make sure they fit snugly.

Tucking the material in between was a little more tedious than I expected.  I used a butter knife and worked one row at a time..  and then decided I did not like the fabric, so I pulled it out and redid it.