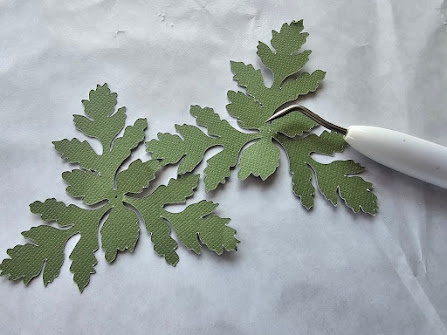
Use your weeding tool to punch a hole for the floral wire
Use the Guide Option in Design Space to add notes on how to make the flowers, so you remember later.
I use my vinyl weeding tool to gently lift small pieces off the mat.
Basic Tips:
It's often much faster to cut the larger flowers by hand. Cut one set of the larger petals with your machine, then use it as a template, you can cut several pieces of paper, stacked together, all at once.
Remember to stagger your petals. Once you have attached the "base" layer of petals, layer the next layer so that the middle of the next petal overlaps two of the bottom petals - as you'd see in a flower in nature.
When assembling rolled paper flowers, roll from the outside in - ending with the center base.
Glue - I prefer hot glue most of the time, but a quick dry tacky glue works great too.
Paper - I use just regular (preferably textured) cardstock [typically 60-80lb] - same as I use for cards. But crepe paper makes really beautiful flowers! I've used felt too - and lighter papers...
================
SITES TO CHECK/ CRAFTERS TO FOLLOW
These are some of my favorite Paper Flower Crafters
Reminder - I'm an affiliate for a number of sites. If you click on a link on this page and make a purchase, I may earn a small commission. This in no way effects the price you pay
==================== Affiliate Disclaimer - remember, I'm an affiliate for a number of sites, so if you click on a link in this post and make a purchase, it's possible I may may a small commission. It will in no way effect the price you pay. =====================
You'll want to use the rotary blade for cutting crepe paper, and that blade can only be used in the Maker series of machines.
Then, you'll want to make sure the grain of the crepe paper is going in the correct direction for the petals. Grain is important when working with crepe paper.
It's often easier to just cut a template with the cricut, then use the template to cut the crepe paper by hand.
Abbi Kirsten recommends setting the pressure to "more" when using the maker
Glue cannot be tacky enough nor thin enough. Water will cause the crepe to stretch and will ruin the texture/stretch of the paper - so use sparingly. Consider double sided tape in place of glue. You'll also want a hot glue gun, for some of the assembly.
Fine crepe paper is more realistic, but heavy crepe paper is more forgiving.
TIP - Save your crepe paper scraps and ball them up to form flower centers [in place of Styrofoam balls]
============== Choosing A Crepe Paper ===============
There are 3 main types of Crepe Paper, based on where it is manufactured:
Chinese, Italian, German
For a more in depth explanation [and other tool tips]
10 Things to Know About Crepe Paper by Lia Griffith
You all know how I feel about Youtube Videos [If you are new - I can read SO much faster than you all can speak] but I watched this one. Yes, it's a bit of an informercial for Lia Griffith crepe paper, but.. Lia Griffith really is the best when it comes to crepe paper flowers. She knows her stuff. This video is a great explanation of Chinese, Italian, and German crepe papers. The differences, and why her collaboration with the German company is made specifically for paper flower makers. She still recommends Italian Paper [not hers] if you want to make really large paper flowers. While she obviously promotes her own brand here, she also lists other brands she recommends, and tells you to work with whatever you have.
Note - a possible substitution for her panpastel set [$57] is eye shadow. I know a lot of crafters have been using eye shadow palettes when making paper flowers.
I'm a big fan of Lia Griffith, and someday will likely subscribe for her membership. At this point in my life, I know I simply don't have the time to really use it - but it always tempts me, she has gorgeous projects in her classes.
However, her crepe paper is far and away the most expensive option. According to a guide by Oksana, "For example, a pack of 10 rolls of Lia's “heavy crepe paper” cost $20, that is, 1 roll cost $2. But the size of this roll is 5 times smaller than standard crepe paper roll. So, in terms of the amount of paper - 5 Lia’s rolls are equal to one standard size Italian or Chinese roll.
Thus, not only you have to buy several packs to make a large flower of one color (or if you need to make a lot of flowers of the same color), but you will pay a higher price ( $10) for the same amount of paper that you have in standard Italian roll ($7).
The Carte Fini brand, Italian, is recommended by several flower makers I follow
This video by Oksana is a little long - but if you skip through, you can see how she stretches the petals, with explanations on why it's important not to overstretch.
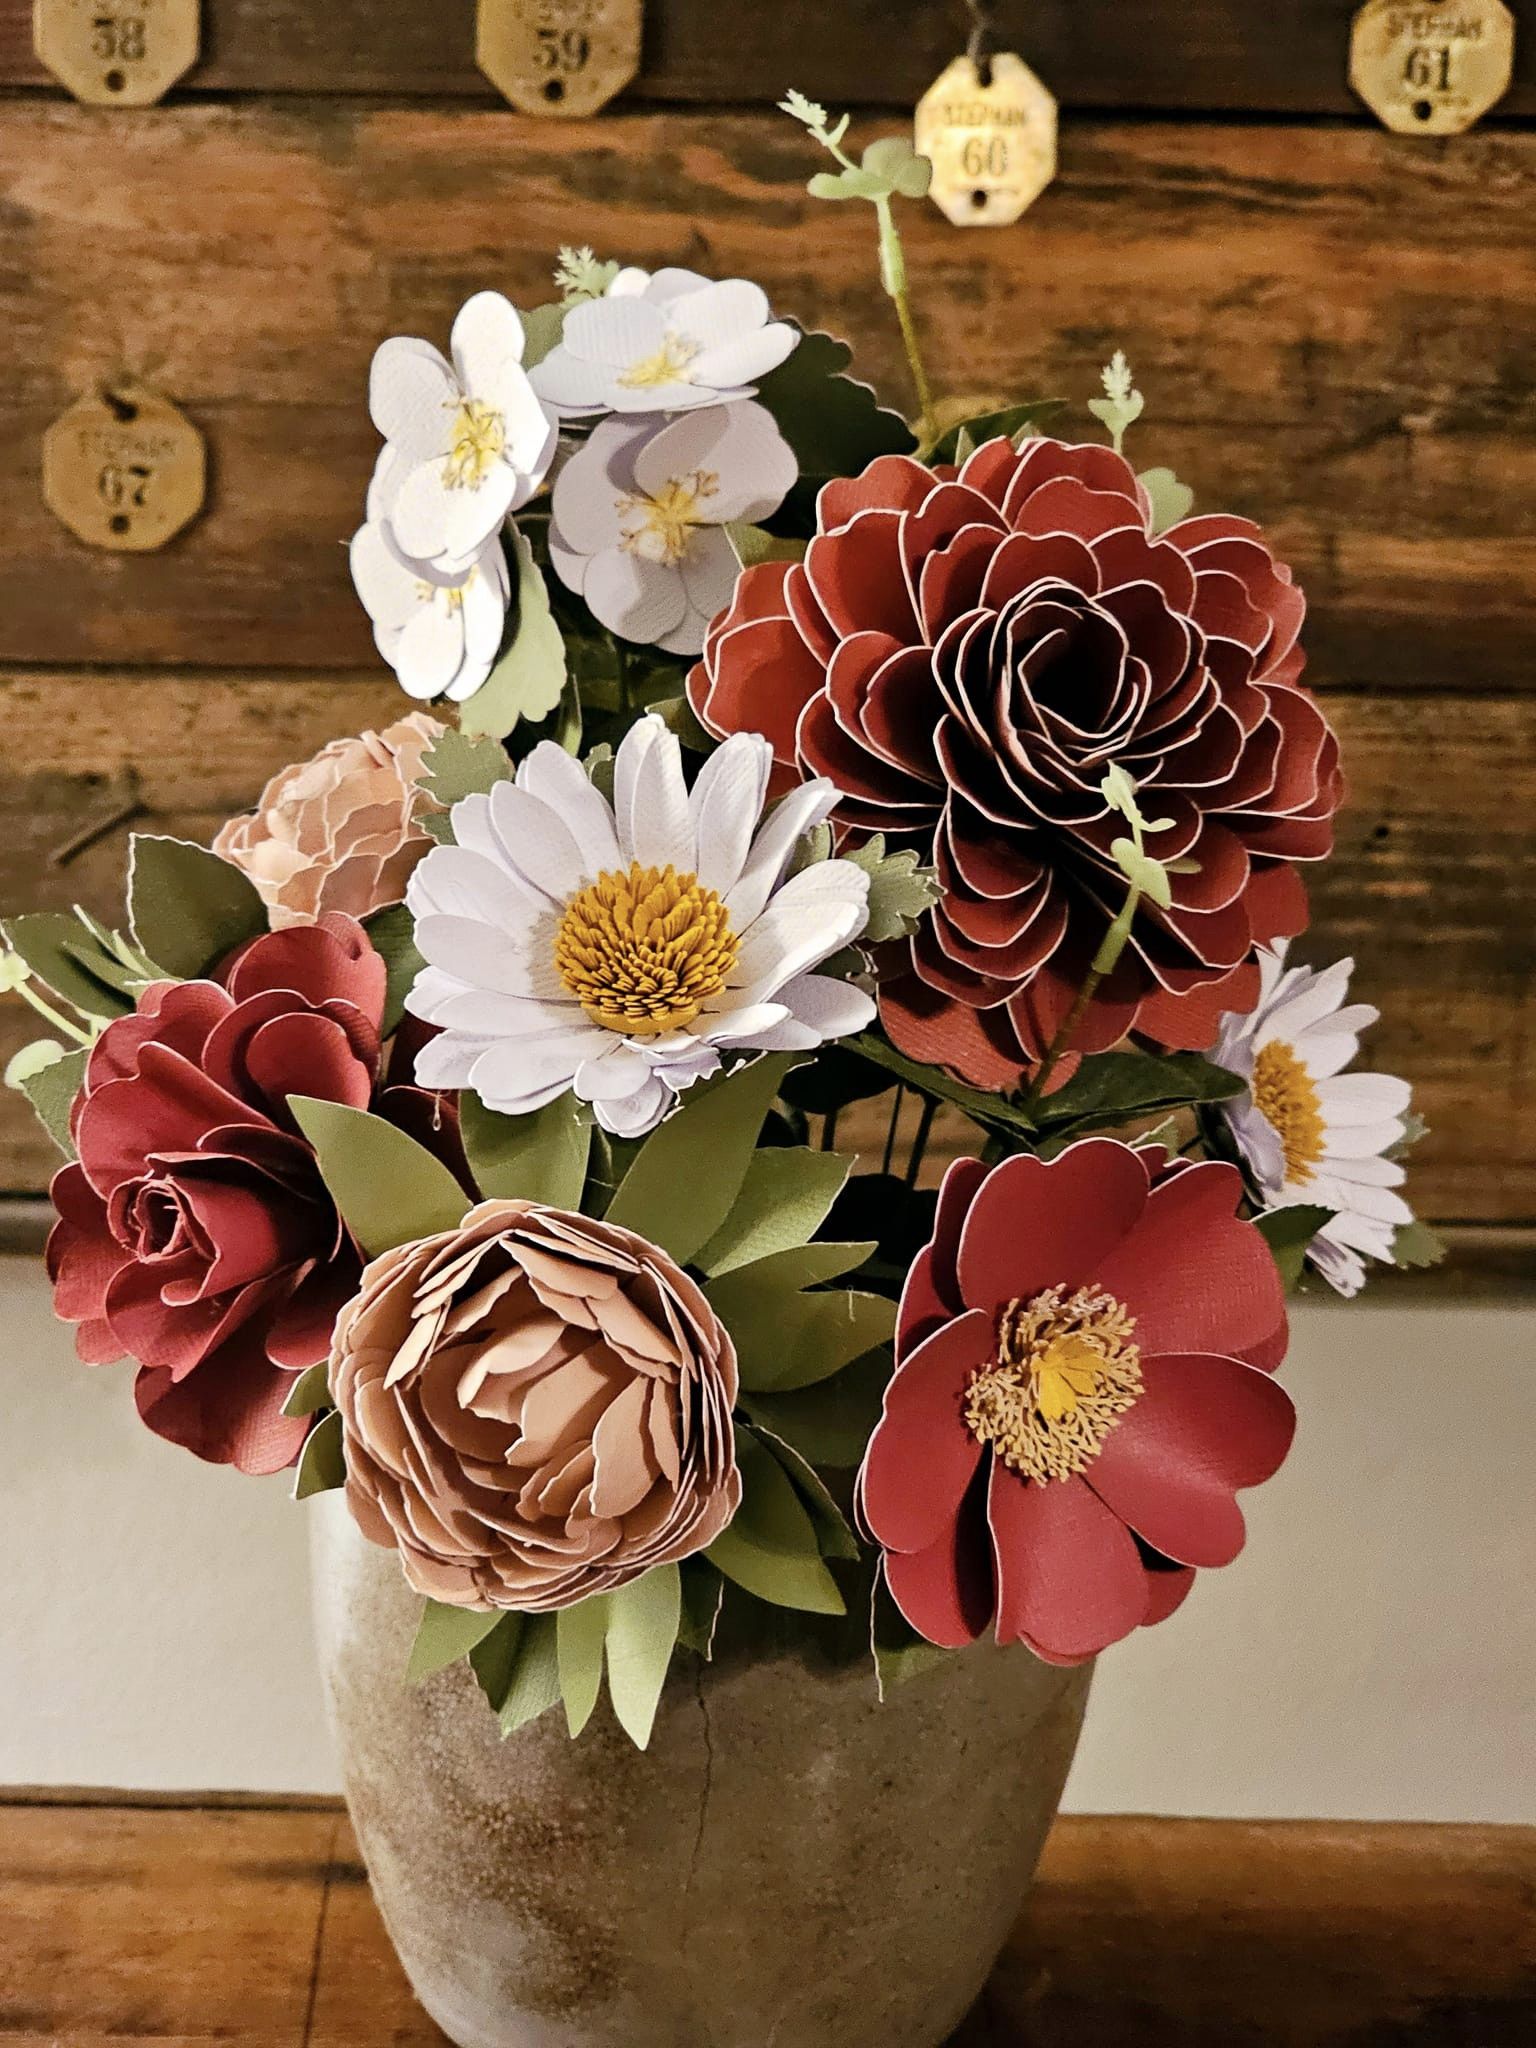
This is my fall bouquet project for 2023 - but it's taking me a very long time to complete it. So I am adding the flowers to this post as I complete them, and hopefully I'll finish it before I start pulling out the Christmas decorations this November. :-) Here's a look at the flower svgs I've used, and how I have modified them, so far:
Bouquet made during the Abbi Kirstin Flowerfest, July 2023
It's rare that I do too much with these never-ending summits. I simply don't have time, and there are so very many of them. But for this flowerfest summit by Abbi, I marked the day off on my calendar and told my family I was unavailable that day. (I did still have farm chores, and my grandson here part of the day... but that's about as close to a day off as I can get right now)
Here's a look at what I made, some tips for things I do a bit differently than she instructs, and some free options for the flowers, since this class was free for 24 hours only.
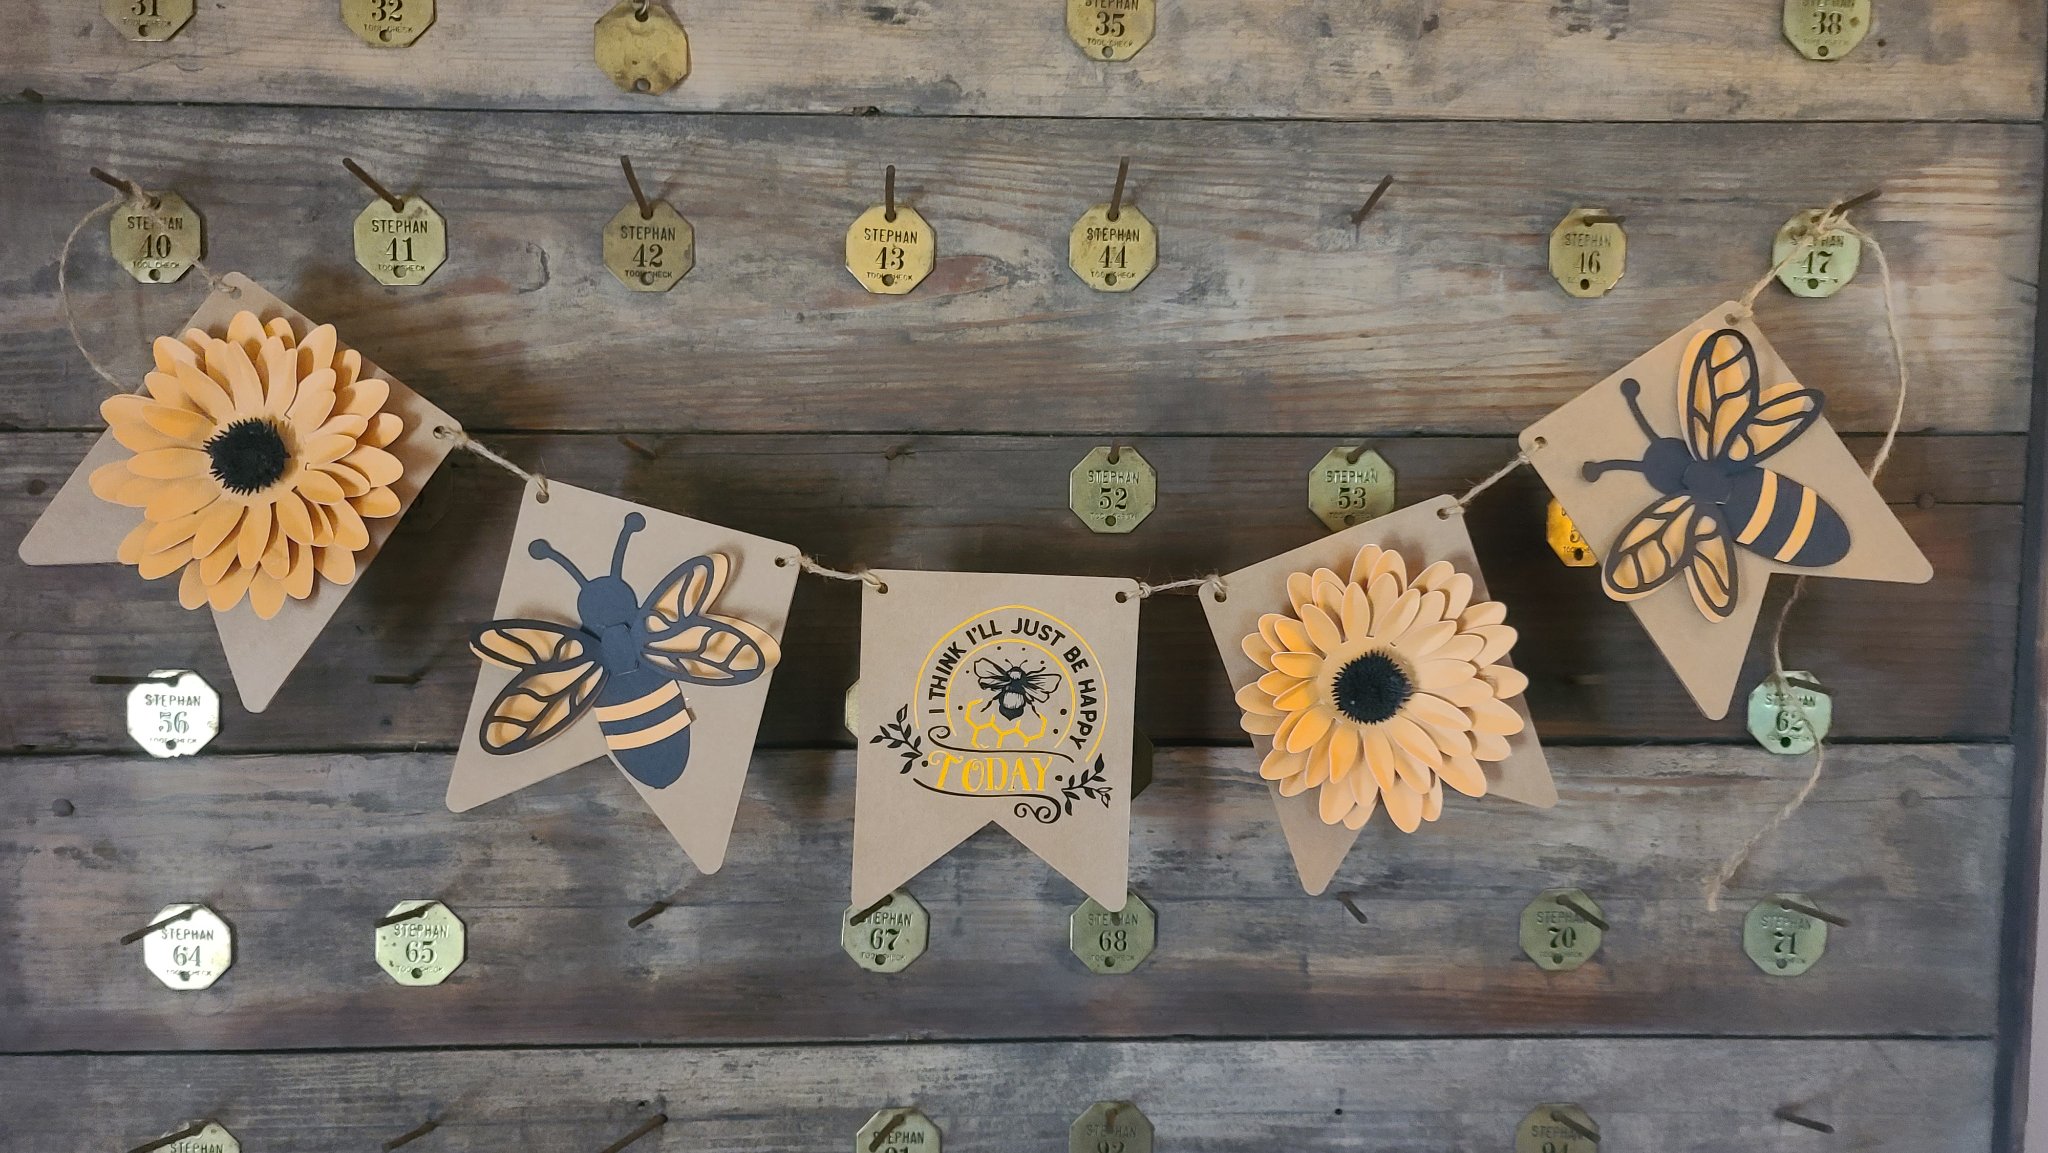
A Sunflower & Bee Banner, made with a variety of svgs
Here's what I used:
These are the same bee and flower svgs I used to make the magnets.
Unfortunately, the bundle, from Canada Crafts, is no longer available. CC is no longer on Creative Fabrica at all, although they do have a store on Design Bundles - this particular bundle is not on there.
Just use the base - skip the flag and star tops for this. I cut 10 of the base, then glued them together in sets, so I have 5 pieces two pieces thick. That's not necessary with heavier cardstock, but I always find my kraft brown cardstock to be a little thinner than a lot of my other 12x12 papers.
The svg in the center is from a bundle I got in the Dollar Deals ages ago. It's 40 bee designs, and I've used a lot of them on wine pouches and garden flags.
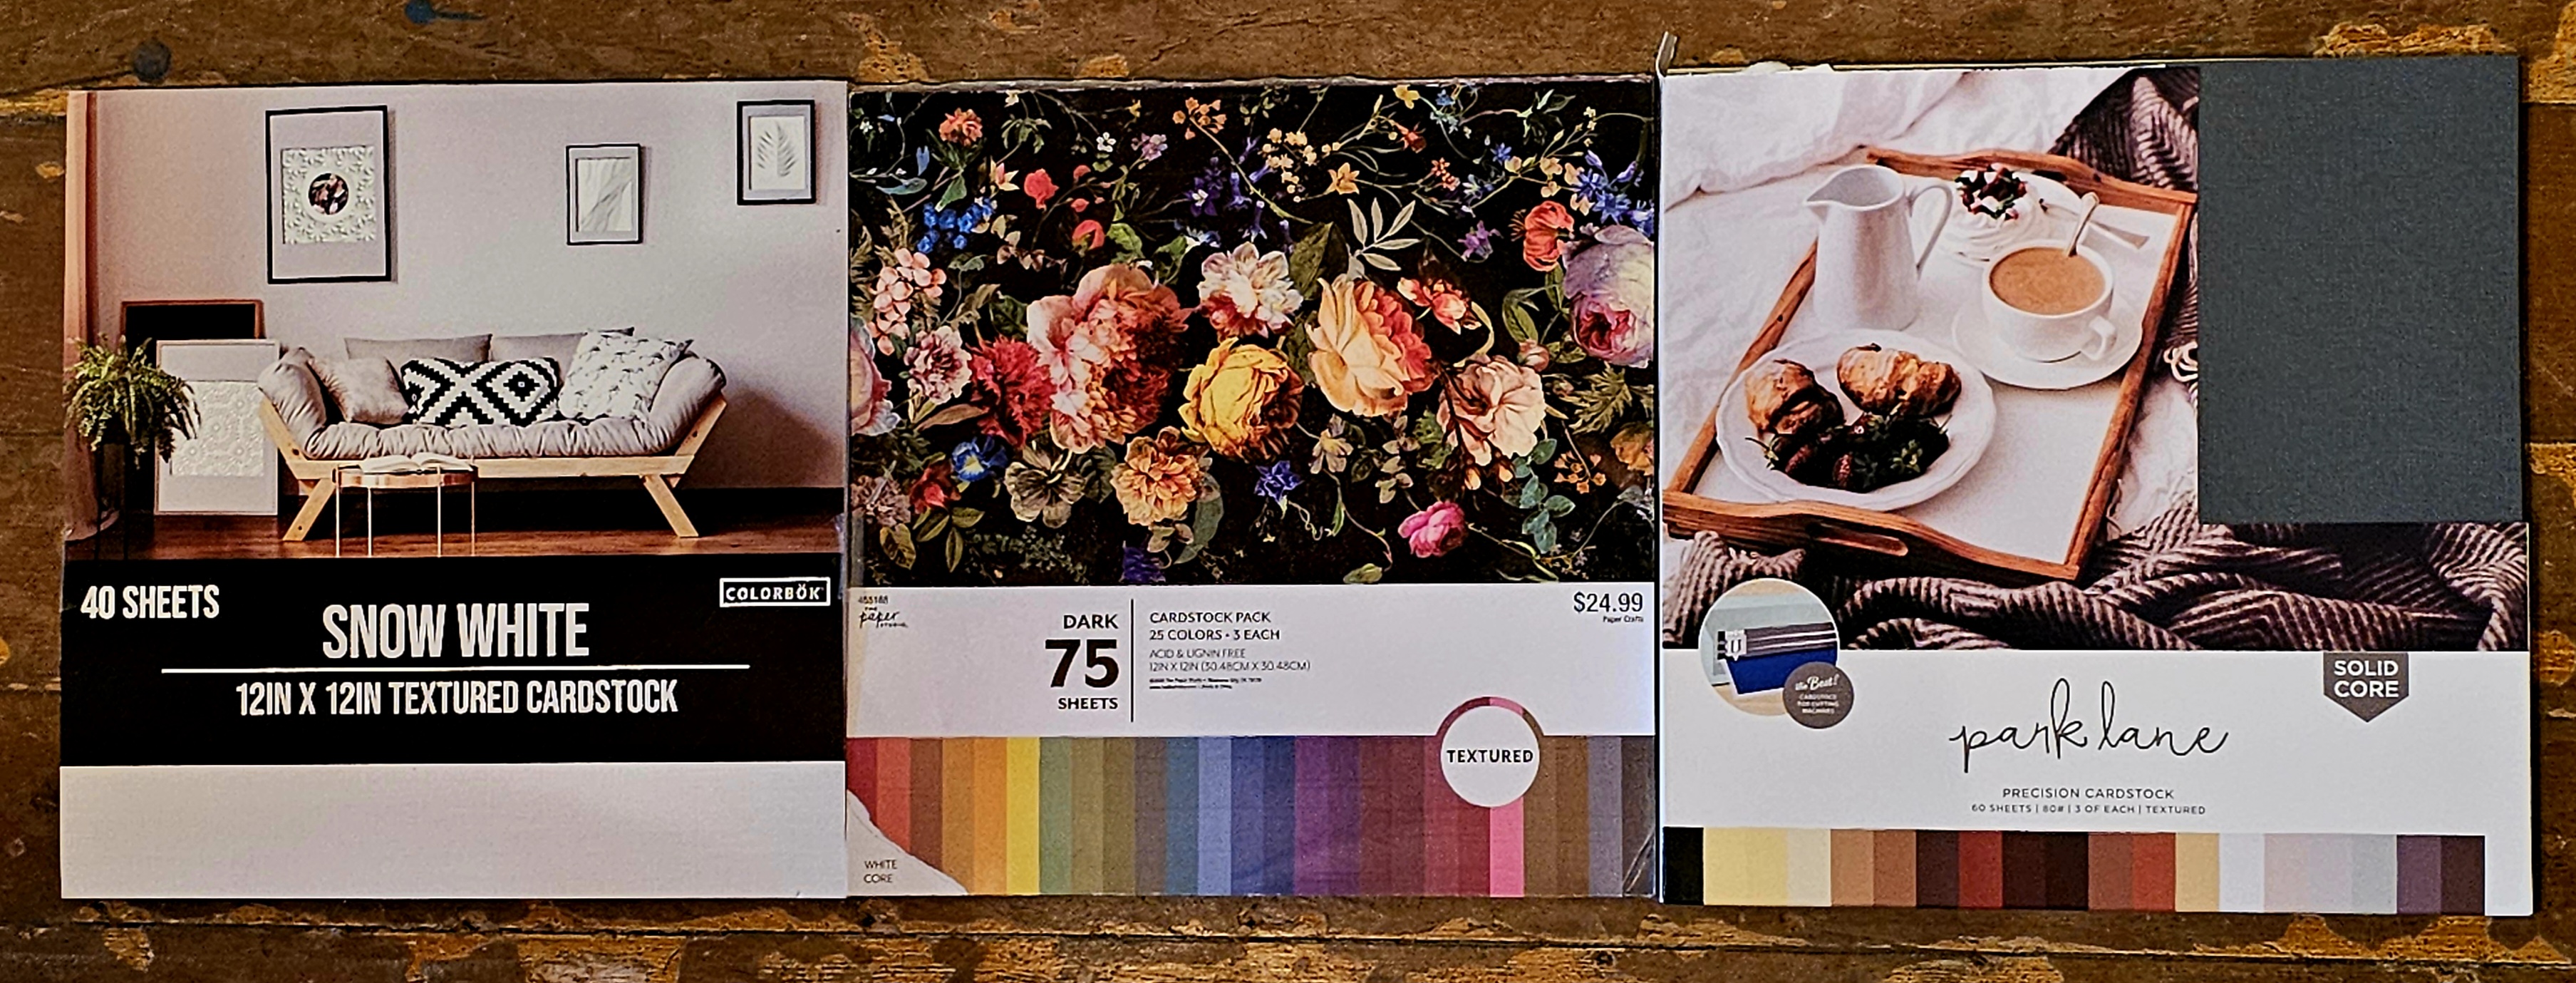
My Favorite Cardstock, The Experts Favorite Card Stock Selections, Price Comparisons, And A Look At My Paper Storage
If you had told me 3 years ago that I'd eventually be buying more paper than vinyl, I'd have laughed and thought that was extremely unlikely. And yet, here we are... with paper projects on my desk every week, and vinyl only pulled out once every month or so! [That may be partially because I put vinyl & htv on EVERYTHING the first two years I had a cricut.... LOL! ]
When I first started with paper projects, I felt like a kindergartner. [A glue stick is still my preferred glue for most layered projects... ] My projects were messy. They sometimes still are, but they have definitely come a long way. Mostly because I settled on better papers. Not expensive papers - I'm too frugal for that, for the most part. Just BETTER paper. I almost always buy something with some texture, or pearlized, or frosted now.
And I don't just stock up on all the colors - I buy the colors I truly love. Which are, most commonly, very deep jewel tones, which can be more difficult to find. Cardstock manufacturers sure do like their brights and pastels.
These are the papers I buy most often. They have all cut well for me, on a regular basis - and they tend to be the best deals I have found. I do buy most of my paper locally, rather than online - at least the first time I purchase it. Too often I find that the color shown on my screen is not true to what it looks like in person. Once I know I love a particular pack, I'll buy it online, but only if shipping is free or it's a fantastic sale.
After I list my favorites, I tell you about what Dreaming Tree, Jennifer Maker, & Lia Griffith, recommend, as well.
And then if you scroll WAY down to the bottom of this post, I share how I organize and store my paper and paper scraps, too.
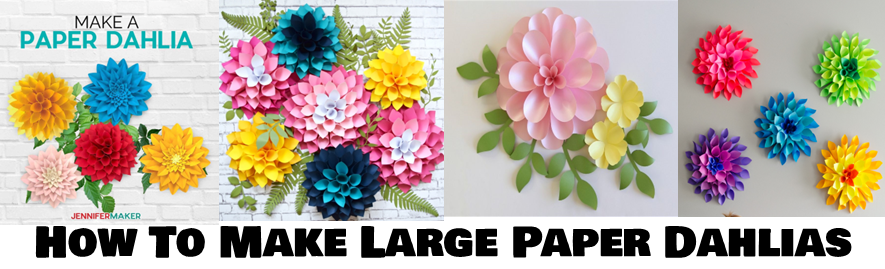
How To Make Large Paper Dahlias And Where To Find Free SVGS
Paper Dahlias are made with one circle, for the base, and a bunch of squares. So you don't actually need an svg, your shapes tool will work fine.. but there are some free svgs in here too. :-)
Where to find free svgs, tutorials, techniques, tools, and projects, for large paper flowers, rolled paper flowers, paper flower bouquets, and more! [Tutorials and svgs will also work with other cutting machines, I just happen to still own cricut machines, myself. ]
I saw something similar to this year year or two ago, done by someone who sells large paper flower displays. I'm pretty sure theirs was a lot fancier than this, but here's how I made my (most likely) quicker and easier version.
The Poppy SVG from Abbi Kirstin looks like shamrocks. I converted it into green flowers to go on our Lions Club pins, for a meeting this week.
Because there was no way of knowing how many would be present, or would need green for the clubs March requirement that we wear green, I made a bunch of extras, and then made a few more when I realized I liked the look in a crock as a decoration. :-)
The exact SVG I used is from Abbi Kirstin and is no longer free
I had used this same project in the past, for Poppy Pins for Remembrance Day. These are the modifications I used on the original file:
1. After all the pieces are uploaded, select all, align center. Then resize to 6.5 wide. I may even go to 6 wide next time - but 6.5 worked, and the centers still cut well, I cut on cardstock plus for the centers - just to make sure they cut well.
2. I deleted 3 of the 3 petal pieces - making each flower just 3 layers. The 4th layer is nice for bouquets, but for the pins, I wanted a little less fluff.
I used hot glue to attach floral wire to the inside of the first layer, then assembled the rest of the flower. The wires tuck neatly between the magnets on our club pins.
The shamrock mandala is from Special Hearts Studio - Free svg
Those brown things on the sides are Insulator Caps. I have collected these for many years, and when my gram passed away, I found a fantastic collection of them in my grandfathers garage. He had died before I was born, I had no idea he had collected them too. :-) Years later I learned that there's a whole convention in Ohio for collectors! I'm not that serious about my collection - but I would like to go to the convention one year.
"Insulators are non-electrical conducting objects, usually made of glass or porcelain, intended to insulate the current running in a wire from grounding out, especially in fog or rain. Most often they are mounted on wooden pins on the cross arms of telephone poles"
My St Patrick's Day Leaf Gnome is not a free file.
I made this using the fall leaf gnome from Dreaming Tree


.jpg)


