A Spider On A Stick - Kids Craft With Cricut


My grandson is currently obsessed with spiders.  The Itsy Bitsy Spider, in particular - we've watched that episode of Sesame Street more times than I can count.  We've already made the spider on a web craft, where he can make the spider go up and down on a string.  And we made a pipe cleaner spider.  Today we put a spider on a stick, which he can then make "walk" by moving the stick.

Download the SVG here

Once the svg is uploaded into design space, select all and resize the group to 10.5 wide.

Cut the second head circle in whatever color you want to show through the eyes and mouth.  Red, Green, and White all work well.

We then added googly eyes on top of the cut out eyes.  Because...  the 2 year old assistant believes EVERY project needs googly eyes.  :-)

Assembly is simple - just glue the legs across criss cross.  I let the 2 year old do that with very little assistance.  Then I used hot glue to add a wooden skewer.  Regular glue would work - but I like hot glue.  Add a circle over the top to cover all of that.

Then just bend the legs  - two bends, one closer to the body, and one to make "feet".
The legs bounce up a bit when you move the stick to "walk" the spider.  This was surprisingly entertaining.  :-)

Find the Spider in the web craft, with free svg, here:
https://fieldsofhether.blogspot.com/2022/09/spider-web-kids-craft-with-cricut-free.html

Nativity Pop Up Cards - Color & Light Options

 
A Light Up Pop Up Nativity Card
I made 8, in a variety of colors, and then tried a few different light options, after sizing the card down to fit in a standard envelope.  With a fairy light pack, this DOES fit in a standard envelope!  If mailing, I'd definitely check to make sure it doesn't require extra postage.

====================
Reminder, as an affiliate for both Design Bundles and Amazon, I may make a small commission if you purchase items through the links on this page.  It will in no way effect the price you pay, either way.
====================

Supplies:
  • [NOT FREE] SVG 
  • Lights - Options below - but for mailing, you will want these (these are also what we used for the light up nativity and angel from Special Hearts Studio in 2020, so you may still have a few left)
  • Three sheets of 8.5x11 cardstock.  
  • Glue - I used a glue stick and hot glue
This svg, as uploaded, will make a card 7.7 x 5.5
That's just slightly too large for a standard 5x7 envelope.

To fix that, make sure the svg is ungrouped, Select all, align center.
Then with all images selected, size to 6.9 wide.  It will default to 9.907 tall.

Now the finished card will fit nicely into a 5.7 envelope - even with the fairy light pack inside.  (There IS a card, with light pack,  inside the envelope shown here)

Aren't those envelopes gorgeous?  They come in green, blue, and other colors too
Find them on Amazon - https://amzn.to/3Sfc67l

NOTE - When folded, the outside of this card is completely blank.  I haven't decided what I will do on the outside yet - but possibly something print then cut, to not add additional bulk.  But then again, maybe not...  I don't think I will be mailing these, I think all of mine will be hand delivered.

There is a pdf file in the svg download with instructions for assembling the cards.  They are pretty quick and simple to make!

==============
COLORS
==============
A variety of options in progress on my desk

Gold Foil for the inserts and background makes a HUGE impact.  It's my favorite, and much better in person than in the photos.

With the Blue, I did some silver foil background, but it really did not make much difference, when compared with the grey background.  If I were going to do more with the silver foil, I'd definitely cut the insert pieces from the silver foil too.

The Kraft Brown paper and white is probably my second favorite - but I have a rustic farmhouse, so this one goes best with my decor here.

Blue with a grey background and white inserts would be my go to color choice, if not using foil.

The original example uses yellow- which is nice, but not my favorite.

=============
LIGHTS
============
Fairy Lights (currently on sale, a 6 pack is less than $10)
Battery Operated Tea Light (2 pack at the Dollar Tree) 
Mini Submersible LED lights (mine are color changing)
Dollar Tree Battery Operated 10 Light Set

My favorite is actually the tea light, in several cases.  However, that will NOT work for mailing and is not as bright.    It's a tight fit - I could barely fit it into the back of the card.

Overall, the fairy lights with the tiny thin battery pack is ideal - they fit right in the card for mailing.  These are the same lights I used in the light up angel, and light up nativity, from Special Hearts Studio (links at the bottom of this post) so I already had these on hand.

The mini submersible light fits better than the regular tea light, but still would not working for mailing.  Mine, a gift from my mom (I have BOXES of them!) are color changing, which I didn't love for this particular project.  

The Dollar Tree Battery Pack of 10 lights was my worst option.  They are not very bright, but the cord takes up a lot of room and looks messier.  The battery pack really does not fit - you need to put that behind the card for the lights to fit in.  

===============
More Projects That Use Those Tiny Fairy Light Packs

When I went to Amazon to see if they still have the lights I used (leftover from projects I made two years ago) they not only still have them, but they are on sale - a 6 pack is less than $10 right now.
The Lights - https://amzn.to/3Rb5zJz

Projects I've used these lights in:
Nativity Pop Up card shown above

Light Up Nativity (this folds down and stores in the base! Love that! ) FREE svg - https://specialheartstudio.com/3d-layered-nativity/

========================


Using Weld & Slice To Make SVGS Better For Paper Cutting

I am using a paper bag puppet svg, free from Easy Paper Crafts for the example, but these are the concepts that will work for almost any svg.  This, for me, began when my grandson asked if we could make a dog craft today.  Of course!  I knew he'd love these puppets I saw awhile back.

Ideas For Using Those Dollar Tree Pumpkins

 
Glitter, yarn, fabric, paint, even googly eyes and plastic spiders...
Ideas for Crafting with the Dollar Tree Carvable Foam Pumpkins

What To Do With All Of These Layered Mandala Designs


Layered Mandalas made into a banner

There are so many great paper mandala designs  - but what do you do with them all?  Here are some of the ways I have used the ones I have made.  I'm having trouble with links in posts here currently, but you can message me, or comment, and I'll point you in the right direction if you see something you want to make and cannot find it.

My Craft Space Through The Seasons


My craft area is not actually a room, bur rather the corner of our laundry room/back porch/pantry.  An all purpose space, it is conveniently located for me, right in the main area of the house.  I have an extra bedroom upstairs, but if I moved my craft supplies up there, I would not use them nearly as much.  And, I wouldn't have this great view of the goats and flowers.  :-)  This post however, is not about how I use my space, but rather, a look at what has been made in this space.  If you follow me, you have seen a lot of these photos titled "On My Desk ".

On My Desk - My Favorite 3 Card SVGS, Through The Seasons

These three card designs, two of them box cards, are my favorites.  By changing the colors, and the text, I've used them for Christmas, Thank You, Mothers Day, Valentines Day, and more!

Unfortunately, I can no longer find two of these files for sale anywhere online - but the concept is the same for any svg, so I'll leave this post as inspiration.  It's amazing how changing the colors can change a design!

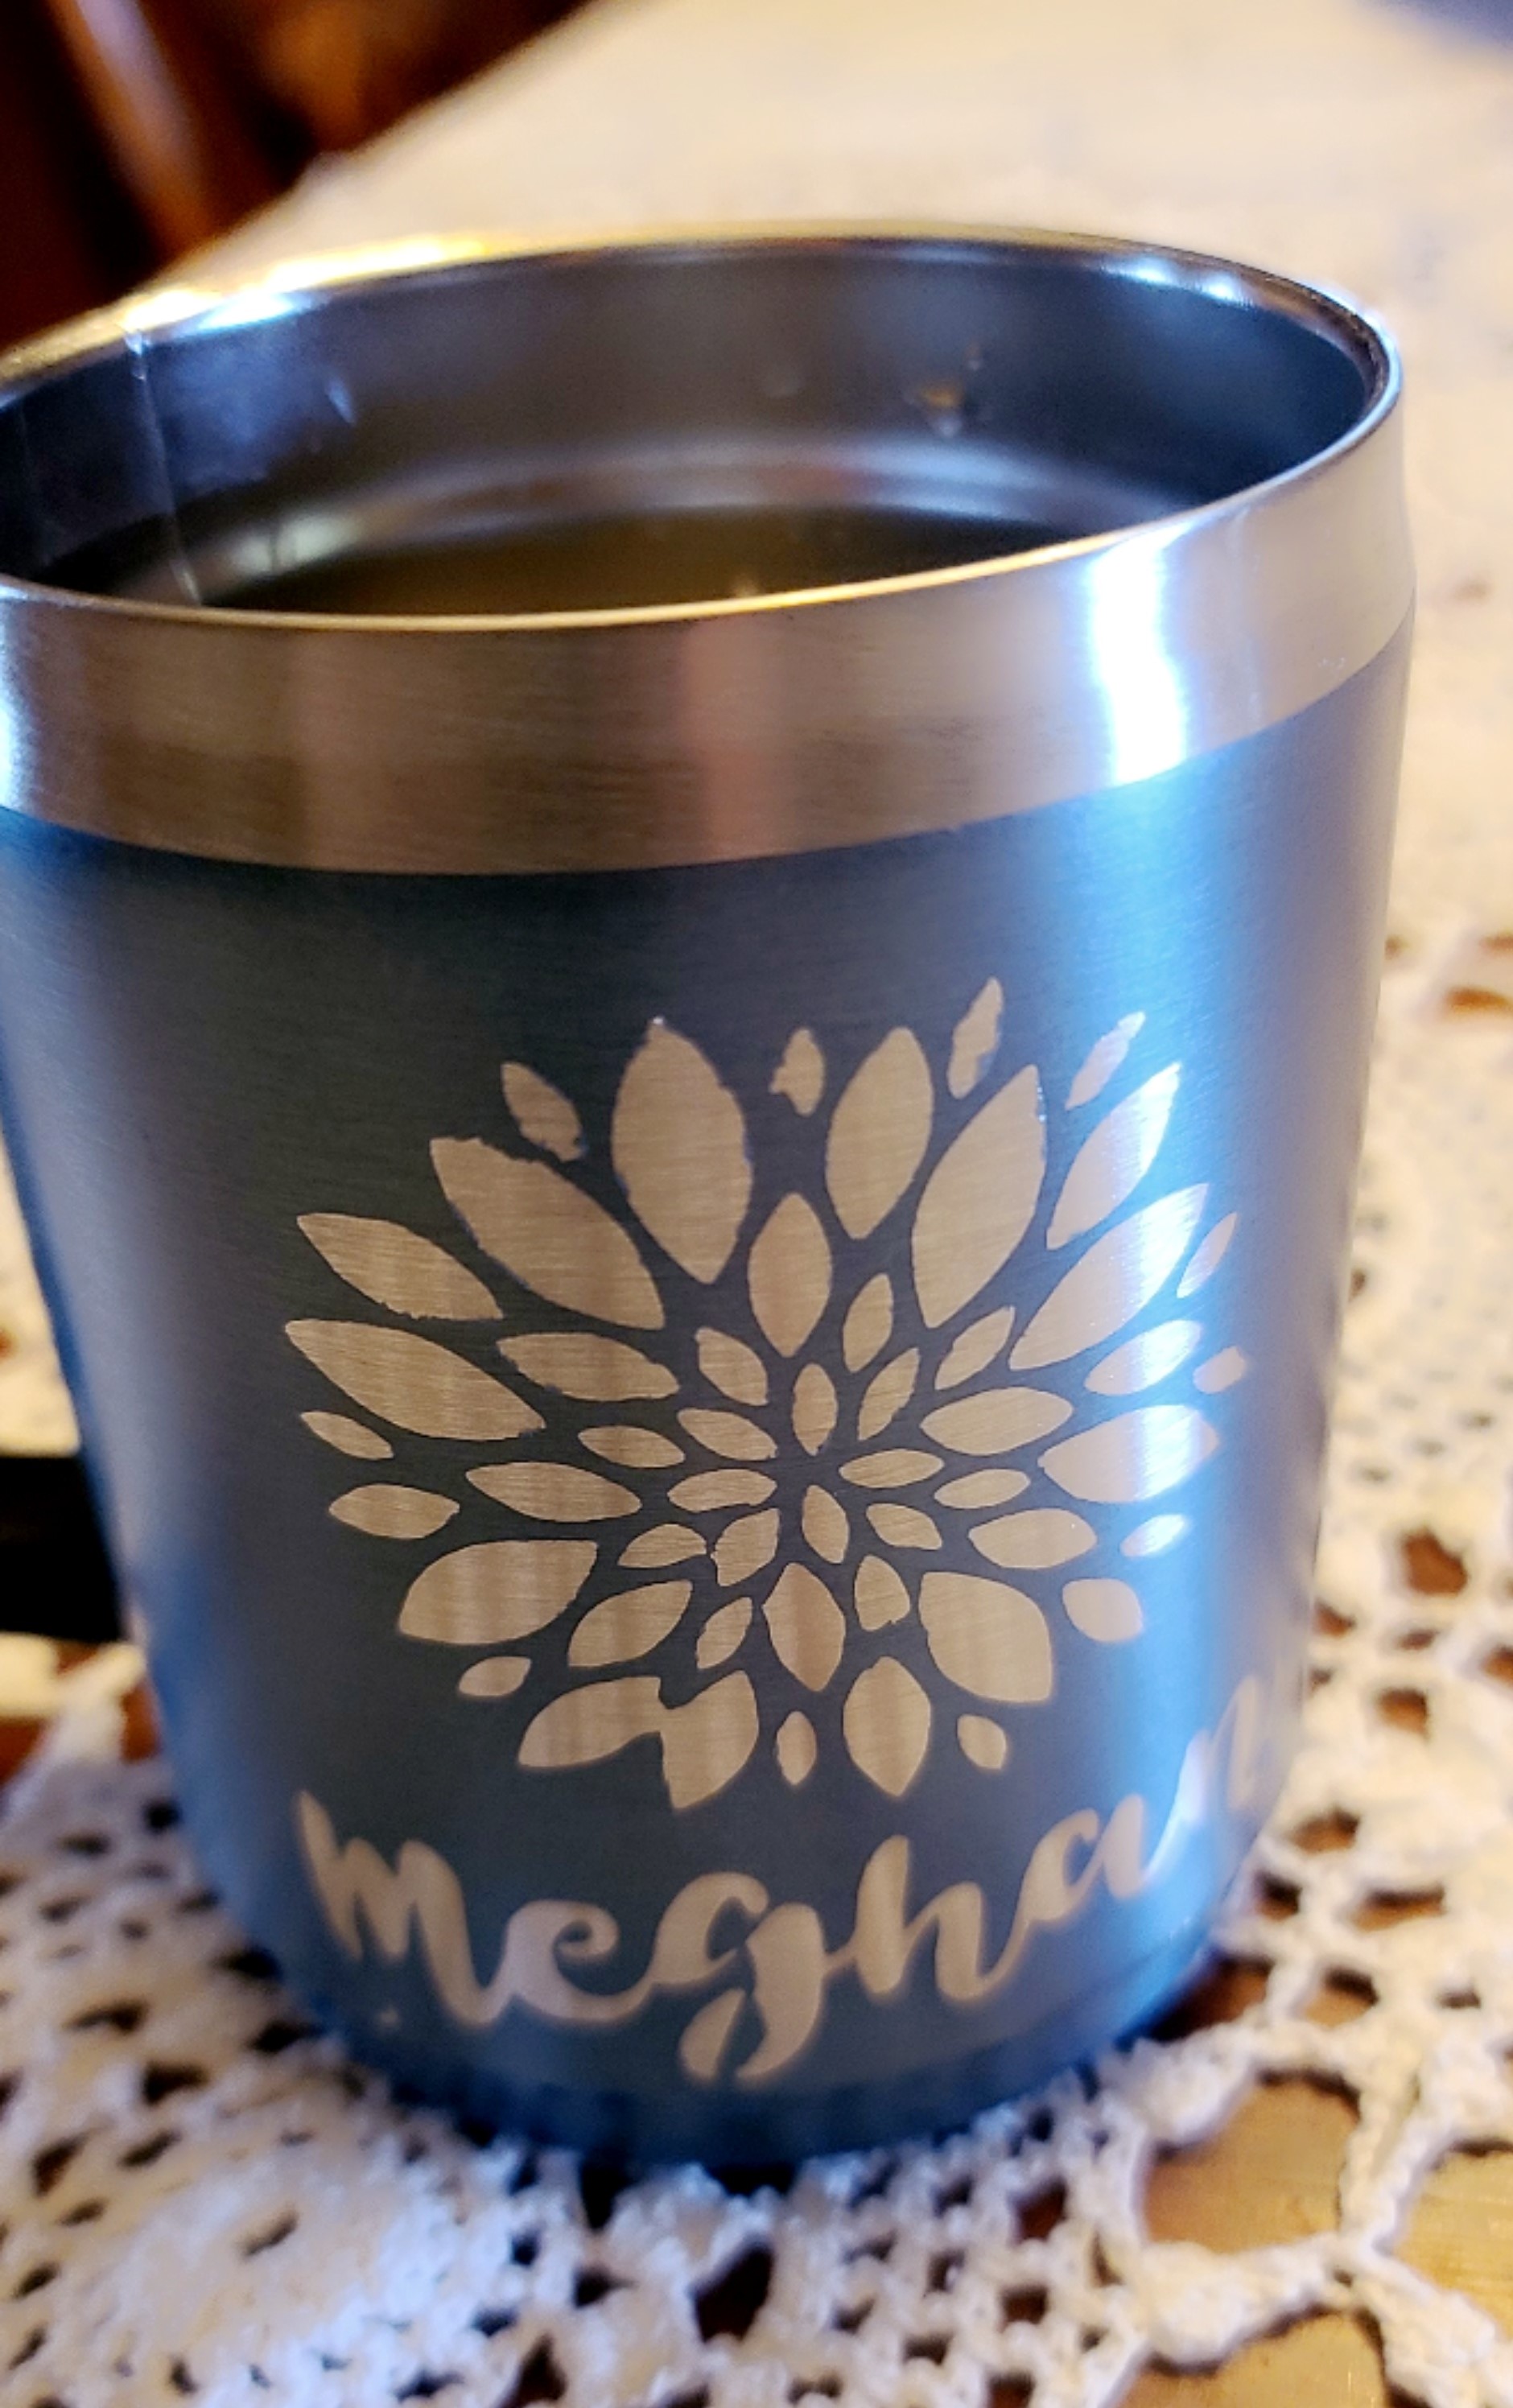
"Etching" Metal Coffee Tumblers with Citristrip

Citristrip is a paint stripper.  It does not truly etch the metal cups, merely removes the paint or powder coating.  Think of it as a reverse stencil - rather than painting, the citristrip removes the paint in your stencil area.

This is the product I used

As for the cups I used, I just pulled a variety from my stash.  It worked beautifully on the Tal mug, and did not work at all on the contigo mug.  The good news is, if it doesn't' work, it doesn't harm the cup at all - I can still apply a vinyl decal the to  Contigo Cup.

The contigo mug AFTER washing off the citristrip.  Although it did not work on this cup, it also did not damage the cup at all.

I don't think this is a clear issue by brand.  It will vary by paint finish, so if one brand of cup comes in two different paint finishes, one may work and the other may not.  It's going to take a lot of trial and error - but in general, look for a more matte finish, or a powder coat.  The shinier finish seems to be less likely to peel.

Method

Apply your stencil - make sure it's VERY secure!  I ruined one mug already because my vinyl was not applied tightly enough.  You can use stencil vinyl, or, as I did, just use permanent vinyl.  It's a really good idea to take a hair dryer over the vinyl once its on the cup - you want it very firmly stuck fast, and the hair dryer will soften the adhesive and make it stick better.
Give yourself plenty of buffer around your stencil area.  Add painters tape if you need to. The citristrip may run a little, you do not want it to run down and touch exposed areas of your cup.

I used a foam craft brush to apply a thin later over the stencil.  

Let it sit for at least an hour.

Use a diaper wipe to wipe off the citristrip.  Now take a clean diaper wipe and wipe a bit harder - the paint should be coming off.  Keep wiping, scrubbing a bit, until you have most of the paint off.  
Remove your stencil, wipe some more.

Then I  rinse mine off in the sink.
Not all of my edges are super crisp, but overall, I'm really happy with this technique!


================