Showing posts with label Cricut Resources. Show all posts

Cricut Tips For Ipad & Iphone Users


Disclaimer - I do not use apple devices.  
 Because a lot of you use ipads and iphones, I have done my best to compile answers to common questions from sites that know more about these devices than I do.

I've sorted these into sections - Fonts, Svgs, & General Tips & Tutorials For Apple Users
 Fonts:

How To Install Fonts On A Mac


SVGS:


How To Download, Unzip, And Save, SVGS On an Iphone - From SVG Cuts
How to Upload SVGS With Iphones & Ipads


General Tips & Tutorials:
How to use Cricut Design Space on your Ipad & Phone – Full Tutorial(includes a section on Snapmat)

The Cheapest Sublimation Printer Option? Alternatives to Cricut Infusible Ink.


With all of the talk this week about Cricut Infusible Ink, I've started compiling alternatives from the comments.  Please note that I have not (yet) tried any of  these - I'm just collecting the information at the moment! 

NOTE - This page is from 2019, Prices have most likely changed!  But probably not for the better...

Infusible Ink is cricut's version of sublimation printing, and I include the prices of their materials, and an expected release date, at the bottom of this post.

A Little About Sublimation
"Dye-sublimation works by penetrating the surface of the substrate with ink. Man-made materials such as nylon, certain plastics, and polyester fabrics contain polymers that when heated, enable the bonding of ink.

Dye-sublimation printing yields beautiful and permanent colors that are embedded in the substrate or fabric, rather than printed on the surface. Images on fabric won’t fade or crack even after multiple washings. Images on hard substrates will not chip, peel or scratch."https://www.rolanddga.com/blog/2016/06/02/22/42/3-things-you-should-know-about-dye-sublimation

1. Everlast Patterns From Heat Transfer Source
(Sublimation pages pre-printed for you, ready to be cut in your cricut machine)


2. There is talk of an online company that will do custom sublimation.  I don't know if that will be the heat transfer site above, or another one, I do not have that information yet. (If you have companies to recommend, please message me!)

3. Buy An Epson Printer and Sublimation Ink Kit -

Epson C88 Printer
https://amzn.to/2WmoDIk


Sublimation CISS system for Epson C88
https://amzn.to/2K3KnXM
Does this include ink?  Or do I need to purchase that separately? I don't know..
Ink - https://amzn.to/2I2aFaD

Sublimation paper to print on
https://amzn.to/2IpGid9

Well, that added up fast.  At least $200 to get started with sublimation?  And that does not include any items to actually use the prints on.  Also consider that most of the new irons will not get hot enough to work with  any of these methods.  You will want a heat press, an easy press, or possibly, and old thrift store iron.


4. Infusible Ink From Cricut - Prices
Expected to be available at Michaels on July 16th online, 22nd in store.
(Personally, I expect to see a lot of it in the clearance section by Christmas...  I can wait)


==========================


Comparing Programs & Sites For Converting Images To SVG

I took two images, one a colorful png and one a photograph of my dog, and ran them through a variety of SVG conversion sites and software - scroll down to see the results from each option.

So which is the best?  It will completely depend on the photo, and what results you are looking for.  My favorite for converting the photo was Adobe Capture.  My favorite for converting the flag svg was PNGTOSVG.  

At the bottom of this post is a list of additional links to try, and more information about the difference between pngs and svgs.

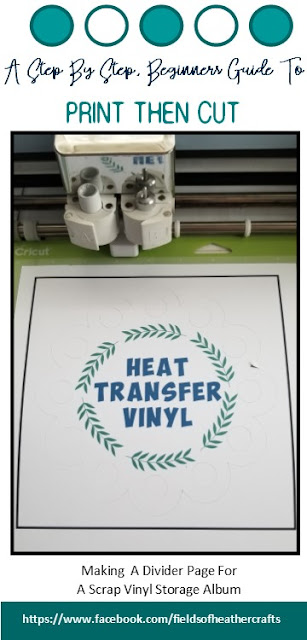
Super Simple Print Then Cut Project - Divider For Scrap Vinyl Storage


Today I wanted to make a divider for my new vinyl scrap storage scrapbook.  Then I wanted to add a divider page, to separate my 651 vinyl from my htv vinyl.
This is a super simple print then cut project, using plain old cardstock, just to go through the steps of how to use the Print Then Cut feature in Cricut Design Space, and to create a divider Page for My new Scrap Vinyl Storage Album.


See more about my scrap vinyl storage album, here:


Quick Links:

First, The Shape - Uploading An SVG - 


It will download as a zip file - you will need to unzip the file, and locate the svg file.  Here's a quick overview:
How to See Thumbnails of SVG files:


Open Design Space, on the far left, at the bottom, choose "Upload"


Now at the top of the screen, you can change the size:

Print then Cut size is limited to 9.25 x 6.75.  So the largest we can cut a circle is 6.75. 


 I'm using an Air 2, so I can only use white paper for print then cut projects.  The Maker can read the registration marks on some other colors of paper, but on any machine prior to the Maker you are limited to white.  (There are some work arounds, but I've never needed to print on anything but white paper or clear acetate - clear acetate works fine in the Air 2 as well. )  You can change the color of our object at the top of the screen, by clicking on the box beside linetype.

Next, Add Text


On the far left, choose the text option, type your text.
Change your font to whatever you would like, I use Obelix Pro here.

Keep in mind that Design Space does not properly read system font kerning.  So if choose a script style font, it will space the letters all weird.  You can read more about that, and how to get around it, here: https://fieldsofhether.blogspot.com/2018/01/using-fontlabpad-with-cricut-design.html

For this project, to keep it simple, I chose a simple font.

Then I decided it needed something, so I uploaded a laurel wreath svg - you can find that for free here: 

Select All & Flatten
Here's the important step - select all, and flatten.

Flatten is for Print Then Cut Projects, so as soon as you select all and flatten, you will see in your layers panel to the right that it is now ONE image, and it changed itself to Print Then Cut.


Send To Printer

Now you can click "make it", and a screen will appear to send your item to the printer.

You can leave the bleed option alone.  Bleed is meant for images that have color around the cur area.  "Bleed" will bleed the color over the cut line, assuring that there is no white edge around your image.  All of our colors here are well inside the cut lines, and our image is flattened, so no bleed will be visible.  If you click make it, and on this screen all of your text is fuzzy - that is because you did not flatten your image.  Every letter that is "fuzzy" - shows bleed - will cut out individually.


Lastly, Cut - 

Place the paper that came out of your punter onto a mat, and insert it into the cricut.  The machine will scan the image, looking for that black box, then it will cut.


That's it!  One super simple print then cut decoration for on my divider page.  I placed it on top of a piece of scrapbook paper, and added a tab to make it easier to find the division in my album.


A Super Simple Draw Then Cut Tutorial - Planner Tabs

A Super Simple Beginners Tutorial
For Using the Draw Feature [Pens] In Cricut
How To Make A Page Divider Tab

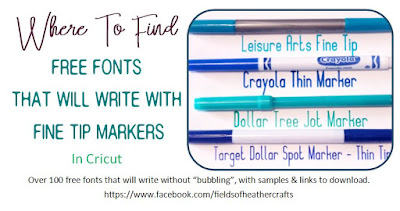
Free Fonts For Writing With Cricut - With Super Fine Tip Pens


Free Writing Fonts For Cricut 
The Cricut machine, when writing, will follow the same path it would if it was cutting.  So most text will appear "hollow", or as a "bubble"  You can avoid this by using a writing font in Cricut Design Space (Most cost around $5) OR, by choosing a free font thin enough that the lines "collapse on themselves"  (Those are the fonts listed here).  Although these are not truly free writing fonts, they are free fonts that will write without bubbling.

The Names under each sample are linked to the sites to download the font.  Simply click on the font name under the sample, to download.
Samples are written with a plain old Bic Round Stic Pen. at .5 inches tall
(To write in 1 inch height, try a thicker pen - the samples for the thicker pens are all 1 inch tall)

  1. Baby Lexi
  2. Lyrics Movement
  3. Advertising Script Monoline
  4. kaleidescope
  5. Argentina Script
  6. Montepetrum
  7. Long Night
  8. Belta Light
  9. Encina Script
  10. Lovesick
  11. Gatsby
  12. Always Here
  13. HSF Skinny Towers
  14. Matilde
  15. English Essay
  16. Rose Water
  17. Mikelis Light
  18. Indesign Signature
  19. Lilypen
  20. Flamenco Light
  21. Lamiar
  22. Europe Underground
  23. Mathanifo Script
  24. Memories
  25. Milton One

Samples are at half an inch tall, with the Precise V5 Pen.  If you look at the S in Stymie hairline, and shopping script, you will see they are missing a bit of the s - this is because I was pushing the limits of the margins.  I have found that if my text is right up along the edge of the paper, it does better if I weld the text, but I did not do that here.  It's really best to not put your text right up against the edge of the page - leave a little margin. 

  1. Reading
  2. Brotherhood Script
  3. Monday Line
  4. Beautiful Friends
  5. Poor Weekdays
  6. Prescriptivism
  7. Prince Charming
  8. Shopping Script
  9. Question Of Science
  10. Romantically
  11. Something Blue
  12. Slim Extreme
  13. Single Line
  14. Stymie Hairline
  15. Stylish Charm
  16. Stymie Stylus
  17. Sunny Winter
  18. Thin Fingers
  19. Sweetly Broken
  20. Thinnyness
  21. Tiffany Script
  22. The Artist
  23. The Age
These are in the sample above, but did not work with this pen.  They work with the fine line pens

Autumn Chant
Moon Flower
Print Clearly
Penelope Anne


Commercial Use Fonts That Will Work As Writing Fonts

=================================


Pin This:

Cricut Cheat Sheets & Printables

A few of the various cheat sheets I have made and used over the years, for crafting with Cricut:

My Cheat Sheet of My Favorite Fonts
is updated regularly.  I include links to download each of them, and all of these are free, most are from Dafont: http://fieldsofhether.blogspot.com/2017/12/my-favorite-fonts-cheat-sheet.html

Fonts With Tails Cheat Sheet
This cheat sheet is for fonts with "easy glyphs".  Fun fonts like I love glitter, where you can quickly access the pretty tails and swirls without needing a full character map (as is needed for Samantha).  I update this post regularly, and have links to download all of the FREE fonts here as well.  http://fieldsofhether.blogspot.com/2017/09/fonts-with-tails.html


Writing Fonts Cheat Sheet

Most fonts will write as an outline in cricut, but I have a long list of FREE fonts that will collapse on themselves and work great as writing fonts.  I'm constantly adding to this, so be sure to actually go to the link and check out the full sample sheet, and all the links for downloading them can be found there too.

Alternative Pens For Cricut
I keep testing new ones, so please check the link.  I have samples of how various pens work in Cricut - with no modifications. These do not require removing anything, or using pencil grips - these all just slip right into the machine the same as if they were the official Cricut Markers.  But some of them write so much nicer than the cricut markers - and they are all cheaper! http://fieldsofhether.blogspot.com/2017/12/alternative-markers-for-cricut.html


In Addition to writing, cricut can draw.  These are some great fonts for sketching words with cricut: http://fieldsofhether.blogspot.com/2017/12/writing-with-fun-fonts-in-cricut.html

Font Terms & What They Mean
https://fieldsofhether.blogspot.com/2020/12/cheat-sheet-font-terms.html


list of free fonts & Resources for monograms and split monograms
http://fieldsofhether.blogspot.com/2017/11/free-monograms-split-monograms-for.html
--------------------------------------------------------------------  


This is more of a "Create Your Own" Cheat Sheet.  :-)  A Vinyl tracker, to track prices on the vinyl brands you purchase and try.

Projects At A Glance
A printable to help track the projects you are currently working on

==============================
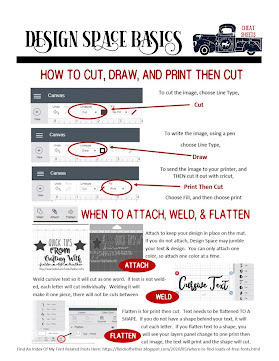
Design Space Basics
I need to update this one - the menu for line types looks a little different since all of the updates, although the basic idea is still the same...