Showing posts with label Cricut Print Then Cut. Show all posts

Making Tags With Cricut

A Beginners Step By Step Guide For Making Tags
Both with Pens, For Draw Then Cut
& with your printer, for Print Then Cut.
A list of free Tag Svgs can be found at the bottom of this post.
Quick Links:

Start By Adding Your Shapes
This will be the first step for both processes, whether you choose to draw and cut, or print then cut.

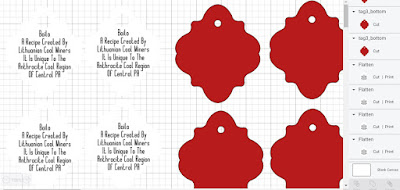
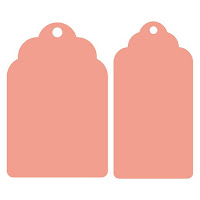
I started with Tag #2 from this collection.  You upload two files, the top and the bottom.
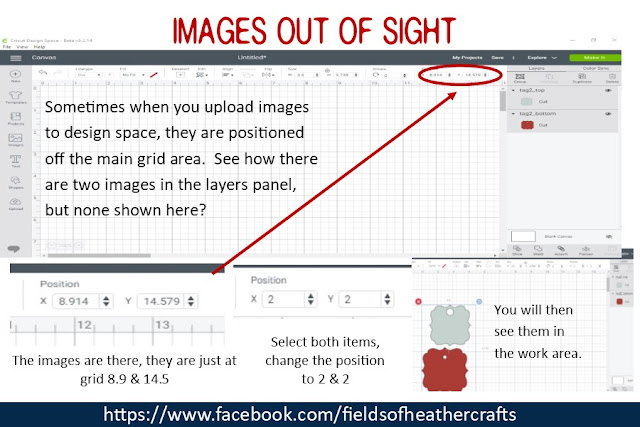
When you upload these, Design Space may place them out of sight.  Change the Position (see above photo) to make them appear in your workspace.  

Layer the images on top of each other, then select all and you can drag to easily resize both images at once.

For Draw Then Cut

The next step is to add your text.  This is where it will matter if you are using draw, instead of print.  When using the draw feature in Cricut Design Space, if you are using a system font, the machine will follow the path of the blade, creating "bubble text".  There are hundreds (literally hundreds!) of free fonts that will work without bubbling, because they are thin enough to "collapse on themselves" and appear to be a single line.  However, results will vary based on the size of the font, and the size of the marker used.  I have samples of well over 100 different fonts, sorted by the marker used, here:

For this project, I used my go to favorite free font for writing - Montepetrum

Once you type your text, change the font, then on the top left of the design space screen, change the box beside linetype to "Draw".


Once your text is added, and set to draw, you need to attach it to the top part of the tag.  The easiest way to do this is to hide the bottom part of the tag, select all, choose align/center then making sure you have both items selected (choose select all again) choose attach on the bottom right.

You can attach any color of writing.  Unlike when using attach for cuts, the colors will not change, because the machine knows it will use pens, and then cut, all on one mat.

Unhide the bottom part of the tag, and click make it.

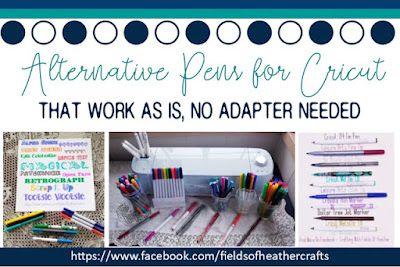
My favorite markers to use are the the jot Markers from the Dollar Tree, Markers from the Target Dollar Spot, and a plain old bic round stic pen.  See examples, and a longer list, of pens that work in cricut, no adapter needed, here:

The machine will prompt you to put a pen in the machine, and it will write and cut.

Then it will prompt you to load a mat with the second color of cardstock, and it will cut the bottom pieces.

For the jar lids, I sized a circle 2.54, then sliced it from the photo.  Delete all the extra pieces, add a new 2.54 inch circle, placed the photo and text on the circle, select all and flatten.  Sent to the printer, then cut with the cricut.  I did these on plain cardstock.  You could use sticker paper, but there's no need, since the jar ring holds the paper in place on top of the lid.

For Print Then Cut
  • Flatten To A Shape!
  • The maximum print area size for Print Then Cut projects is 9.25" x 6.75"
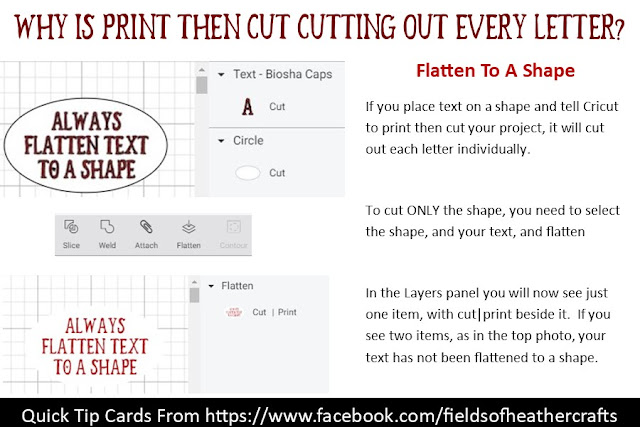
The  most important thing with print then cut is to make sure you flatten all text TO A SHAPE. If you just flatten text, it will cut each letter individually.  If you flatten text to a shape (the tag) it will cut only the shape. In the above image, I flattened everything all together, but I changed my mind and decided to print and cut the white, and just cut red backings to layer the tag.


For Print then cut, you can use any font.  Print then cut will be MUCH faster than draw then cut.  The results will look very similar. But print then cut is limited in size.  I originally had the image grouped, I duplicated it to make 4 copies, and then clicked make it - and it put it on two white sheets (and one red).  By going back and ungrouping, manually placing the white images together and attaching them, I could get design space to put the white images on one piece of paper.  Design space does not always place images well on its own, I often have to manually place, and attach, items to save materials.


Here's a comparison of the print then cut, and draw then cut with two different pens:
The first tag, on the left is print then cut
Middle tag is with a target dollar spot marker
right tag is with a bic pen

Where To Find Free Tag SVGS:


=====================
For more tips, tricks, tutorials and free svgs, find me on facebook:

Making Floating Christmas Ornaments With Vellum Instead Of Acetate

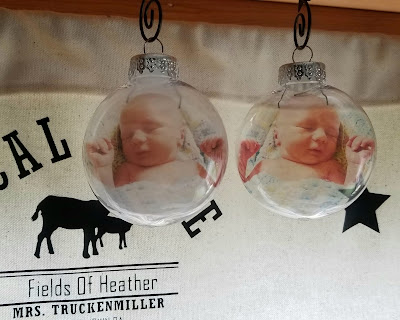
On the left is vellum, on the right is printable acetate.
Neither ornament is done here - to be finished they will get vinyl names on the outside, and bows..  and possibly the birth date/height/weight on the back...

While making our grandsons newborn ornaments today, I tried them on both the printable acetate, and the inkjet vellum.  For this project, I still prefer the acetate.  Although when I hung them both on a  lighted tree, the vellum does show up much better.  I think I am going to like the vellum a lot better for the Memory ornaments I am making this year.

Quick Links:
This is a good thick vellum, perfect for use in Inkjet Printers

I use a Cricut Air 2, and it refused to acknowledge this vellum for print then cut today.  It insisted it could not find the sensor marks.  I turned the lights on, I turned the lights off, I pulled the curtains, I switched from a green mat to a blue mat...  no luck.  I tried on the clear acetate, it cut perfectly on the first try.  So I placed a sheet of white paper behind the vellum, and sure enough, it read the marks and cut just fine.  Why it can not find the marks on white vellum, but CAN on clear acetate, I just simply do not know.

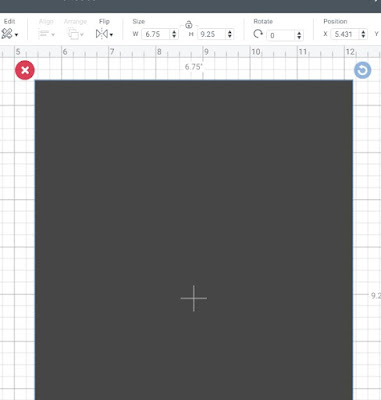
So to make this easier, print yourself a print then cut frame.  This is very simple to do.  Go to Design Space, Choose the "Add shape" tool on the left, and choose a square.  At the top of the screen, click on the lock to unlock the size, then type beside the W 6.75 and beside the  L 9.25  That is the largest a image can be for print then cut.


I use HP Instant Ink, which means I pay by the page no matter what is on the page.  It costs me exactly the same to print the word "test" on a sheet of paper, as it does to print a dark full color photo.  So I didn't bother to try to save ink here.  But if you pay for your ink, you will want to make this a very light grey color, or slice the center of the shape out, so that you are not printing a full page of color.  
At the top left of the screen, under fill, choose Print, to make this a print then cut project.

Next, send your project to your printer, printing it on a piece of good white card stock,  then place it on a mat and insert it into your cricut to cut.  

Now you have a print then cut frame.  Make your print then cut project on the vellum, place it on your mat, then place the frame you just made from cardstock (which has a black outline to show the machine where to cut) over your vellum.  Use Painters Tape to tape the "frame" to the mat.

This is NOT following my directions above.
This was about my 5th attempt to get the machine to cut the vellum.
I simply stuck the white sheet of paper underneath
Then I taped the vellum on top. I do not recommend this.
Because the vellum is not stuck to the mat in the middle
It will move when cut, and it gets bent and crinkled.

This is a comparison of the prints - vellum on the left, acetate on the right.

If you are looking for how to get the photos on the shape, follow the tutorial found here:

And here's a comparison of them held up in the light.
Left is vellum, right is Acetate.


=============

=====================================


Find me On Facebook At Crafting With Fields Of Heather
Where I post LOTS Of Free svgs each day, and more tips and tutorials
https://www.facebook.com/fieldsofheathercrafts/posts/


Pay By The Page, Not The Cartridge - Saving Money With HP Instant Ink


try.hpinstantink.com/pNJBV
When you sign up for an HP Instant Ink plan, you pay a monthly fee to print a defined number of pages per month. The plans are based on the number of pages that you print, not on how many ink cartridges you use.  

My ink costs will be under $50 this year. Total.

 It used to be twice that, at least, and I wasn't even printing nearly as much.   I've printed at least a dozen cookbooks this year alone.  

The only catch is that you have to have an instant ink compatible HP printer, but I think all of the newer printers are compatible.  I've been using this for 6 months now, and wish I had learned about this so much sooner!  The 

When you sign up for an HP Instant Ink plan, you pay a monthly fee to print a defined number of pages per month. The plans are based on the number of pages that you print, not on how many ink cartridges you use. 

Your monthly fee pays for ink, shipping, and recycling.


 If you do not print all of your plan pages in a month, you can roll over up to two times the number of pages per month in your plan. ( For the $0 plan, only unused additional pages that were purchased roll over into the next month. Free pages do not roll over.)


 If you print more pages, there is an additional charge but you are still paying the same price per page as your base plan.  OR, you can login and up your plan to the next level before the billing cycle.  When I realized I was going to go way over my 50 pages last month, I simply logged in and bumped up to the $4.99 a month plan, giving me 100 pages.  I'll stay at that rate through the holidays, when I print a lot more, and I can go back to a lower plan for the summer months when I am not printing nearly as much.


 A printed page counts the same whether it’s black and white, a color document, or a photo. 


Check it out here:
I use an HP Envy 7800  - I love this printer.

=====================
Solving Simple Print Then Cut Problems In Design Space

=====================================

Find me On Facebook At Crafting With Fields Of Heather
Where I post LOTS Of Free svgs each day, and more tips and tutorials


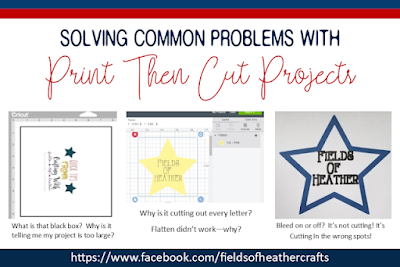
Solving Common Print Then Cut Problems


Quick Tips:
  • Select All, Flatten.
  • Be SURE you are flattening to a shape - you can't flatten text to empty space.
  • There needs to be a black box [black corners at least] around your project.  That's how cricut knows where to cut.
  • If it is not cutting exactly around your shape (the cut is offset) - Calibrate your machine
  • If your machine cannot read the registration marks, make sure your project is on the mat in the same direction as shown on the screen - and make sure it is slightly inside the grid lines.  Trying moving it 1/4 of an inch in and 1/4 inch down, from the outside grid line on the mat.
The most common issue with print then cut is that your text is not flattened to a shape.  It cannot just be flattened, it needs to be flattened TO something.  I cover that in detail below, along with that black registration box,  cricut not detecting the project to cut it, and what to do if the machine is cutting in the wrong spots.


Cricut needs the black box [these days it's 4 brackets in the corners, previously it was a full box around the image]  to know exactly where to cut.  When you place the printed paper onto a mat and load it into the machine, cricut will "scan" the mat, and locate exactly where the black box is.  That tells the machine exactly where to cut your image.


Print Then Cut Quick Tip Card
I explain this in more detail below, but here's the quick version. You have to flatten to a shape.  You cannot just flatten, it has to be flattened to a solid shape that it will cut.


How To Tell Cricut To Print Then Cut
For Cut, and Draw, you choose from the drop down box under Operation
For Print Then Cut, you go to the next box, over and choose "print" from the fill options.


How To Keep Cricut From Cutting Out Each Letter Of Text
Flatten To A Shape
If your Layer Panel Looks Like This, It WILL cut every letter.
See in the layers panel, there are two items here - Text, and a shape.
This is telling cricut to print the text and print the yellow star, then to cut around the star and around the text.  Because this is not attached, it will not even cut the text on the star.
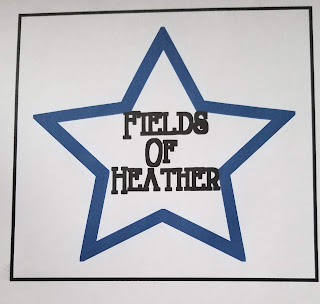
If I select all and attach, it will now cut the text out of the middle of the star, as it appears on the left.
To fix this, select all, and flatten.

Flatten can be found in the bottom right of the screen in design space.  You need to have at least two items selected to flatten.

A Correct Example For Print Then Cut
Look to the right in the layers panel - see how it is just one item?  This is what you want to see.  This is telling cricut to print a yellow star with writing in it, and then to cut around the star.


Make sure your shape has a "back"
In this example, the layers panel is one image, but this will still cut every letter - because text is "floating" on a transparent background.  If you can see the grid behind your text, the machine is going to cut each letter individually.

To solve this, create a rectangle shape, slice your frame out of the rectangle.  Delete all but your frame and the new "center" piece you have created.  Make your background shape white, your fame whatever color you would like, Select all and flatten, and now you should have one shape - a colored frame around a white background with your text. 

Bleed Or No Bleed?
Leave It On 
See how fuzzy & thick the letters are?
This tells me right away that my text is not flattened to a shape, and it will cut out each letter.

If your letters are all "fuzzy" or extra wide when you print, that is an indication that the bleed is on - but it also tells you right away that cricut is going to cut every letter.  You will only see the "bleed" where Cricut is going to cut.  Bleed can be important on some designs, usually it's best to leave it on.  It "bleeds" the image over the cut line, so that when cricut cuts, there is no white left around the image.
With the bleed on, there is no white edge showing around my cut out shape.

If The Machine Won't Read The Registration Marks
 Use White Paper, Close The Lid, and/or Change the lighting.

I've sometimes has to turn more lights on, and sometimes had to turn lights off.  A glare, or too little light, can keep the machine from reading the registration marks (that black box around your design) that tells the machine where to cut.

More Tips, From Cricuts Help Section:
  • Verify your Cricut machine mat has been placed under the mat guides, and ensure the mat is positioned snugly against the machine's rollers before pressing the Load button on the machine.
  • Is the mat bent? A bend or crease in the mat can cause a failure to read the cut sensor marks. Press down on the bend if possible as your machine scans cut sensor marks, or remove sheet, rotate mat 180-degrees, reapply sheet to the opposite end of the mat and reattempt the cut.
  • For best results, use a machine mat with few or no marks or smudges. A mat with smudges near the cut sensor marks may cause your Cricut machine to mistake the smudges for cut sensor marks.
  • Verify that the Print Then Cut sensor light is clean. To clean the cut sensor light on your Cricut Explore or Cricut Maker machine, sweep gently with a small, clean, dry watercolor paintbrush.
  • Verify that the Print Then Cut sensor light comes on when scanning for Print Then Cut sensor markings. It is located on the underside of the carriage. If that light does not come on when scanning the Print Then Cut sensor marks, contact Member Care for assistance.
  • Print your image again, making sure the paper size is set to Letter and that you have unselected any page scaling options such as Fit to Page or Shrink to Fit. The page needs to print at actual size. 

Close the lid on your machine.

Make sure your project is loaded on the mat in the same direction as it is shown on the screen.  If it is upside down, the machine will not find the registration marks.

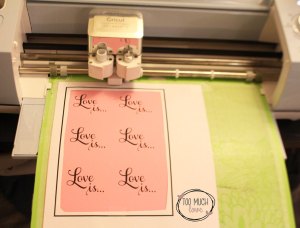
The Air Machines can only do print then cut on white paper, although there is a hack to help work around that.  The maker can print then cut on colored paper. It involves printing your design twice, once on colored paper and once on white - there's a good tutorial here, from Too Much Love:

Although I know it's possible, or at least was possible, to print your item elsewhere, and then cut it out when you got home to your machine, Cricut now says you can NOT do that, and that print then cut must be done "all in one session".  In other words, do not print unless you are ready to immediately cut, from the same device, without closing the program.  

CAN you still print elsewhere?  Maybe, sometimes.  

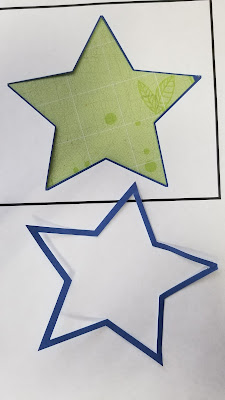
If The Machine Is Not cutting In The Right Spots 
Calibrate
If your machine is cutting "offset" of the design, you may need to calibrate your machine.

For more information on how to calibrate your machine:

Quick tip - how to switch from cut, to draw, to print then cut


=======================================

Facebook Page - For Tips, Tricks, & Free SVGS

Facebook Group- For Questions, Support, Sharing Projects, 
and LOADS More Free SVGS in themed posts with links in the comments
==================
An Index Of All Of My Cricut Related Blog Posts