Showing posts with label Cricut How To. Show all posts

Quick Tip - How To Use Contour In Design Space

The Contour Button in cricut allows you to remove some of the unwanted cut lines - like an old date that is sliced out of an image.

 To use contour, you can only have one item, or "layer" selected.

When you click on Contour at the bottom right, a screen will pop up.
For this, you can choose the box at the bottom that says "hide all contours".  That will remove all of the text.

If you only want to change the numbers, simply click on each number in the panel  on the right to make them disappear.

Now when I close the contour screen, the design looks like this.
It can be cut as is, or you can add your own text.
In most cases, you really don't need to match the exact font - just find something that works well with the design.


For this, I used Garlic Butter

Many of the free KG fonts on dafont would work well here too.

You can select your new text, weld it, then slice it from the banner.  Or you can just attach it.

======================
An Index Of My Quick Tip Cards
Also a slideshow of them, & A printable pdf version

===========================

Facebook Page - For Tips, Tricks, & Free SVGS
 https://www.facebook.com/fieldsofheathercrafts/

Facebook Group- For Questions, Support, Sharing Projects, 
and LOADS More Free SVGS in themed posts with links in the comments
https://www.facebook.com/groups/1121399284857845
==================

How To Clean & Restick Cricut Mats


Three tried and true methods for cleaning your cricut mats, and one tried and true way to restick them when cleaning is no longer enough.

How to Clean Your Cricut Mats - 

My favorite go to method for cleaning mats is using diaper wipes.  You want scrub lightly, but hard enough to pull up all of the lint.  (I've read that you should use alcohol free wipes for this.  Those are easy to find - I usually grab huggies at our local Dollar General)  The mat will be sticky again when it dries again.  If you are in a hurry, this is definitely your best bet.  Not only will it work great but it will dry the fastest of all the methods here. 

I love these dishcloths from the Dollar tree with the netting on one side.

My second favorite method is plain old soap and water.  The blue dawn dish soap is what is supposed to work best, and it is what I typically have in my kitchen anyway..  but I have used others over the years. squirt on some soap, scrub lightly, rinse.  When the mats dry, they will be sticky once again!

LA Awesome Cleaner - $1 At Dollar General & The Dollar Tree
This is a popular method, that I used when I first started, but I think soap and water and diaper wipes work just as well, and they don't smell nearly as bad.  But if you want to try it, just spray this stuff on(from the dollar tree) and rinse it off.  Let the mat air dry.

When That Stops Working - Tack It Over & Over

I have mats that are two years old, and have been used hard for everything from paper and vinyl to faux leather.  Some of them are just not sticky any more, even after a good cleaning.  Two coats of Aleenes Tack It Over and Over and I think they are stickier then when I first bought them!  
Do not apply it this thick - its not necessary.  Thinner coats.  :-)  That little bottle is going to last forever, even with all the mats I have here.  

Mix the Alenes 50/50 with water, and paint it on.  This was the first time I did this, and I went pretty thick.  I ended up going back later and brushing some of this off to make it a thinner coat.  Wait 20 minutes, then apply a second light coat.  Let the mat dry for at least 24 hours.

This even worked right over the spots on my mats that have lost their green.
(The new, no flowers on them, cricut mats are not nearly as good as the old ones!)

I ended up letting mine dry for a few days - I would recommend at least two.  Maybe less if you use thinner coats.  But when they were dry, they were SO sticky!  I could use them for faux leather again!  I would not use them for paper right away - I'd cut vinyl on them a few times first, they are too sticky for paper right away.

Buying New
Watch amazon for sales - mats go on sale frequently!  A two pack of 12x12 mats is almost always $10 or less on sale.


I've used the 3 pack of Nicapa ($9 normally)
and I think they are pretty much identical to the Cricut mats.  I'm not fussy about brand names, and own Xinart, Nicapa, HTVRont, and probably more...  

The long, 12x24, inch mats are 3 for $24 normally

===========================

Facebook Page - For Tips, Tricks, & Free SVGS
 https://www.facebook.com/fieldsofheathercrafts/

Facebook Group- For Questions, Support, Sharing Projects, 
and LOADS More Free SVGS in themed posts with links in the comments
https://www.facebook.com/groups/1121399284857845
==================

Tips For Creating SVGS In Inkscape


This morning I wanted to create an svg to share with someone.  It's a text design, and I'm using commercial use fonts, so I thought it would be pretty simple. (It was definitely not.)  I've learned that the quickest way was for me to type each line of text one at a time in to fontlab pad, save it, then send her several svgs to put together herself in design space.

But I was still frustrated with not knowing why Inkscape wasn't doing what I know it can do.  So I went searching, and found a few answers.  I still have SO much to learn, but below are a few quick answers that helped tremendously.

Quick Links:
Typing the text in inkscape was easy enough, and I immediately thought "this is so easy!" and that all I had to do was save as an svg.  No. When I attempted to upload it to Design Space, I got a message that it was unsupported.  A few quick google searches taught me that I had to "convert to path".

Convert To Path In Inkscape

  • select text
  • choose Object/Ungroup
  • select all the letters, choose Path/Stroke To Path
  • There's a really good explanation of the differences between Stroke To Path & Object To Path here.  From that site: "One of the main things to remember when working with stroke is it will always cut as a single line regardless of how wide the stroke looks on your screen. If you only want to print the design you do not have to make changes. However, if you wish to cut the design you would apply Path>Stroke to Path to ensure the design cuts how it looks on your screen."

Ok, that was a quick fix!  No problem!  Saved as an svg.

And then I uploaded it to Design Space and it was 542 inches wide.  I'm not kidding.  It took a few minutes to load, so I suspected it was going to be large, but 542 inches wide?  I was expecting it to be 8 inches wide.  I couldn't even see it in design space, because the x y position was all messed up too..  but I'll get to that later.  First things first.  Fix the communication between inkscape and design space.

Quick Settings To Fix Sizing Issues:
  • cntrl/shift/D (all at once) to access the document properties in Inkscape
  • Set Display Units to px
  • Set Custom Size Units to px
  • Set custom size to  1080 x 1080


That seems to work!


Fixing The X Y coordinates
 from Inkscape To Design Space

Quick Settings:
  • For a true fix - No idea, I'm still clueless
  • As a work Around - I just changed the x to 1 and the y to 1 once it was uploaded, and that moved it to a spot on the canvas where I could see it.
The Problem - when I uploaded the svg, you can only see the bottom of the design.
If You look at the Y  position, it is at -8.74
I don't have any idea how to fix this from the Inkscape end, but in Design Space, I simply changed the X to 1 and the Y to 1 - and that moved the design to a visible space in Design Space.


============================


Pin This:

==================================================
Failed Options Saved For Reference:

Quick Settings To Fix Sizing Issues: (FAIL)

  • cntrl/shift/D (all at once) to access the document properties in Inkscape
  • Set Display Units to in
  • Set Custom Size Units to in
  • Set custom size to 12 x 12 (the size of the mat for cricut)
  • Set Scale to 72 - If I understand correctly, this tells Inkscape that Design Space reads an inch as 72 pixels.  Or something like that.  Notice that the scale in my 1st example is .26 - that change was automatic. I think messing with this is tricky.
I'm including this method because the first time I tried it, it worked like magic!  When I went back and tried to repeat it, It did not work.  I must be missing something the second time around, but I do not know what!  


=========================
Find An Index Of All Of My Cricut Related Posts Here:

===========================

Facebook Page - For Tips, Tricks, & Free SVGS
 https://www.facebook.com/fieldsofheathercrafts/

Facebook Group- For Questions, Support, Sharing Projects, 
and LOADS More Free SVGS in themed posts with links in the comments
https://www.facebook.com/groups/1121399284857845

Solving Common Print Then Cut Problems


Quick Tips:
  • Select All, Flatten.
  • Be SURE you are flattening to a shape - you can't flatten text to empty space.
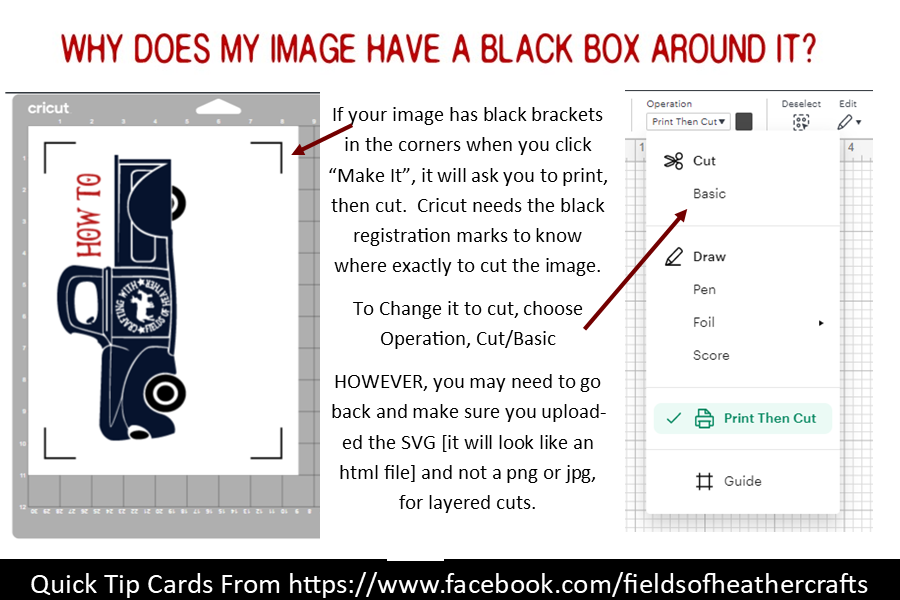
  • There needs to be a black box [black corners at least] around your project.  That's how cricut knows where to cut.
  • If it is not cutting exactly around your shape (the cut is offset) - Calibrate your machine
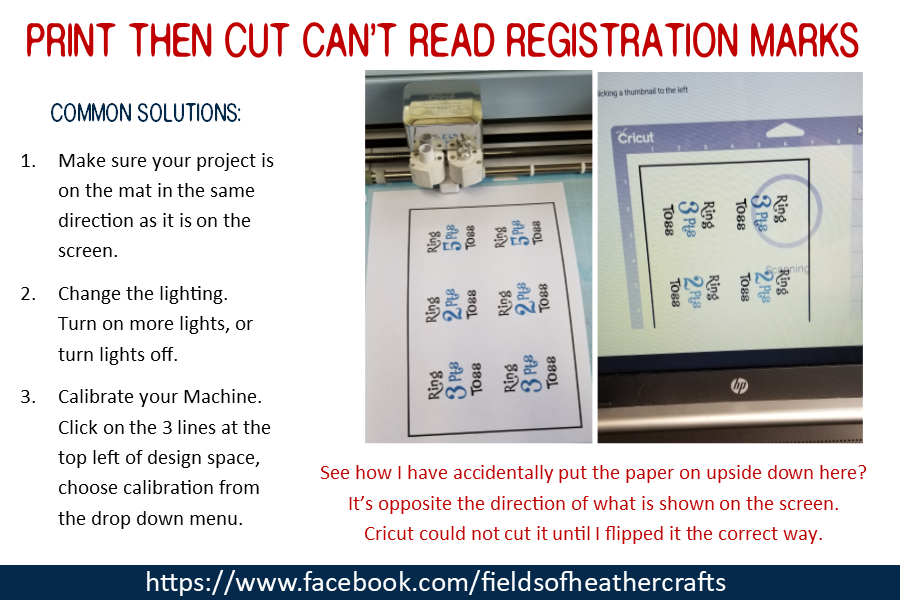
  • If your machine cannot read the registration marks, make sure your project is on the mat in the same direction as shown on the screen - and make sure it is slightly inside the grid lines.  Trying moving it 1/4 of an inch in and 1/4 inch down, from the outside grid line on the mat.
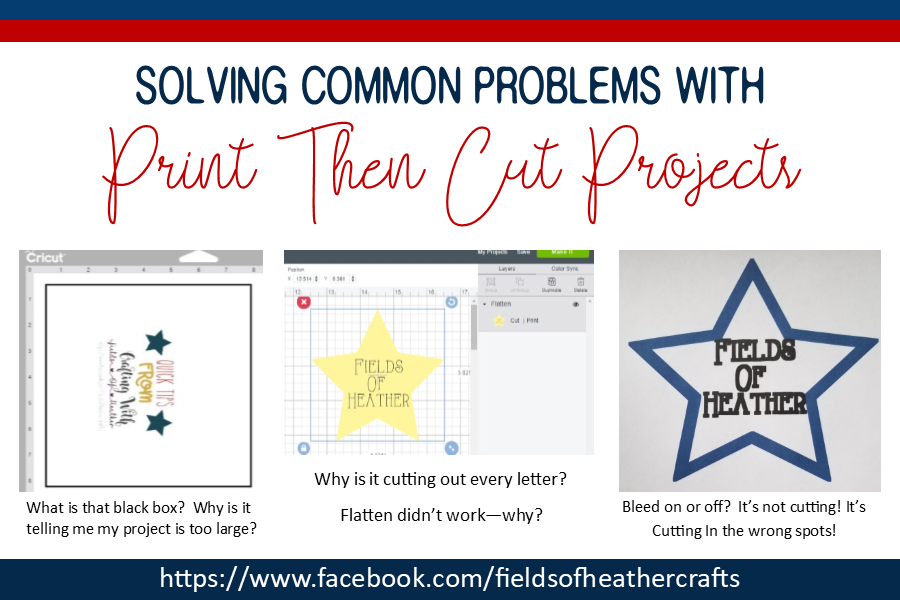
The most common issue with print then cut is that your text is not flattened to a shape.  It cannot just be flattened, it needs to be flattened TO something.  I cover that in detail below, along with that black registration box,  cricut not detecting the project to cut it, and what to do if the machine is cutting in the wrong spots.


Cricut needs the black box [these days it's 4 brackets in the corners, previously it was a full box around the image]  to know exactly where to cut.  When you place the printed paper onto a mat and load it into the machine, cricut will "scan" the mat, and locate exactly where the black box is.  That tells the machine exactly where to cut your image.


Print Then Cut Quick Tip Card
I explain this in more detail below, but here's the quick version. You have to flatten to a shape.  You cannot just flatten, it has to be flattened to a solid shape that it will cut.


How To Tell Cricut To Print Then Cut
For Cut, and Draw, you choose from the drop down box under Operation
For Print Then Cut, you go to the next box, over and choose "print" from the fill options.


How To Keep Cricut From Cutting Out Each Letter Of Text
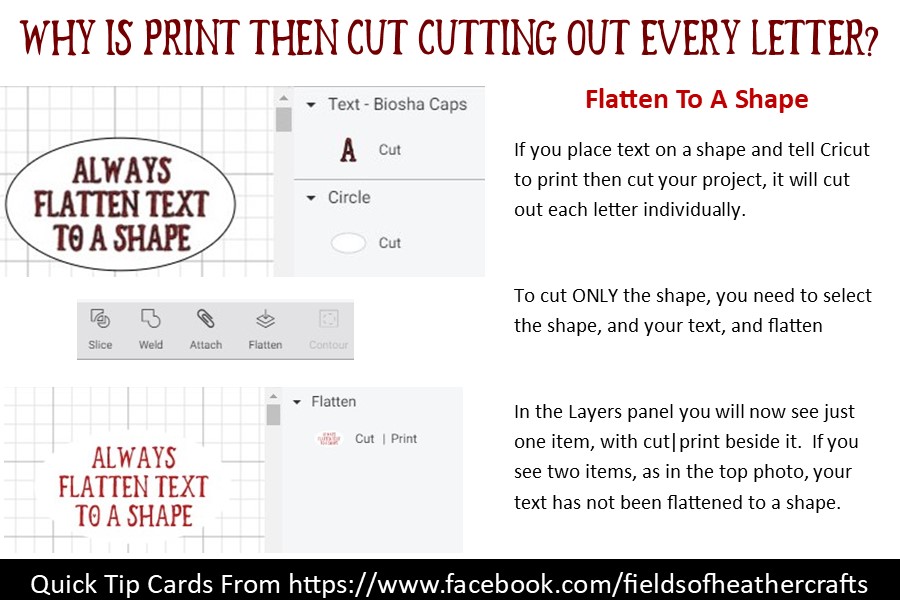
Flatten To A Shape
If your Layer Panel Looks Like This, It WILL cut every letter.
See in the layers panel, there are two items here - Text, and a shape.
This is telling cricut to print the text and print the yellow star, then to cut around the star and around the text.  Because this is not attached, it will not even cut the text on the star.
If I select all and attach, it will now cut the text out of the middle of the star, as it appears on the left.
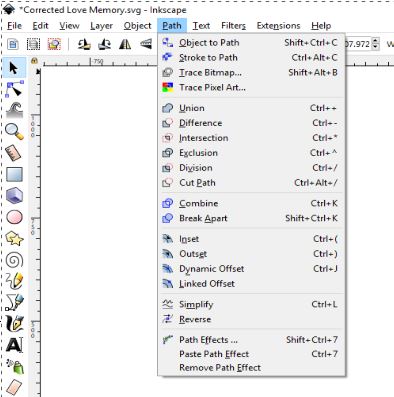
To fix this, select all, and flatten.

Flatten can be found in the bottom right of the screen in design space.  You need to have at least two items selected to flatten.

A Correct Example For Print Then Cut
Look to the right in the layers panel - see how it is just one item?  This is what you want to see.  This is telling cricut to print a yellow star with writing in it, and then to cut around the star.


Make sure your shape has a "back"
In this example, the layers panel is one image, but this will still cut every letter - because text is "floating" on a transparent background.  If you can see the grid behind your text, the machine is going to cut each letter individually.

To solve this, create a rectangle shape, slice your frame out of the rectangle.  Delete all but your frame and the new "center" piece you have created.  Make your background shape white, your fame whatever color you would like, Select all and flatten, and now you should have one shape - a colored frame around a white background with your text. 

Bleed Or No Bleed?
Leave It On 
See how fuzzy & thick the letters are?
This tells me right away that my text is not flattened to a shape, and it will cut out each letter.

If your letters are all "fuzzy" or extra wide when you print, that is an indication that the bleed is on - but it also tells you right away that cricut is going to cut every letter.  You will only see the "bleed" where Cricut is going to cut.  Bleed can be important on some designs, usually it's best to leave it on.  It "bleeds" the image over the cut line, so that when cricut cuts, there is no white left around the image.
With the bleed on, there is no white edge showing around my cut out shape.

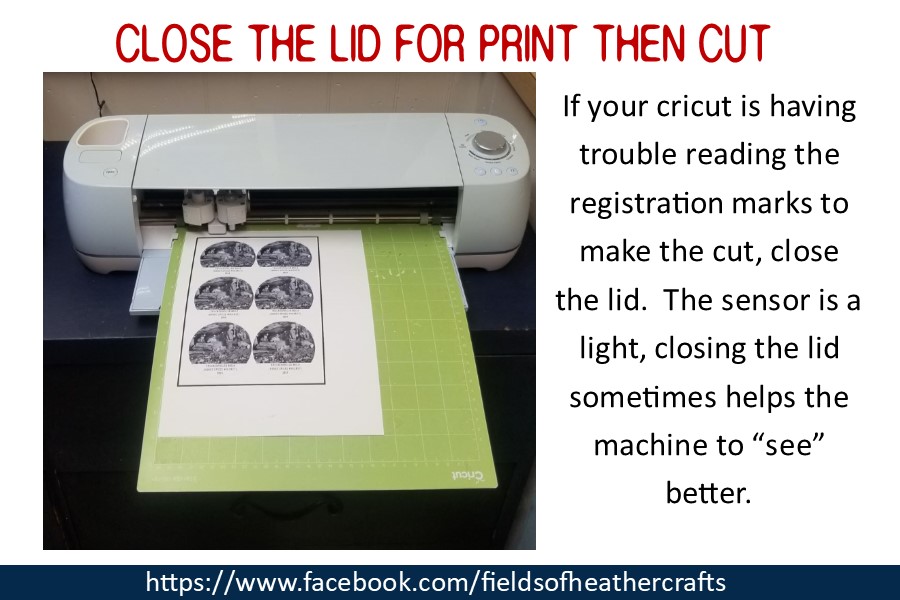
If The Machine Won't Read The Registration Marks
 Use White Paper, Close The Lid, and/or Change the lighting.

I've sometimes has to turn more lights on, and sometimes had to turn lights off.  A glare, or too little light, can keep the machine from reading the registration marks (that black box around your design) that tells the machine where to cut.

More Tips, From Cricuts Help Section:
  • Verify your Cricut machine mat has been placed under the mat guides, and ensure the mat is positioned snugly against the machine's rollers before pressing the Load button on the machine.
  • Is the mat bent? A bend or crease in the mat can cause a failure to read the cut sensor marks. Press down on the bend if possible as your machine scans cut sensor marks, or remove sheet, rotate mat 180-degrees, reapply sheet to the opposite end of the mat and reattempt the cut.
  • For best results, use a machine mat with few or no marks or smudges. A mat with smudges near the cut sensor marks may cause your Cricut machine to mistake the smudges for cut sensor marks.
  • Verify that the Print Then Cut sensor light is clean. To clean the cut sensor light on your Cricut Explore or Cricut Maker machine, sweep gently with a small, clean, dry watercolor paintbrush.
  • Verify that the Print Then Cut sensor light comes on when scanning for Print Then Cut sensor markings. It is located on the underside of the carriage. If that light does not come on when scanning the Print Then Cut sensor marks, contact Member Care for assistance.
  • Print your image again, making sure the paper size is set to Letter and that you have unselected any page scaling options such as Fit to Page or Shrink to Fit. The page needs to print at actual size. 

Close the lid on your machine.

Make sure your project is loaded on the mat in the same direction as it is shown on the screen.  If it is upside down, the machine will not find the registration marks.

The Air Machines can only do print then cut on white paper, although there is a hack to help work around that.  The maker can print then cut on colored paper. It involves printing your design twice, once on colored paper and once on white - there's a good tutorial here, from Too Much Love:

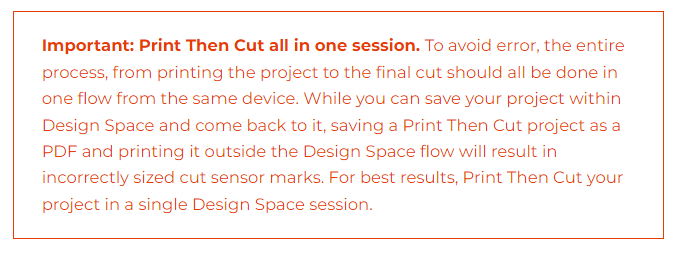
Although I know it's possible, or at least was possible, to print your item elsewhere, and then cut it out when you got home to your machine, Cricut now says you can NOT do that, and that print then cut must be done "all in one session".  In other words, do not print unless you are ready to immediately cut, from the same device, without closing the program.  

CAN you still print elsewhere?  Maybe, sometimes.  

If The Machine Is Not cutting In The Right Spots 
Calibrate
If your machine is cutting "offset" of the design, you may need to calibrate your machine.

For more information on how to calibrate your machine:

Quick tip - how to switch from cut, to draw, to print then cut


=======================================

Facebook Page - For Tips, Tricks, & Free SVGS

Facebook Group- For Questions, Support, Sharing Projects, 
and LOADS More Free SVGS in themed posts with links in the comments
==================
An Index Of All Of My Cricut Related Blog Posts