Showing posts with label Cricut How To. Show all posts

Quick Tip - How To Quickly Organize All Of Those Free SVGS


Quickly Sort SVGS From Bundles Using the Search Feature

At the top right in any windows folder, there is a search feature.  Type .svg in the search box, and it will show you all of the svgs,  You can select all the search results, move them to a new folder, and delete everything else.

When I first updated to Windows 11, the search feature stopped working for me.  I would type svg, and see no results, even though I knew there were svgs in the subfolders.  I used the suggestions on this site to troubleshoot the issue, and it now once again works great:


Quick Tips:
  • For Free Cloud Storage, Try Dropbox, One Drive And Or Google Drive
  • Folders By Theme  - Christmas, Baby, Farm, Etc
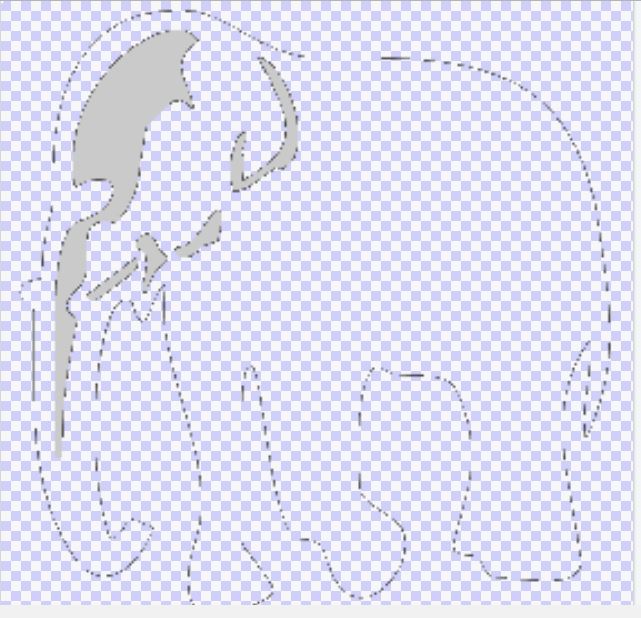
  • I  delete everything but the svg (many like to save the pngs too - they work great for print then cut)
  • Consider renaming files with designers name, and a C if it has a commercial use license
  • Download this extension to see thumbnail views of your svg files


Sort by File Type
Choose View, Sort By, and select type


Now you can easily select all the zip files, and unzip them.

Unzip Your Files
You can usually select all the zip files, right click and choose "extract all".
If that is not an option, you may need to download software to unzip files
  • winzip - Free trial (although it will continue to work after your trial is up, you will just get a nag screen every time you use it)
  • 7zip - Completely Free!
What is the MACOSX Folder?
"The __MACOSX folder is created when a Mac user creates and archive (also called a zip file) using the Mac. If the Mac user sends the zip file to another Mac user, the folder will not appear - this is a hidden folder. "

In other words, delete it, it's not needed.  


Delete the Extras

I delete almost everything, except the svgs.   PNG files can be better for Print Then Cut Projects, so a lot of people prefer to save those as well as the SVGs.

View SVG Files as Thumbnails

By default, your svg files may look like html files.  You can download a simple extension that will fix that, and then you can scroll through thumbnail previews of your svgs - making it much easier to sort them!

Sort into folders by theme


Then just drag and drop your svgs from one folder to the next.   I use my own made up folder system, and it's constantly evolving and changing.  The general idea is 

0 Holidays
2 Project Type
4 More complex project type, non cricut projects, etc
Then assorted random categories, mostly for vinyl svgs.

 I like to use cloud storage like dropbox - because then I can access the files from any device, and they are backed up if my laptop crashes.  Now that my collection is so large, I store them on a wifi enabled external hard drive, and on dropbox I keep a "Cut Now" file, of the projects I want to work on in the very near future. 

Each of my folders looks a little different inside - some have a lot more files than others, and the more files, the more subfolders I add to organize them.  For instance, my St Patricks Day Projects can all just be in one folder.  But for Christmas, I have subfolders for cards, shadow boxes, luminaries, layered paper decorations, paper villages, wreaths...

Here's a more specific look at my Valentines Day Folder


===========================

Facebook Page - For Tips, Tricks, & Free SVGS
 https://www.facebook.com/fieldsofheathercrafts/

Facebook Group- For Questions, Support, Sharing Projects, 
and LOADS More Free SVGS in themed posts with links in the comments
https://www.facebook.com/groups/1121399284857845
==================

How To Convert Simple Free Clipart To Cut Instead Of Print In Design Space


I chose a simple image to demonstrate this, I found it at 


Open design space, open your project or open a new project, then on the bottom right, choose upload/  It will upload the image, and give you three options  - Simple, Moderate, Or Complex.


For a simple image like this, Simple is perfect.  All of your white areas will turn light grey - don't panic, that's ok!

On the top right, the wand is usually selected by default.  That's what you want.  Click on the light grey parts.

See how you get a "grid" where you clicked?  That's now transparent and will not be part of your image.  Notice how I left the head unselected?  If I do not select that piece, it will "fill in" and not cut.  Choose preview at the bottom of the screen, and you'll see your new image:


I could use the image like this, but if I want the trunk piece to cut out, I need to select that too.  Don't worry if you make a mistake and click the wrong area, there's an undo arrow in the top right- you an undo and redo!


By default, the image on the left, save as print then cut, is usually selected.  Go ahead and click on the one on the right, save as a cut image.
This is not critical.  If you accidentally save it as a print then cut, simply switch it to cut in the layers panel once you have it inserted.


That;s all there is to it!  But what if you are putting this on a red shirt, and you want the white parts on the elephants head to be white, or a lighter grey?  That's easy too.  Follow the steps above, and insert that image.

Then start from the beginning, repeating all the steps, but this time, erase the dark grey parts and leave the head parts - like this:

This time you will be left with a jagged outline after using the erasing wand, to get rid of that, click on the eraser tool that is right beside the wand.  You can adjust the size of your eraser...
If you are having trouble working on the design because it is small, on the top right you can use the magnifying glass to zoom in.

After erasing the outline of the elephant, you are left with this.  Click on preview to see how it will look on the next page.
Now insert both of your new images into your project.

Make sure there is a scissor icon beside each piece.  Then you can click on the colors to change them, making the insert cut out of cream, and the body in grey, here.

That's all there is to it!  Make sure it is set to cut, instead of print then cut, when you go to make it:

If you are looking to convert something a little more complex, I did a comparison of 10 different apps and websites that will convert a photo to an svg - 


===========================

Facebook Page - For Tips, Tricks, & Free SVGS
 https://www.facebook.com/fieldsofheathercrafts/

Facebook Group- For Questions, Support, Sharing Projects, 
and LOADS More Free SVGS in themed posts with links in the comments
https://www.facebook.com/groups/1121399284857845
==================

How To Use VLR To Remove HTV - Fixing A Cricut Fail


Cliff Notes:
  •  VLR - Amazon is the only place I know of to find it.
  • Apply to the back of the fabric.  Stretch the fabric.  Peel off the htv.
  • Super easy.  Worked great!
  • I reapplied a new design over the area where I had used the VLR, and it went on beautifully!  No problems at all.
There are examples below, and a video of it at the bottom - showing how well the vinyl peels off!  


I love this pillow (second from the left), despite my mistakes in not welding the pumpkins to the truck...    But my husband and I did not get married in 1993.  That's when our twins were born.  We got married in 1991.  Yeah, I don't know what I was thinking either.  :-)


VLR is something I had heard mentioned a few times on different facebook groups, so when I placed my last amazon order, I added a can to my order.  It has sat on the shelf ever since.  I was intimidated by it.

Today, Design Space was down.  (Still is, actually...)  so it was a good time to try the VLR.  My first challenge was opening it.  Although I knew it couldn't actually be aerosol, when I saw I had to puncture the top (which the label says is plastic, but sounds more like metal when tapped) it made me nervous to use a hammer and nail.  I couldn't think of another way to do this, so a hammer and nail it was.


That worked fine!  
The next instruction was to remove the red tip from the spout  - my spout did not have a red tip.  The cap appeard to be missing.  (So once I was done, I taped the top close, because this smells like something that might evaporate, and it is not exactly cheap.)
(For these pillows I had used the "backside" of some clearance fabric..  so the inside of the pillow case has a design, as shown here. The wet spot is where I applied the VLR)

The next instructions are to turn the item inside out and apply the liquid to the back of the design. That sounds easy enough, but it is actually a little tricky, if you cannot see the design through the fabric, and do not want to remove all of the vinyl.  Still, I managed well enough.  I ended up losing both the 3 and the 9 - but I don't mind replacing two small numbers, I was replacing one anway!


Once you apply the liquid, you stretch the fabric, and then when turned right side out, the vinyl comes off REALLY easily!  Or at least it did for this one!


In addition to my date mistake, I had this pillow, that my sister in law had asked me to make.  She brought the cover.  I applied the htv.  Then two weeks later, my nephew changed his mind and enlisted in the Navy, instead of the Air Force.  She had suggested I just add all of the branches to the pillow and make the Navy the largest.. but I thought I would like it better if I could remove the htv and start fresh.


For the this second one, the material didn't have as much stretch, so the vinyl didn't pull up quite as much on it's own.  It still was REALLY easy to pull up a corner and peel the vinyl right off!


(a quick video of the htv peeling off, to show you how easily it comes up!)


I reapplied a new htv design over the area where I had used the VLR to remove the old, and it went on beautifully - no problems at all!


======================


For New Cricut Users - What To Buy, What To Download, & How To Use It All -

For New Cricut Users - What To Buy, What To Download, & How To Use It All 

The cricut machine can be just as overwhelming as it is amazing. SO much you can do, it's hard to know where to even start. Often the easiest way to get started is simply to start.  Choose a project, and learn just what you need to know for that first project.  But I know that's hard - so I've made a list of resources that might help while you decide where to start.

==========
Tools & Accessories
==========
What else should I buy? Tools & Supplies that will help with your projects - 
You can get a LOT of supplies at the Dollar Tree!  

Apps & Websites to use with cricut - sites & software that will make a lot of this easier!

======================
Do I Need to Subscribe to Cricut Access?
=======================
No.  You may choose to, but you do not need to! 
Paying For Cricut Access is like renting svgs.
And that's great, if that is what you want to do!  Personally, I prefer to outright buy the few designs I use, rather than rent hundreds I have no interest in.  

To use free svgs, in most cases, you will download them, UNZIP them, then upload the file that looks like a website or html file.

Here's a much clearer step by step on how to download and use free svgs in Design Space:

As with svgs, there are LOADS of free fonts available to use in cricut!  The process is a little bit different.  Unlike SVGS, Fonts are not uploaded to Design Space,  but they are installed on your device, then you find them under the "system" tab when you choose your font in Design Space.

Here's a  more detailed step by step for using fonts in Design Space:

And here's a "Font Index" with links tons of free fonts by type & style, and more information on how to use them all:


Update: Design Space has added what they call "kerned fonts".  When you use system fonts, you can now filter them and see only "kerned" fonts - which means the fonts that Design Space has optimized to space properly.  You still will not see ligatures if a font has them.

  When font designers design a font, they write instructions into the font, telling software how to space them, and in the case of ligatures, when to do fancy things with certain letter combinations.  Design Space ignores all of those instructions.  Most users will tell you to ungroup your text and manually space the letters.  Please don't do that.  You will never space them the way the designer intended.

 Fontlab pad is a free utility that will space your text properly, and save it as an svg.  It's an extra step, yes, but it is still much faster than trying to properly space text yourself - and the results will be much better!  If a font has ligatures [these are different than glyphs] they will appear automatically in Fontlab pad.

Here's more information on how to use Fontlab Pad

Here's a cheat sheet of Font terms, to explain the differences between ligatures, glyphs, etc.

==============
Attach, Weld, & Flatten
=============

Group is for grouping items together to move around in Design Space.  The group command is NOT sent to the machine, and will have no effect on how the design cuts.

Attach keeps your design exactly the way you placed it. If you click make it and your design looks like a puzzle, go back and attach.  You can only attach ONE color at a time.  Attach all black, then select all red and attach, etc.  More about attach: 

Flatten is for print then cut.  If you do not flatten your text to a shape, cricut will cut out each letter of your print then cut project individually.  Find more about Flatten here:


There are now several options for Weld - all in a menu labeled "Combine".  Here's a look, with examples,  at what each of those options will do:


================
"Operation" is where you tell cricut what you want it to do with a design.  Find the operation menu on the top left of the screen in Design Space.

===================
What are the different kinds of vinyl?
===================


HTV is the same as iron on - it's Heat Transfer Vinyl, and what you need if you are putting vinyl on fabric. 651 is permanent vinyl, and 631 is temporary vinyl (for things like wall decals)

For a more detailed list, along with the price guidelines I use when buying, and my favorite sites and brands:

Which Vinyl Do I Need & Where Should I Buy It?

==================
Do I Need To Buy A Heat Press?
================
No.  You may chose to buy one, and you will hear a lot about how you have to "use all of your body weight" to use an iron (false) and that vinyl will "not hold up as well" without a heat press (also false).  Another option is an Easy Press, which is basically an iron made by cricut, with a chart for temps and times. 
 But a plain old regular iron will work just fine too.
A Project To Start With 
Using Vinyl For the First Time 
===========
Using your Cricut To Cut A Vinyl Decal For The Very First Time:


=======================


Looking for more?  I have an index of my cricut related posts sorted by theme here:
https://fieldsofhether.blogspot.com/2019/02/an-index-of-cricut-resources-how-tos.html
============
Find Even More On Facebook - 
The facebook page for my crafting posts
https://www.facebook.com/fieldsofheathercrafts

And a facebook group, where you can share your projects and ask questions:


How To Use New Fonts In Phonto On Android

There are lots of apps to add fonts to android devices, but I really didn't want to add fonts to my android system.  I have a zillion fonts on my phone already.  What I wanted was to be able to use fonts like I love Glitter in Phonto.  

Cliff Notes - Just add them to the fonts folder in the Phonto App. 

Phonto has a "how to" for installing fonts on android, but it did not work for me.  This is what worked:

My fonts are all backed up in dropbox. That makes this simple - but you could also send the font to your phone through email, and save to your downloads folder.  

I just opened dropbox, went to the font, clicked on it, chose export/save to device, and saved to my downloads folder.


Then I went to my downloads folder (Use "My Files" - in your app drawer. ) 
LONG click on the font.  If you just open it, you may get a message saying you do not have an app to pen this file.  You want to select the font, which you do by holding down on it, not just tapping it.  A check mark should appear on the left.

Now choose "move"


Internal Storage/Phonto/Fonts
Your Phonto file might be in a different location, that is where mine was.  

Add the font to the font folder.

Now open Phonto, and when you add text, choose font, and select "my fonts".  You will see the fonts you put in that folder.


Another quick way to do this is to hook your phone to your computer with a usb cable, and drag all the fonts you want in phonto to that folder.
=================
===========================

Facebook Page - For Tips, Tricks, & Free SVGS
 https://www.facebook.com/fieldsofheathercrafts/

Facebook Group- For Questions, Support, Sharing Projects, 
and LOADS More Free SVGS in themed posts with links in the comments
https://www.facebook.com/groups/1121399284857845
==================