What Do I Need To Get Started With A New Cricut?

What tools & supplies to buy, and what not to buy, when starting out with a new cricut.

If you just got a new cricut machine, you are probably wondering what else you should buy to go with it.  I know you are excited and want to have everything right away - but don't buy too much just yet.  Wait and see what projects you truly enjoy, and will be making the most of.  Because the supplies you need for making paper flowers are drastically different than the supplies you need for making t-shirts, and those supplies are different than what you need to make designs for coffee mugs, and those supplies are different than what you need to make faux leather earrings.....

The Basic Tools Most Everyone Uses At Some Point:

The Tool Set


Although I am often not a fan of cricut products (I have NO luck with their vinyl), I do recommend their tool set.  You can buy much cheaper weeding tools (a dental pick from the dollar tree, or a tool set from harbor freight) but personally, I prefer the cricut weeding tool.  Update - I ordered vinyl from htvront and it came with a free weeding tool that I like just as much, if not more, than the Cricut version.  But I still am glad I started with the cricut tool set - I've used all of the tools, frequently.


I've been meaning to try the pin pen - many rave over these as well, but I've yet to make or buy one.  


The Dollar Tree now carries a complete line of knock off tools, nearly identical to the cricut brand.  My only suggestion is to look for a metal scraper, like the one shown in the cricut tools, and not one with a plastic head.  I find that the metal one is much better for lifting paper from the mat.

A Fabric Tape Measure


A fabric tape measure is the first thing I recommend to everyone with a cricut.  No matter what you are making, you are likely to need to measure it.  (Ok, maybe not for some of the paper projects...  but everything else.)  Making a t-shirt?  You'll want to see the measurements of your design on the shirt to see if it's the right size.  Making a cup?  Measure the space where you are placing the design...  etc.  You can buy this two pack at the Dollar Tree.  

Transfer Tape


Transfer Tape is what you use to transfer your cut design onto the item.  Htv (which is used for fabric) comes with it's own transfer tape right on it, but if you are doing a design on a coffee mug, you will want to use 651 vinyl - and then you will need something to transfer the design.  

Here is an example of how to use transfer tape, step by step:

http://fieldsofhether.blogspot.com/2018/01/thrift-store-redo-simple-vinyl-transfer.html

While at the Dollar Tree, pick up a roll of cheap contact paper.  This is my favorite "transfer tape".  Which transfer tape works best for you will be trial and error, but at $1 a roll, this is a great one to try when starting out.  Pick up a roll of painters tape if they have it, while here too.


Other options for transfer tape:

  • Cricut Transfer Tape This comes by the roll and has a grid on it.  It's VERY sticky, and often if someone asks "why can't I get my design off the transfer tape?" it's because they used this.  This is, however, the BEST, and sometimes the only, transfer tape that works with glitter vinyl.  
  • Duck Brand Contact Paper This is one of the most popular choices for transfer tape.  You can buy it at Wal-mart, near the shelf liners.  It's a little thicker and stickier than the contact paper from the Dollar Tree.  
  • Painters Tape/Masking Tape This is great to keep on hand for smaller projects - it's one of the easiest ways to transfer small designs onto Christmas ornaments.
  • Press & Seal I've had NO luck with this method, but I see others rave over it.  If you have some on hand, it might be worth giving it a try!  
  • Craftopia Transfer Tape I have never used this one myself, but it comes up as a recommended option by others, repeatedly.  They swear it is the best.  :-)  I have great luck with the Dollar Tree contact paper, painters tape, and occasionally the thicker duck brand contact paper...  so I have never purchased this. You can find it on amazon, here.  


A Light  (Possibly A Light Pad)
As with almost everything, you will need to figure out what works best for you, and there are a lot of options.  Some people work better with a light underneath their design (like the cricut lightpad) while others work better with a light over their design, like an ott light.  And still others work just fine with whatever light is in the room.  

General opinion seems to be that the cricut lightpad is really not worth the money.  (Although some people think they are the best thing ever - so again, it depends on your preference!)  Other options, if you like light under your design, are to make your own light box with a rubbermaid container and a light inside.  Crayola makes a lightbox for kids, that I've seen a lot of people use with their cricut.  And there's a much cheaper lightpad option on amazon that seems to be the most popular choice.

I bought the amazon option, but for me, I found I much prefer a good overhead light.  I love the Ott lights.  In my cricut craft area (part of my laundry room) I use a shoplight from Sams club.  It's one of my favorite things - although again, it's not something that would work for everyone!

Mats - 
I made the mistake of buying my mats on sale at Michaels.  They are MUCH cheaper at Wal-mart and on Amazon.  (A 2 pack of standard grip is $8.39 currently on Amazon) 

Again, what you need will vary drastically from person to person. I find that I use the green mats the most, and I have about 6 of those...  When first cleaned and super sticky, they work with the faux leather.  When they have been used quite a few times and need cleaned, they work well for paper.  But I work mostly with vinyl - so the green mats are what I would expect to need the most in general.
There is also a pink mat for the maker, for fabric.

These Nicapa Mats are the one I buy most often.  Watch for them to go on sale, 3 mats for $7.99.  https://amzn.to/3F32Dvk


Eventually you may want an extra long mat as well.  They come in 24 inches long, for longer projects.  And if you cut a lot of really large items, you will want to research "off the mat" projects.  Apparently cricut CAN cut without a mat - although I've never tried it myself.  I've "needed" the longer mat exactly twice in the last year, and I make hundreds of items.  You can use them for smaller projects, so it won't go to waste if this is what you buy, 
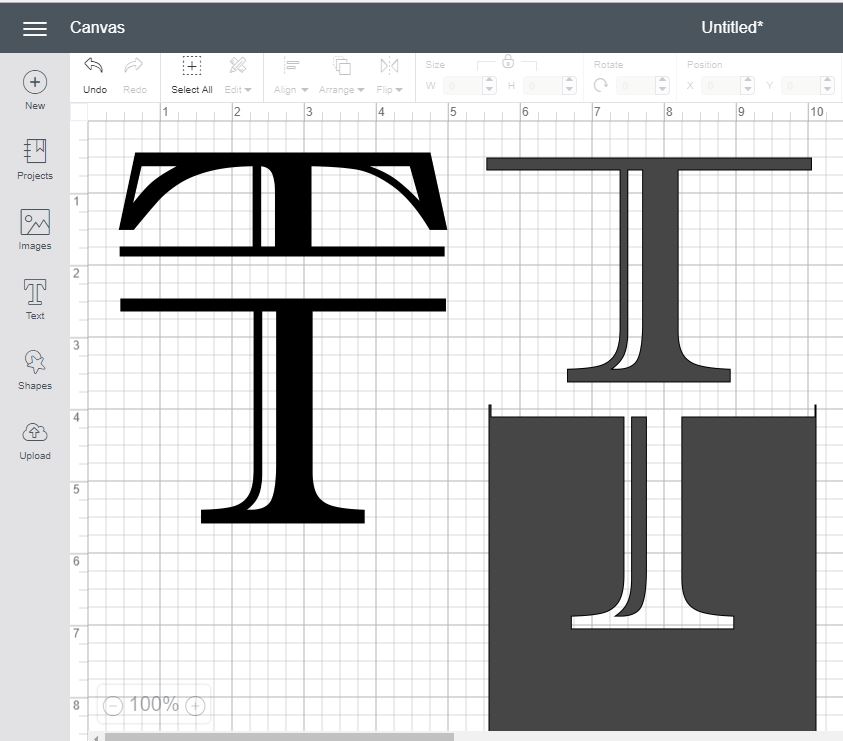
SVGs

Svg - Scalable Vector Graphic.  Svgs are what the cricut most commonly uses.  It will have each color in a separate "layer" and will resize without making rough lines.  


Some cricut users LOVE cricut access and gladly pay the fee to have access to some of the designs built right into the software.  Cricut access allows you to "rent" many of the designs in design space.  If you stop paying the fee, you will no longer have access to those images.


I am cheap.  I prefer free, and luckily, there are SO MANY free options for free svgs, that I have never had any need to subscribe.  


I have a long list of good sites with free svgs here:

https://fieldsofhether.blogspot.com/2018/11/where-to-find-free-cut-files-for-cricut.html
and here's more about where to find free svgs and how to use them:
https://fieldsofhether.blogspot.com/2018/12/freebies-for-cricut-how-to-use-design.html


A Note About Etsy
While there are some great, reputable, designers on Etsy...  there are a lot of others too.

A few months after buying my cricut, I saw a post on a facebook group from a designer who had shared an svg freely in this facebook group, but asked that it "not be sold".  I assumed she meant do not use the svg to make shirts to sell.  No.  She meant please do not take the free svg that she made and upload it to Etsy and sell the svg to others.  I figured this  out when it actually happened.  Someone took the design she had made freely for a member of the group, and uploaded it to Etsy and sold it as their own.

And then I found out that that is SUPER common.  I had actually purchased two designs from Etsy that I later learned were not made by the person selling them.  One was taken from a free svg site and resold on Etsy, another was stolen from a facebook group.


I know - unbelievable, isn't it?  But it is very, very common.


Here's another common Etsy problem.  If the design is Harry Potter, or Disney, or an NFL logo...  they do not have the legal right to sell the image, even if they created it.  How you feel about that, and what you do about it, is a personal decision.  But you should know that just because you bought a Disney design "with commercial use license" on Etsy, you do not have the right to make a shirt with that design and sell it - because the Etsy seller did not have the right to make the design and sell it to you.  Those images and designs are copyrighted, and the licensing fee to be legally allowed to use them is so astronomical, and so rarely even granted,  that anyone paying for that license is extremely unlikely to be selling in an Etsy shop.  
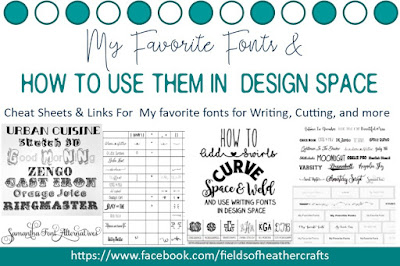

Fonts
Fonts are installed on your device, and then can be used in design space.  There are millions and millions of great free fonts!  For those who are completely new to this, I have a very detailed step by step on how to download fonts and use them in design space:
https://fieldsofhether.blogspot.com/2017/12/all-about-fonts-text-in-cricut-design.html


Here's where to find a list of my favorites, with cheat sheets on how to use them:


Paper - 

 There are so many great 3d paper projects you can make with cricut (including beautiful paper flowers!)  - I keep a list of free svgs for making them here:


I tend to buy my paper from Hobby Lobby, locally that is the best selection for me. It's typically 40% off every other week.  Sometimes I buy from Michaels too, but the sales have not been as good, and our local stores selection has been disappointing.  However, Michaels is the only place locally I can buy 12x24 cardstock - not that I use that often.

Pens

My favorite pens for the cricut (no adaptor needed) are currently  the Jot markers from the Dollar Tree!  Really - they work great, are super cheap, and fit right in the pen holder the same as the cricut markers.  


I have samples & Examples and a long list of others that are reported two work well, here:


Iron, Heat Press, Or Easy Press

You will need a heat source of some type, if you want to apply htv to fabric such as a design on a t-shirt or pillow.  If you ask on any facebook group, you will be told that you absolutely have to have a heat press.    And if you do want to use an iron, you will have to "stand on it with all of your body weight" .  (No, no you do not.)

I don't sell my items.   But I can tell you that I have successfully made hundreds of shirts now (we have a huge family) with no problems, with an iron.  And it does NOT require that much pressure. You have to press, yes, but it shouldn't make your arms hurt.  You definitely do not need to stand on the iron.  I also do not wash our shirts specially - they are tossed into the regular laundry and just washed and dried with everything else.  

I can't imagine telling my daughter in law that the shirts I made for my grandsons have to be turned inside out and never put in the dryer... she has her hands full enough with those boys as it is!  They hold up great.  I have some that have been washed dozens of times now - no problems.  

Since the iron works so well for me, I've never really even looked at the easy press...  but I have heard so many say that it's really just an iron, and that if you are going to spend the money, that same amount would buy you a heat press.  I really don't know..
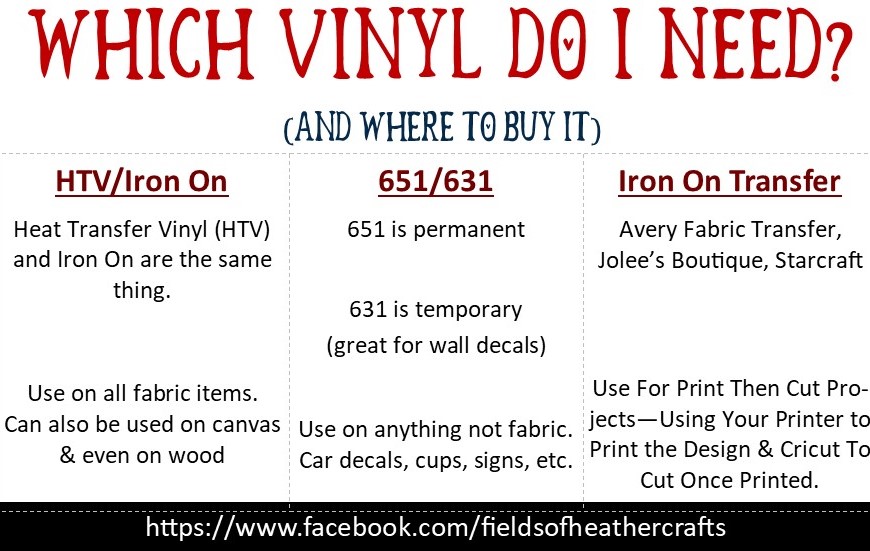


 Vinyl - 
You don't  need vinyl if you are only doing paper projects, but most of us who buy a cricut also "need" vinyl.  There are different types of vinyl, and many, many places to buy it.  It can be a bit confusing.  It is much cheaper to buy online, and no matter what you buy, you likely will "need" something different every time you find a new project.  But if you start with a black and a white, it's very likely you will use them somewhere and they won't go to waste.  

"Blanks" - The Things You Put Vinyl On
 A quick trip to the Dollar Tree will be great - you can find all sorts of "blanks" to get started on.  Coffee mugs, pot holders, etc.  I have a list here of Dollar Tree projects I have made, and suggestions for what to look for when shopping there:


T-shirts are often cheap at Michaels on Sale.

Your local thrift store is also likely to have a lot of great items you can practice on!  

Apps


There are a variety of apps & websites that will help  a lot when using Design Space!  Especially sites like Wordmark.it that will show your text in every font installed on your computer, and the utility FontLab Pad, which will properly read and display system fonts and save them as svgs (Design space cannot read font kerning properly, and will not space/connect script fonts properly)

Tutorials
The quickest way to figure out exactly what you need, is to choose a project, then list the materials.  Most people LOVE youtube for cricut tutorials.  I have no patience for youtube myself, and prefer step by step tutorials I can read through, so when I make a project, that is what I do - I list the step by steps and walk through exactly how I did it.  I have those all listed here: https://fieldsofhether.blogspot.com/2018/10/heathers-cricut-tutorials-step-by-steps.html


https://fieldsofhether.blogspot.com/2018/03/cricut-dollar-tree.html
The Dollar Tree is a great place to start.  Practice on items that only cost $1.  


I hope that helps you get started!  If you are looking for more, I keep an index of my posts here:


You can find me on facebook here:

==================================================


Pin This:


Cricut - Which Vinyl Do I Need & Where Do I Buy It?


The chart above is simplified, there are more options - such as marine vinyl, and sign shop vinyl, and they sometimes have numbers like 751, etc.  HTV comes in sports-flex, stretch, and more.  

Homemade Sticky Buns


Dough Recipe
(This is a basic dough recipe that we use for everything from calzones to sticky buns)

1 cup hot water
1.5 T sugar
2..25 t yeast
(I put all of this in one measuring cup and let sit)
3 cups of flour (maybe a bit more - start with 3 cups)
1/4 cup vegetable oil 

When the yeast bubbles in the measuring cup, I dump it into the kitchen aid with the flour and oil, and mix on low with the bread hook.   

Set aside in a covered bowl and let rise until double.

Roll out bread dough
top with melted butter (abt 1/4 of a cup)
cinnamon and brown sugar - lots of both

Swirl together
Roll into a log, 
slice into 12 pieces

Make the sauce:

Sauce Recipe

3/4 cup butter
3/4 cup brown sugar
cook until melted and starting to caramelize
remove from  heat and add 1/4 cup Kings Syrup (a pancake syrup)
Or you can use corn syrup 

Pour the sauce into a 9x13 inch pan
place the rolls on top of the syrup
cover and let rise

Bake until the tops are brown - about 30-35 minutes.

I've made hundreds of these by now - and yet, I couldn't find one decent photo of a finished batch..  here's a selection of baked goods from 2013:

Pumpkin cookies, mini brownies, chocolate cherry bars, mini sticky buns & a full size pan of sticky buns for Dan & the boys.


A local sent this to me, telling me it is the recipe from Limbaugh's Bakery in Milton.
And then someone else said it absolutely is NOT their recipe.
I suspect both are correct - based purely on my own experiences baking.  How I make these has evolved over the years.  The amount of syrup varies.  I rarely measure anything, I make these without really thinking about it at all.  So I find it very likely that a bakery's recipe evolved and changed over time too.

All About Sweet Corn Season...


This year, more than any other, we've had a lot of questions about the sweet corn.  I thought I'd try to answer them all here in one spot, for my reference as much as anyone else.  :-)

What Is The Difference Between Yellow & Bicolor?

We plant two variety of seed - a yellow, appropriately named "Incredible", and a bicolor, which is usually refereed to as Butter and Sugar.  Both of these seeds are non GMO.

Dan's family has been planting the Incredible brand for may years, and we have planted it every year since we've moved here in 2004.  It is hands down my favorite. 

The Butter and Sugar is expensive to plant.  The seed is very expensive, the corn is often buggier, and it just doesn't grow as well, so it is sometimes more limited in availability.  The bi-color that we plant is a triple sweet variety called Serendipity.

We typically sell by the 100, although we will do "special orders" for less.  In past years, it was about 100 ears that fit in one feed bag.  This year we have smaller feed bags, we've been buying our feed from Norms Farm Store, and his bags are smaller.  So this year it's 50 ears in each bag, which is really much easier to lift into vehicles anyway.  Yes, we will sell 50 yellow and 50 butter and sugar as 100 ears - we do that any time we are asked, as long as both are ready at the same time.


When Will It Be Ready?
In 2017 we planted very late, because it was such a wet spring.  We found that our customers really liked having sweet corn later in the year, after their summer vacations, with some still fresh for labor day.  So now we always try to have it come on in August, and September.  I so wish there were concrete dates I could put on a calendar to plan weeks ahead - but it will all depend on the weather each year. 

 Once it is ready, we usually have sweet corn for weeks.

We try to stagger the planting so that it does not all come on at once.  This year the yellow was ready one week before the butter and sugar.  Usually it comes on for about two weeks once it starts..  so this year it was a week of yellow, a week of yellow and butter and sugar, and then a week of butter and sugar, allowing us to  have corn available for three weeks.  That varies each year, depending on the weather.  We've had years where we planted the two varieties weeks apart, and yet it all came on at the exact same time.  Unfortunately, we can't guarantee corn will be ready the day you have free to do it.


How Much Corn Is 100 Ears?
How many quarts can you get from 100 ears?  Oh, that depends.  How much are you putting in each bag?  I usually use a 1/2 cup scoop and put 4 heaping scoops in each bag.  It works out to roughly 3 cups in each bag.  Most people fill them a bit fuller and have closer to 4 cups per a bag.

Then it will depend on how full the ears are.  It is smaller early on, and sweeter, then gets a little bit tougher as it fills out...

I think a safe rule of thumb is 25 qts per 100 ears.  But that number is going to vary greatly depending on how full you fill your bags, and how full the ears are.

For reference I did 28 ears of yellow yesterday, and got 9 quarts of corn.  Tonight I did 30 ears of butter and sugar, and I got 7 quarts of corn.  Those bags were all about 3 cups each.


When Do I Order?
We pick the corn fresh each morning.  Freshly picked, sweet corn is high in sugar and low in starch. The longer it sits, the starchier it gets.  A day or two usually does not make much difference at all - but a week or so definitely will.  For me, myself, I don't let it sit more than 48 hours - the fresher the better.  After  awhile, not only will it not be as sweet, it may start to get a chalky taste.  This is one of the reasons why the sweet corn you freeze each year will be SO much better than what you buy in the freezer section of your grocery store. You can order as far in advance as you want (once we announce when it is expected to be ready) but we do not pick more than that days orders... so if you call at 9am, we may not be able to get back out to pick more until the next morning.  It depends on the day - sometimes we have time to go back out, but your best bet is to make sure we have your order before 6:30am - so the night before, typically.


Molly, after picking sweet corn.  

How Long Do I Cook It?
We do not husk the corn for you - it will come in the husk.  When you get it home, you will first husk it, then silk it.  I put the corn in a sink of cold water and run a vegetable brush over it quickly to remove the silk.  (Note - the butter and sugar also seems to have a lot more silk than the Incredible... another reason I prefer the yellow).  While you are husking you can start the water boiling on the stove.  I use my canner, but any large pan will do - even a dutch oven.  You want the water  to be at a good rolling boil, then place a few ears at a time in to cook.  Cooking recommendations are 3-5 minutes.  It will depend on how full your pan is...  basically you want the corn cooked all the way through, the ears should be good and hot.  Then you can drop them into a sink of ice water, so they are cool enough to handle to remove the corn.  You can then slice the corn off with a knife, or use a variety of gadgets.  I LOVE the pampered chef tool, and recommend it if you are doing a lot of corn.  It is SO fast and easy to use.


Why Did My Sweet Corn Go Sour?
Once you have your corn bagged, lay it out in thin piles to freeze it.  If you pile all the bags into one high stack, you run the risk of the center bags going sour.  I'm sure there is some science behind this, but I don't know exactly what it is off hand...  I just know it happened to me when I did 300 ears years ago, and my mother in law said it had happened to her once too.  I usually make sure the corn is good and cool on the counter before putting it in the freezer too.


================

How To Make a Split Monogram For A Dollar Store Tote


I bought these totes at the dollar store, knowing that I'd be able to do something with them eventually.  And then I got a cricut.  YAY!  Now I must cricut absolutely everything, to justify the cost of this thing.  :-)

I knew I wanted to put a monogram on them, but I wanted to do a "split" monogram, and it took me a bit to figure out how to do that.  This was the first I have used the weld and split features - I didn't even know they were there until I tackled this project.  You'll find them on the bottom right of your cricut design screen.  They will be faded out until you select two images at he same time.


I started with a T  - for Truckenmiller.  5x5 works nicely on these totes.  I used the Imprint Mt Shadow font for the T.


Next use the shape tool, and choose Square.  Unlock the shape (bottom left) and you can stretch it into a rectangle.  I like to keep the rectangle just about as wide as the letter.


Now is when you "weld" the image.  First select both the rectangle and the letter.  Then choose weld, from the menu on the bottom right.  This will merge the two images into one.

Next select the shape tool, and create a square to cover the bottom of your image.  I like to split that first rectangle so it's thinner on top and wider on bottom.  It should look similar to the image above. Again, select both images, but this time instead of Weld, choose "slice"

Once you have clicked slice, click on the image and start dragging, you will find there are now 4 images.  Delete the two gray ones (on the right) and stretch the two black ones on the left so there there is a space between them, as shown on the left above.
Once you separate the images, it will now be much taller than the 5 inches you started with.  Click the unlock button on the bottom left, and you can shorten the bottom of the image.


Next use the Text tool, and type the full last name.  I used the Engravers MT Font.  You can again use the unlock to resize the font into the space - I made it a little taller and a lot narrower to make our long last name fit. 

Next, going to images, search for Phone Vinyl  #M3E3B3.  


Resize the image to roughly the same size as your first image.  Then select the shape tool, and splice this image.  I cut right below the butterfly.


Once you have the image split, select the top and bottom.  Then choose edit, copy, and edit, paste, so that you have two copies.  Select one of the images, then choose Flip, and flip horizontally.


Now drag the 4 bird and leaf images and position them around the monogram, resizing as needed.   Next select all parts, and weld.  Then flip the image, so it is backwards, or remember to use mirror print.  I don't trust myself to remember mirror print, so I flip the image.

This is not a simple image to "weed".  If you print a couple of these at the same time though, weeding the image a great project while you are watching tv.  Once you have the image cut to size and all of the extra vinyl weeded out, it's time to iron it on to the tote bag.
This is how not to do this.  Do not turn your iron on high, place iron over the plastic & vinyl, and press hard.  These bags are some kind of plastic and WILL melt, as shown above.

Instead, use a piece of wax or parchment paper over the design, and keep the iron on cool.  work a few seconds at a time and keep repeating until the plastic will pull away, leaving the design behind.


It took me quite awhile to learn all of this today, but once I learned the process, it's a pretty quick project to make more.


Genealogy Albums On Shutterfly

New to Shutterfly ? You can get a FREE 8x8 photo book - just in time for Christmas.  :-) I have one of Grandma Truckenmiller, a recipe album (Truckenmiller recipes) and a couple of other genealogy albums all premade that you can order (shipping is not free unless you spend over $39), or you can of course make your own, and when you do, I then also get another free 8x8 book.

First, sign up here:

Then click on any of the links below, if they are the albums you are looking to order.  (Or create your own! )

 The Brown Genealogy is an 8x8 album  -

Aikey Oberdorf (this is a 12x12 album - so it would not be free, but they will credit the amount of the 8x8 album towards the price) http://share.shutterfly.com/action/welcome?sid=0AZNmTJm5YsWrFoA

Truckenmiller Recipe Drawer Album 8x8

The Smith Family - (this is a 12x12 album - so it would not be free, but they will credit the amount of the 8x8 album towards the price)

Mary Ellen Lewis' Photo Album - This is an 8x11 album -


You Can't Take It With You - the Watsontown Christian Academy Play -

What I've Been Reading In The First Half of 2017

According to Goodreads, I've read 30 books so far this year.  That puts me significantly behind in my goal of 100 books in 2017, but I'm not really concerned about the numbers.  I often check reviews on Goodreads before I start a new book, but more and more I wish there was an option to filter out the "I received a free copy of this book in exchange for my honest review".  Is it just me, or are those reviews skewing the true numbers?  I've read through way too many lately, where everyone who "received a free copy" raved over the book, and then those who are not receiving free books were at the opposite end, hating the book.  I know everyone's taste is different, but lately I have noticed that happening a lot more.  I'm not so sure the "honest reviews" are as honest as they would be if they weren't hoping to receive more free books.

My Favorite Reads So Far This Year:
Looking at the covers, I do believe this is the most diverse my favorites list has ever been.  That's in part due to being in two book clubs that both "force" me to read outside my comfort zone.

Dead Letters is hard to describe.  It's about sisters - twins - who grew up on the family winery. One flees to Paris, only to return home when she receives news that her sister has died.  Or has she?  A series of letters from her "dead" twin lead her to believe her sister is playing an elaborate hoax - but then whose bones are in the barn?  There are at least a dozen reasons I should have hated this book, and yet I loved it, and had trouble putting it down.  Definitely one of my favorite reads this year.

The Thousand Dollar Tanline, a Vernoica Mars Book, really surprised me. This was on the "unputdownable" list by the Modern Mrs. Darcy.  (What Alice Forgot is also on her list, and I loved that one too - so I look forward to the rest of her list)  While I could put this one down, I really, really enjoyed it and will look for more in this series.  I've never seen the tv show, and think I'll avoid seeing it until I read all the books. 

Elizabeth Is Missing, a book club selection, was one of those stories that will stick with me.  I really, really enjoyed this, although our book club had pretty spit opinions on it.  It's a murder mystery, in flahsbacks of memories, told from the perspective of a woman sliding into dementia. Present day events remind her of events long ago, and at the end, our book club was split in their opinion of who actually committed the murder, which surprised me, I thought it was obvious...  it made for great discussion, not only about who was guilty, but also about caring for a mother with dementia.

Years ago I read every John Grisham novel as fast as they came out. But then they all started to seem like pretty much the same book to me, so I stopped reading him for a long time.  Rogue Lawyer was a book club selection, so I picked it up, and read it almost straight through.  I loved this book, and I hope there is a sequel with this main character. 

The Good House by Ann Leary is not a mystery.  Its about an alcoholic who is not believing she is an alcoholic, and that should NOT be funny, but it is. I loved this book, thoroughly enjoyed the characters. 

Although I did love all of the above, none are quite the caliber of the Nine Books I Could Not Put Down.

Reads I Enjoyed, But Didn't Love

Dorothy Sayers books feel like a "must read" for every mystery lover, so I chose one of the Lord Peter Whimsey novels, Cloud Of Witness to try this year.  I enjoyed it, but didn't love it.  I'll probably come back to the series later, because I still feel like I need to read these for some reason.  But I still have not finished all of Agatha Christie's, so although they are on the list, they are not really high on my list.  So much to read, so little time...

I've been working my way through the Maisie Dobbs series, and I'm really not sure why.  I do enjoy them, but they are not spectacular, and some of them haven't even really been that good.  And yet I am still enjoying them.  I can't explain it.  Cozy mystery style, female PI, set in the years between the two world wars.

Mr Penumbra's 24 Hour Bookstore is a book I never would have chosen on my own.  It was a book club selection, a bit of science fiction.  I really really liked it.  This is why I join book clubs, to read things that I never would choose on my own.  

Although Mary Kubica's Good Girl is one of my all time favorite books, Don't You Cry was not.  It was good.  I enjoyed it.  It's another mystery/thriller, which is my favorite genre.   There's a new one out by her this week that I can't wait to read, as well as one I apparently missed...  She's still on my list of favorite authors, and this was a GOOD read, just not one of my favorites.

The Girls In The Garden was not a thriller, but it is a mystery.  It was a bit different than what I normally read, and while I enjoyed it, it's not something I would look to read more of.

The Hiding Place is a book I read, enjoyed, gave 4 stars on goodreads, and when I go back I can barely remember the plot let alone the ending.  So it was good, but not memorable.  Since it's a mystery, and I can't remember the ending, I'm not feeling the need to go back and re-read the last chapter, but that's silly, because I'll likely forget the ending again by this time next year.

The Things We Wish Were True is another one I just can't remember much about.  I liked it. I think it was a good summer beach read, but I can't remember why I think that...  Goodreads says it's a neighborhood full of secrets, who all tell their version of one event, and in the end all of their secrets come out.  I vaguely remember a pool.  Maybe that's why I think it's a good beach read.  :-)

The Heist is a novella from my Geocaching To Read List, and I really enjoyed this one.  I hope the author writes more.

To Cache A Killer is another geocaching mystery, part of the Franny Shoemaker campground series.  It was good.  Very much a typical cozy mystery - I would like to read the rest of the series.

Mrs Lee & Mrs Gray was a book club selection.  I love historical fiction.  This one, about the relationship between Mrs Lee & her slave was ok.  

The Wicked City by Beatriz Williams was ok.  What I did not know is that most of these books, although not technically a series, should be read in order so that you have the back story.  Inspite of it being a bit odd, and feeling like I was missing something (I was - I hadn't read the other books) I still sort of enjoyed this, and someday would like to read all of the books in order.

I did the Listen Love Repeat study with Proverbs31 online this year.  It was ok.  Typically I love anything Karen Ehman writes, but I think perhaps I read this one at the wrong time, and it often grated on my nerves (because of my circumstances at the time) and I just didn't enjoy it.  What I needed to be reading at the time was something along the lines of "How to build a moat" or "How to set boundaries with impossible people" - and this is quite the opposite.  :-)

Naked Came The Phoenix was yet another book club pick.  (I'm in two book clubs this year).   This is a mystery written chain style - each author takes the next section, and the next author in line needs to deal with any decisions the previous author made.  I enjoyed it very much, even though it was a bit ridiculous at times, and probably not something I would have loved had it been written by a single author.

Frederik Bachman's books have been some of my favorites recently, so I was excited to read A Man Called Ove for book club.  It was good.  But I liked the others I have read by him much better.

Never Let You Go is one that I rated 3 stars on Goodreads, and when I looked back at it today, I wondered if it wasn't more of a 2 star read.  It was ok.  Not exactly a thriller,or a page turner...  and parts of it still bother me (the dog poisoning in particular), because they don't fit the ending.  But it was ok.

The Flower Arrangement was a good read - not a mystery, but a book full of likable characters.  It would make a good Hallmark movie.  

She Makes It Look Easy was described in one review as a book of "surburban angst".  It's very much in the theme of the grass is not always greener on the other side, even when it looks like it might be.  And enjoyable read.

Books I Really Didn't Care For

The Bughouse Affair by Bill Prozini & Marcia Muller.  I'd been looking forward to reading this series, it's a style that I typically would love.  I'm not sure why I didn't love this one.  I am not going to give up yet, I'm keeping the series on my to read list for now...  "n this first of a new series of lighthearted historical mysteries set in 1890s San Francisco, former Pinkerton operative Sabina Carpenter and her detective partner, ex-Secret Service agent John Quincannon, undertake what initially appear to be two unrelated investigations."

The Girl Before is one of those thrillers I thought I would love, but I found it disappointing. Not terrible, just not great.

The Eggnog Murders, which I thought was a book by Leslie Meir, ended up being three short stories.  Some were better than others.

The Book That Matters Most is one I almost didn't finish.  

The Life We Bury was a book club selection.  I wish whomever had written the description of it had also written the book. The story line had such promise, and the description was fantastic.  I did not enjoy the book.

"Didn't care for" is too mild for my opinion of To Cache A Predator.  I have a list of geocaching themed books I want to read through this summer, but this is one I strongly recommend everyone avoid.  This is my review on Goodreads: 

 "As we headed off to ASPGB (Allegany State Park Geobash) Mega Event for a weekend of camping & geocaching, I packed this book to read around the campfire. A geocaching mystery to read at a geocaching event. How perfect!

No. no. no. 

I should have read the first chapter before we left - if I had, I would have downloaded a different (geocaching themed) book. This book is not about geocaching. Geocaching is mentioned, awkwardly, in terms that feel unnatural & vaguely inaccurate. 

This book is about child molesters. Practically everyone in the town is a registered sex offender, and almost everyone in the book has been a victim. One of the many victims is drugging registered offenders, cutting off their male parts, and hiding those body parts in geocaches. These cases are filed in a folder named "wankers" at the police department, and emergency responders & police officers have to hold back laughter at crime scenes. But its not funny at all.

The subject matter was not what I was expecting, and the absurdity of hiding the parts in geocaches made no sense & felt like a forced attempt to include geocaching in the book. 

In-spite of all of this, I'd be interested in reading other books by this author. Overall this felt like a poor school assignment, meeting weirdly set criteria, but done by a good student with real promise."


Books I Didn't Even Finish

Two Days Gone by Randall Silvis is listed as a thriller, and was on someones "Could Not Put Down" list.  (I'm trying to remember where I found that list - but I can't remember.  So far I'm learning that whomever wrote it has very different taste than me.)  I was looking forward to a fast paced thriller, but a few chapters in I felt it was dragging, and just not a writing style I enjoyed. I popped over to goodreads and all the reviews were favorable, stating that it was great in the beginning and drug in the middle before wrapping up nicely.  Since I couldn't even get excited about the beginning, I decided not to stick it out for the middle.  It's hard for me to give up on a book. But there are so many books on my to read list


===========================================================
My List Of Favorite Authors:
http://fieldsofhether.blogspot.com/2014/12/my-favorite-authors.html