Showing posts with label Cricut Christmas. Show all posts

Christmas In July - 5 Cricut Projects (With Free SVGS) To Make This Week-End

 
I know - It's July, and Christmas feels a long way off. But it's going to be here before you know it.  
Here are 5 projects you can cut and make to get a head start on the Christmas crafting season.

Where To Find Free SVGS For Making A Paper Christmas Village

This is a great time of year to decide on a Christmas village, and get it cut out.  You can print out the webpage with the instructions (just in case the website disappears!) and put all of the pieces and the instructions in a zip lock bag to assemble during the holiday season, if you don't want to actually put it together now.

This was one of my favorite projects last year from Special Hearts Studio. It's  a FREE svg, and several of my friends asked me to make them one when they saw it.  I didn't have time to make extras last year, but this time of year I can get a head start, cutting out several  and putting together the outside layers, and making sure I have enough of the lights for inside.  Closer to the holidays, I can finish assembling them, adding the side pieces, but for now, I want to be able to store them fairly flat in ziplock bags.

This is another incredible free svg from Special Hearts Studio.  (She has so many amazing projects!)  For this one, my plan is to cut it out for each of our adult children's families.  Then I'll add all of the supplies (glue, lights) to assemble them to a ziplock bag, and after Thanksgiving, I'll mail them out, so that the kids can each assemble their own.  

Looking for a quick hostess gift, or gift for the neighbors? You can often find clear glass plates at the Dollar Tree.  A little etching cream, and a stencil made with cricut, and you have custom plates.  
Here's a step by step tutorial on how to make them:

Customized Christmas ornaments make quick and easy stocking stuffers.  These arabesque tiles often sell out in our local Lowes & Home Depot stores at holiday time, when they are a popular craft. July is a great time to get a head start on these - or on any Christmas ornaments!  I often think I should make one Christmas ornament a month, year round, so that i am not so rushed in November..  but here we are in July, and I still have not started any this year.  :-)
Here's an index of Tips, Tricks, Tutorials, and Free SVGS for making Christmas Ornaments:


===============
The Index For The 12 Week Christmas Craft Challenge
Twelve Weeks Of Christmas Crafts, with step by step tutorials and free svgs for each!

=============


Cricut Christmas Challenge Week Nine - Mixing Print Then Cut With VInyl

So many crafters get a new Cricut machine specifically to make Christmas gifts, but then are completely overwhelmed by how to use the machine.  To make it a little less overwhelming, I put together 12 weeks of Christmas Crafts, Step by Step, walking you through new skills each week  to help you become comfortable with your machine and how it works..  Find the index here:  https://fieldsofhether.blogspot.com/2020/10/the-12-week-christmas-craft-challenge.html

This week, step by step,  we're learning about using both print then cut t-shirt transfer paper and heat transfer vinyl in the same design.

For "Choose Your Own Adventure" section this week, there are a variety of ideas for more holiday shirts to make.

As always,  I'd love to see what you make!  Join the group for this page to share your progress, ask questions, and be absolutely inundated with free svgs, posted by themes.  :-) Join The FB Group For This Blog By Clicking Here

For which vinyl to buy, I have a list of my favorites, and price guidelines, here:

============
Step By Step
A Shirt made with both print then cut transfer paper  & HTV
=================

This was not a free svg.  It wasn't even an svg.
But it was in the Design Bundles $1 sale, and my daughter loved it.  So For $1, I bought it.  It is no longer $1. https://bit.ly/3pQy9rA

The process I used will work for just about any image!

Upload the png or jpg image to Design Space.  It will upload as a print then cut project.
Select it, and duplicate.
Now with the duplicate copy selected, change it to a cut image by selecting "no fill".


Now with the duplicate image still selected, choose contour, and click on the gnome shapes to make them go away.

Using the shape tool, add a square, click on the lock to unlock it, to make it a rectangle.
Cover the text, Select the image and the new rectangle, and choose slice.

Delete the extra pieces from the slice, turn the text black and the snow white, then select both and group.  These are your pieces to cut from heat transfer vinyl.  Don't forget to mirror them before you cut!  Once this part of the design is grouped, go ahead and drag it to the side, or hide it, while we get the next part ready.

Select the original image, and duplicate it again, just like we did the first time.
Again, change the duplicate copy to "no fill" so it is a cut file.
This time, select contour and at the bottom choose "hide all contours".
Then select each of the gnome shapes, so that only they appear.

Now you will have your original image, and your new gnome shapes.
Next is the hardest part of this process.  Line the shapes up over the printed version

Once they are lined up, select both images and slice.
Delete all the extra, and you have just 3 individual gnomes ready to be print then cut.


unhide or bring back your cut pieces, and your canvas should look something like this:

Notice that in my layers panel, the gnomes are set to print then cut, and the text and snow are set just to cut.

The text definitely need to be flipped if you are cutting it from htv.  You can choose to select it and flip it horizontally, or on the make it screen you can remember to click "mirror".  I never remember to click mirror, so I always flip.

For the Gnomes, whether or not you need to flip them depends on your transfer paper.  You will need to read the instruction sheet that came with your printable iron on transfer paper.

I used Avery For Darks, which does NOT get mirrored.  (Avery for lights does get mirrored)

When you click make it, you will be prompted to print your design first.  Then cut that part of the design.

Print then cut projects always print with a black box around them.
There is a sensor in the cricut machine that will find that black box, and that is how it knows exactly where to cut.

For this paper, I set my dial to light cardstock.  

For tips for solving simple issues with print then cut projects:

As of December 2020, make sure your canvas is set to "classic" and not the new canvas before clicking make it.  The new canvas is causing all sorts of issues, including many with print then cut projects not printing properly. https://fieldsofhether.blogspot.com/2020/12/quick-tip-revert-to-classic-cricut.html

Once cut, I just pull up the side, and the images are left stuck on the mat

Again, be sure to read the instructions that come with your transfer paper!
For this paper, Avery For Darks, there's a backing that you peel off once printed.

Once the backing is peeled off, place the gnomes on the shirt right side up.
I then placed my snow vinyl over top, to make sure I had the gnomes spaced properly.
I didn't iron the snow on, just set it down for spacing.  I removed it, then added the paper that came in my pack of printable iron on transfer paper - 

And then I pressed, with a plain old regular iron, because that is what I always use.

How to use a regular old iron for HTV projects - 

Then once the gnomes were on, I added the snow and lettering htv, and pressed again.

Try not to press over the gnomes any more than you have to - it is possible to over press and burn both htv and iron on transfers.  With just two layers, it's not a big risk or concern, but if you are layering a lot, try to press the early layers as little as possible.


Here's another shirt where I mixed print then cut with htv:
For this one, I simply added text around an event logo.

=================
Choose Your Own Adventure
More Holiday Shirt Ideas
With Free SVGS or Print Then Cut Images
=================
Obviously we are on a gnome kick this year..
This particular Hallmark Movie Watching shirt is NOT a free svg
But I do list free versions in the post

I put these gnomes on a different shirt for my daughter.


This is my ugly Christmas Sweater, Free SVG - 
And find pages and pages more like this here:


Find more free svgs inspired by A Christmas Story

I've been using this design on Christmas ornaments, but it would work well on a shirt too - 

And find more free Grinch SVGS here:


=====================
The Christmas Craft Challenge Index

====================
The Christmas Index
Where To Find: Free Christmas SVGS By Theme (Nativity, Grinch, A Christmas Story, Etc), Where To Find Free Christmas SVGS By Project (Gift Tags, 3D Paper, Earrings, etc) and Where To Find Free Christmas Project Tutorials & Gift Ideas.  Including an entire extra index just for making Christmas Ornaments.  Find it all here:


Ten Great FREE Christmas Paper Cutting Files To Try With Cricut This Week-End


Snow globes, banners, nativities, shadow boxes, paper villages, and more!  There are so many great free files for making Paper Christmas Decorations with Cricut this year!

Quick Tips:

  • The recollections brand paper from Michaels is the most popular paper, and my personal favorite,  for these projects.  It's often the cheapest too!
  • Art Glitter Glue is amazing.  The price is ridiculous, and it took me years to try it because of that, but seriously...  it lives up to the hype. That super thin application tip, and the way it dries, really makes it the best. (A year later, I am back to Elmers precision tip craft bond.  The tip clogged constantly in the AGG, it was just too annoying. )
  • I use clear glue sticks a LOT too.  Because Art Glitter Glue is $16, on sale.  
  • When you click "Make it", on the left look under each mat, and you can change the paper size to 8.5x11.  8.5x 11 paper is usually much cheaper than 12x12 
  • Flip your mat upside down and peel the mat away from the paper, to reduce curling

1. A Gnome Snow Globe (And a few other free paper gnome projects too!)

A 3D Christmas Snow Globe from Maggie Rose Designs - 

Or how about these simple layered paper gnome Christmas ornaments?

Or the free standing gnome  here:

Or a gnome candy holder, here:

Find more free Gnome svgs here:


2. A Paper Nativity 
Free Light Up Nativity SVG
This is such a well done file.  Super easy to use, it went together great!
That can be stored in the base.


For quite a few more paper nativity options, see the post of free Nativity svgs here:
Scroll about half way down the page to the "projects" section, for a selection of free svgs for nativity shadow boxes, nativity lanterns, and paper nativities.


3. A Paper Angel Luminary


Or a much more complex version:
This is not a limited time freebie - her files are all free
And they are amazing.  Layered alphabet mandalas, - so many layered 3d designs.
And more.  New file each week.  (You do have to subscribe to her emails to receive the password to the "freebie vault")


4. A Christmas Shadow Box


Or this free one, based on the little red truck design:

Or A Nativity Shadow Box:


5. A Paper Christmas Village
Here's a whole list of free options for paper village svgs!

Just a heads up - the one from the Crafting Nook, while my favorite to actually make, takes forever to set up properly in Design Space.  There's a lot of layers to delete (the entire copyright notice is on the bottom of every file, and each letter of the notice is it's own individual layer that will need deleted, one letter at a time) and the score lines will appear as cut lines (they do on most uploads - this is common) so change them to cut then be sure to attach them.  Once the files are set up correctly in Design Space though, this is a GREAT village!  Easy to cut and put together, I've cut it 5 times, copies for me and my daughter in laws to put together)

The village from Heart Filled Spaces is larger than the others (although any can be resized!) and her files have recently all been redone so they are much easier to upload into Design Space!


6. A Christmas Banner
If this site is new to you, finding it is going to be like Christmas for you.  She has been adding new free designs each week, and they are incredible!  I made the Thanksgiving version of this banner and it is time consuming only because it takes so long to cut - but it goes together quickly and easily!
https://specialheartstudio.com/layered-mandala-merry-christmas-banner/
This site is always full of great seasonal letters for paper cutting, perfect for  adding to any banner

7. A Luminary or Paper Lantern

Another - 

And another:


8. A Paper Christmas Ornament


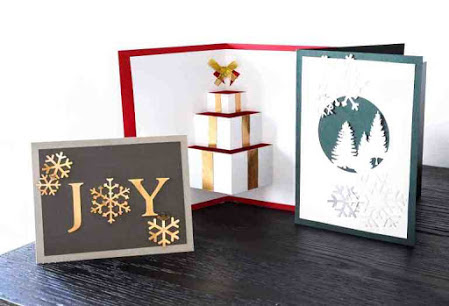
9. Cards


Find a  list of free svgs for making Christmas Cards


10. Christmas Gift Tags


If you are brand new to cricut, this is a great place to start!

There's a list of free gift tag svgs there too.

====================
STILL MORE FREE
 PAPER CRAFTING SVGS
====================
The Christmas Index
Where To Find: Free Christmas SVGS By Theme (Nativity, Grinch, A Christmas Story, Etc), Where To Find Free Christmas SVGS By Project (Gift Tags, 3D Paper, Earrings, etc) and Where To Find Free Christmas Project Tutorials & Gift Ideas.  Including an entire extra index just for making Christmas Ornaments.  Find it all here:

 ============