
So many crafters get a new Cricut machine specifically to make Christmas gifts, but then are completely overwhelmed by how to use the machine. To make it a little less overwhelming, I put together 12 weeks of Christmas Crafts, Step by Step, walking you through new skills each week to help you become comfortable with your machine and how it works.. Find the index here: https://fieldsofhether.blogspot.com/2020/10/the-12-week-christmas-craft-challenge.html
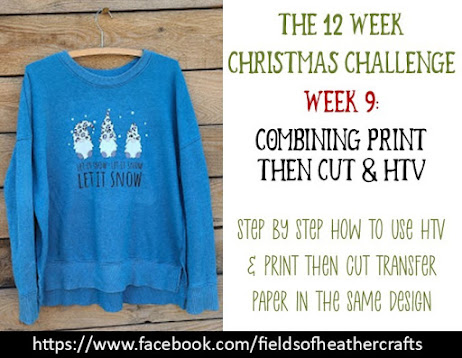
This week, step by step, we're learning about using both print then cut t-shirt transfer paper and heat transfer vinyl in the same design.
For "Choose Your Own Adventure" section this week, there are a variety of ideas for more holiday shirts to make.
As always, I'd love to see what you make! Join the group for this page to share your progress, ask questions, and be absolutely inundated with free svgs, posted by themes. :-) Join The FB Group For This Blog By Clicking Here
For which vinyl to buy, I have a list of my favorites, and price guidelines, here:
============
Step By Step
A Shirt made with both print then cut transfer paper & HTV
=================

This was not a free svg. It wasn't even an svg.
But it was in the Design Bundles $1 sale, and my daughter loved it. So For $1, I bought it. It is no longer $1. https://bit.ly/3pQy9rA
The process I used will work for just about any image!

Upload the png or jpg image to Design Space. It will upload as a print then cut project.
Select it, and duplicate.
Now with the duplicate copy selected, change it to a cut image by selecting "no fill".

Now with the duplicate image still selected, choose contour, and click on the gnome shapes to make them go away.

Using the shape tool, add a square, click on the lock to unlock it, to make it a rectangle.
Cover the text, Select the image and the new rectangle, and choose slice.

Delete the extra pieces from the slice, turn the text black and the snow white, then select both and group. These are your pieces to cut from heat transfer vinyl. Don't forget to mirror them before you cut! Once this part of the design is grouped, go ahead and drag it to the side, or hide it, while we get the next part ready.

Select the original image, and duplicate it again, just like we did the first time.
Again, change the duplicate copy to "no fill" so it is a cut file.
This time, select contour and at the bottom choose "hide all contours".
Then select each of the gnome shapes, so that only they appear.

Now you will have your original image, and your new gnome shapes.
Next is the hardest part of this process. Line the shapes up over the printed version

Once they are lined up, select both images and slice.
Delete all the extra, and you have just 3 individual gnomes ready to be print then cut.
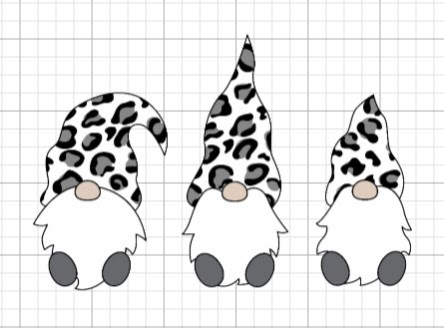
unhide or bring back your cut pieces, and your canvas should look something like this:

Notice that in my layers panel, the gnomes are set to print then cut, and the text and snow are set just to cut.
The text definitely need to be flipped if you are cutting it from htv. You can choose to select it and flip it horizontally, or on the make it screen you can remember to click "mirror". I never remember to click mirror, so I always flip.
For the Gnomes, whether or not you need to flip them depends on your transfer paper. You will need to read the instruction sheet that came with your printable iron on transfer paper.
I used Avery For Darks, which does NOT get mirrored. (Avery for lights does get mirrored)
When you click make it, you will be prompted to print your design first. Then cut that part of the design.

Print then cut projects always print with a black box around them.
There is a sensor in the cricut machine that will find that black box, and that is how it knows exactly where to cut.
For this paper, I set my dial to light cardstock.
For tips for solving simple issues with print then cut projects:
As of December 2020, make sure your canvas is set to "classic" and not the new canvas before clicking make it. The new canvas is causing all sorts of issues, including many with print then cut projects not printing properly. https://fieldsofhether.blogspot.com/2020/12/quick-tip-revert-to-classic-cricut.html

Once cut, I just pull up the side, and the images are left stuck on the mat
Again, be sure to read the instructions that come with your transfer paper!
For this paper, Avery For Darks, there's a backing that you peel off once printed.

Once the backing is peeled off, place the gnomes on the shirt right side up.
I then placed my snow vinyl over top, to make sure I had the gnomes spaced properly.
I didn't iron the snow on, just set it down for spacing. I removed it, then added the paper that came in my pack of printable iron on transfer paper -

And then I pressed, with a plain old regular iron, because that is what I always use.
How to use a regular old iron for HTV projects -

Then once the gnomes were on, I added the snow and lettering htv, and pressed again.

Try not to press over the gnomes any more than you have to - it is possible to over press and burn both htv and iron on transfers. With just two layers, it's not a big risk or concern, but if you are layering a lot, try to press the early layers as little as possible.
Here's another shirt where I mixed print then cut with htv:

For this one, I simply added text around an event logo.
=================
Choose Your Own Adventure
More Holiday Shirt Ideas
With Free SVGS or Print Then Cut Images
=================

Obviously we are on a gnome kick this year..
This particular Hallmark Movie Watching shirt is NOT a free svg
But I do list free versions in the post

I put these gnomes on a different shirt for my daughter.

This is my ugly Christmas Sweater, Free SVG -
And find pages and pages more like this here:


Find more free svgs inspired by A Christmas Story

I've been using this design on Christmas ornaments, but it would work well on a shirt too -
And find more free Grinch SVGS here:

=====================

The Christmas Craft Challenge Index
====================

The Christmas Index
Where To Find: Free Christmas SVGS By Theme (Nativity, Grinch, A Christmas Story, Etc), Where To Find Free Christmas SVGS By Project (Gift Tags, 3D Paper, Earrings, etc) and Where To Find Free Christmas Project Tutorials & Gift Ideas. Including an entire extra index just for making Christmas Ornaments. Find it all here:
No comments:
Post a Comment