
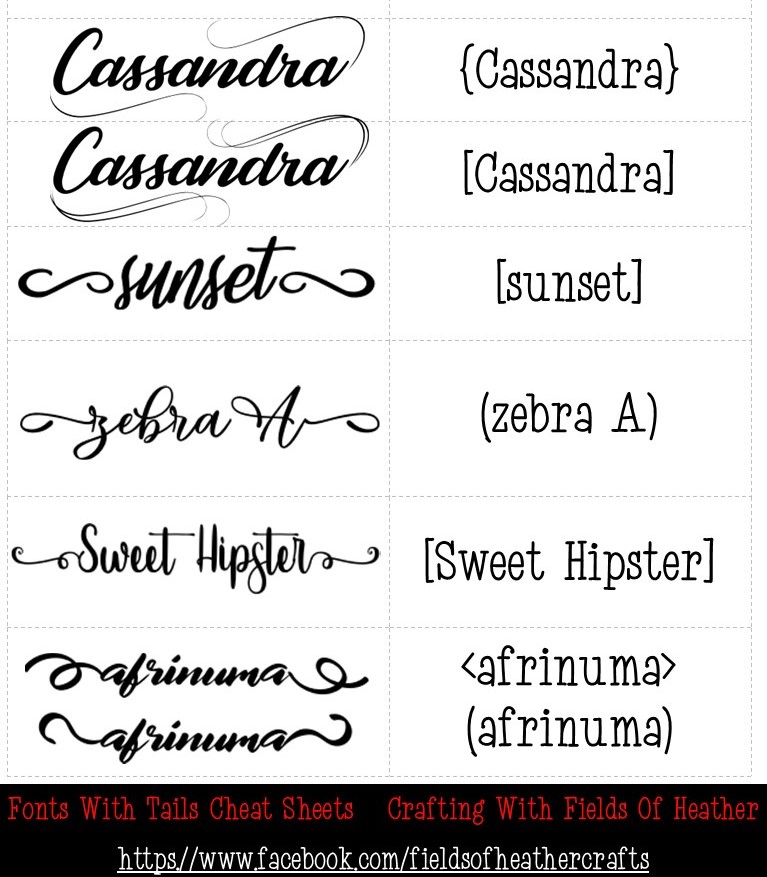
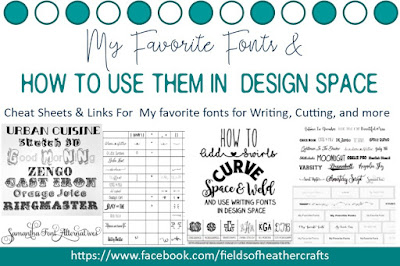
Cheat Sheets for "Easy Glyph" Fonts with Tails. No Character map needed, for these fonts you simply type characters like [ ] or ( ) to add the extra tails or swirls.
Links to download each font are found under the photos
Quick Tips:
- These are "easy glyph" fonts, but many fonts with extra glyphs will require a character map. you can read more about how to use those here
- Sometimes a font preview on dafont will show pretty tails, but you will not see them when you download the font. Dafont Fonts are frequently Free Demo Versions of commercial use fonts. The Demo versions usually do not include all of the extra glyphs.
- Some fonts, like All The Roll, have ligatures—special effects that occur when you type certain letter combinations. You will never see these features in Design Space—use a free program like fontlab pad to display and space your system fonts properly and save as an svg.
==============================================
Fonts With Simple Tails
========================================
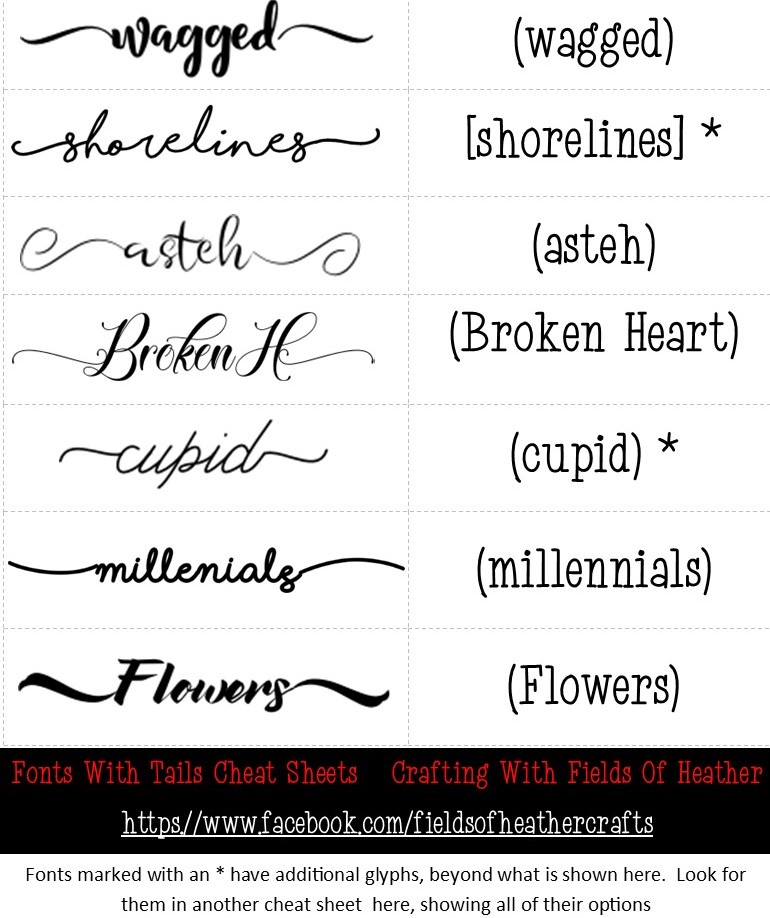
Kl Cupid Millennial Solstice Flowers2
====================================
====================================
=============================================
Fonts With Fancy Tails
=======================================
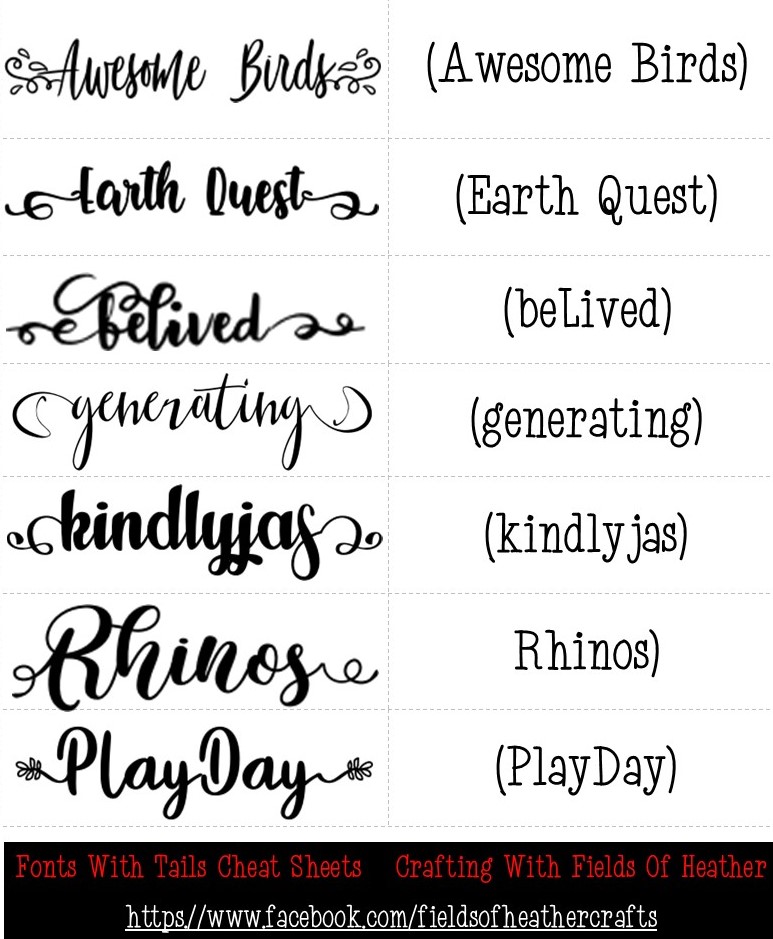
Kindly Jasmine Rhinos Land Play Day
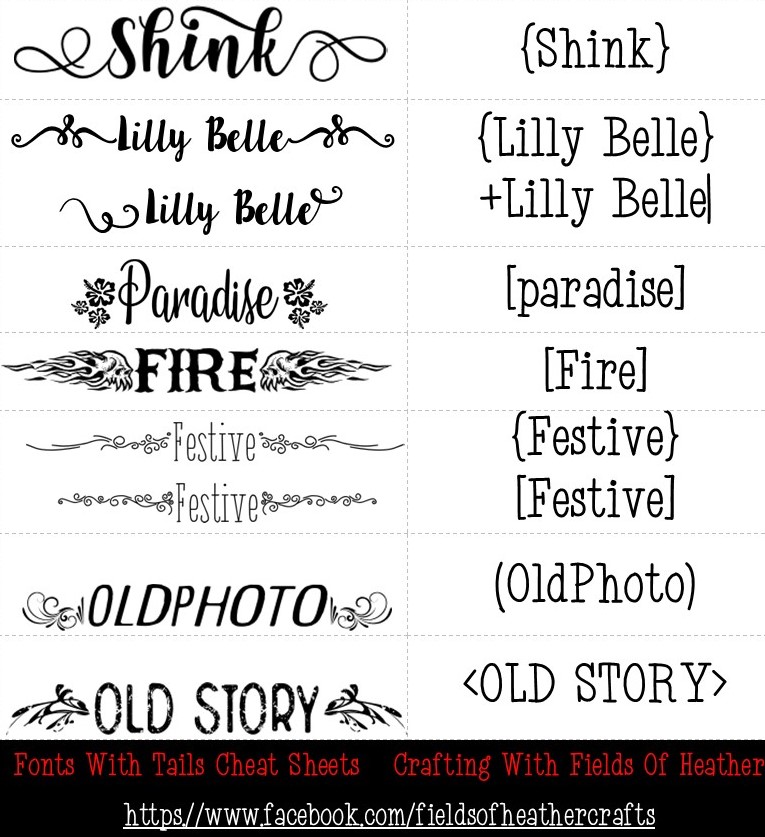
 Shink LillyBelle Vacations In Paradise
High On Fire White Festive
Old Photograph Old Story
==============================================
Fonts With Heart Tails
========================================
 Bunch Blossoms Countryside Kelya
Hello Lovely Crazy Love Nirvana Yessy
==============================================

High On Fire White Festive
Old Photograph Old Story
==============================================
Fonts With Heart Tails
========================================
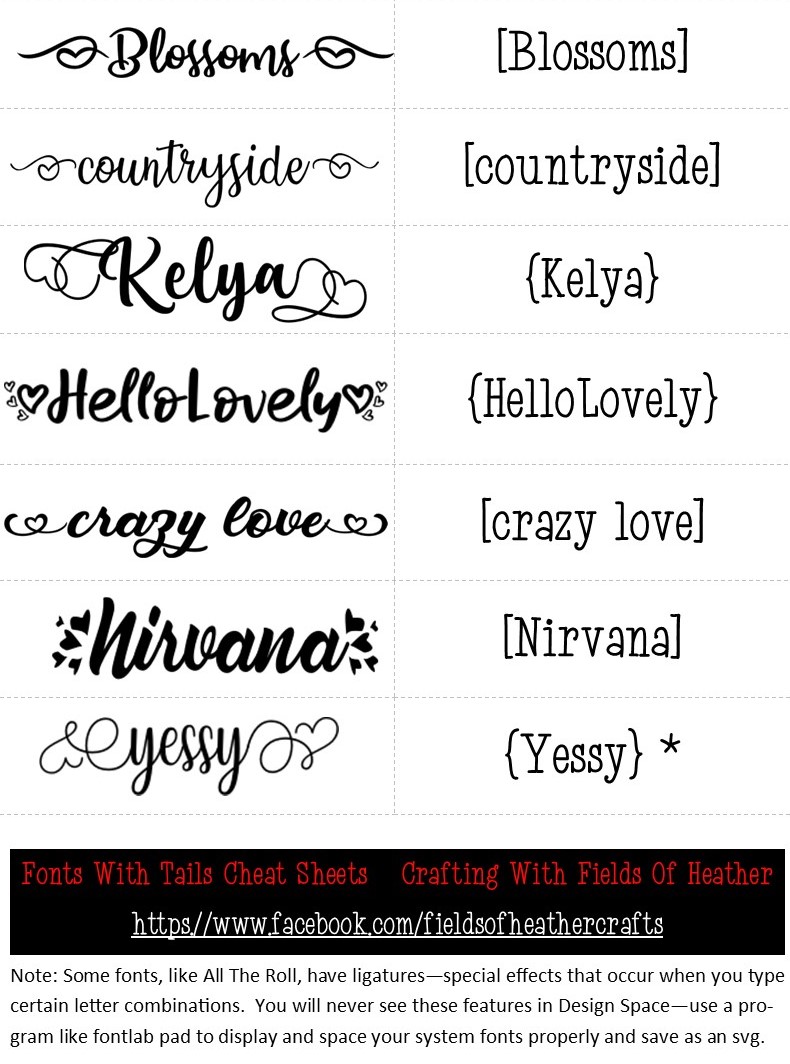
Hello Lovely Crazy Love Nirvana Yessy
==============================================
Fonts With "Splashes"
========================================
========================================

Hello Sunshine Honey Cute
 Linglelenglang


Plastic Beauty comes in two versions. You want the LIGHT version if you are using a cutting machine such as cricut or silhouette. The regular version will probably work too - but it has so many extra cuts (distressing) in it that it will take a long time to cut, and will be miserable to weed.

This is NOT an "easy glyph" font - for this one you would need a character map to access the glyphs.
I'm including it because it's a pretty commercial use font with the "splashes" shown in the easy glyph fonts above.

Just in case you'd like a whale with your splash. :-)
To get the whale, you can type a variety of things - & , 4, 5, < }.. all the same whale
=============================================
Fonts With Multiple Glyphs
=======================================

=============================
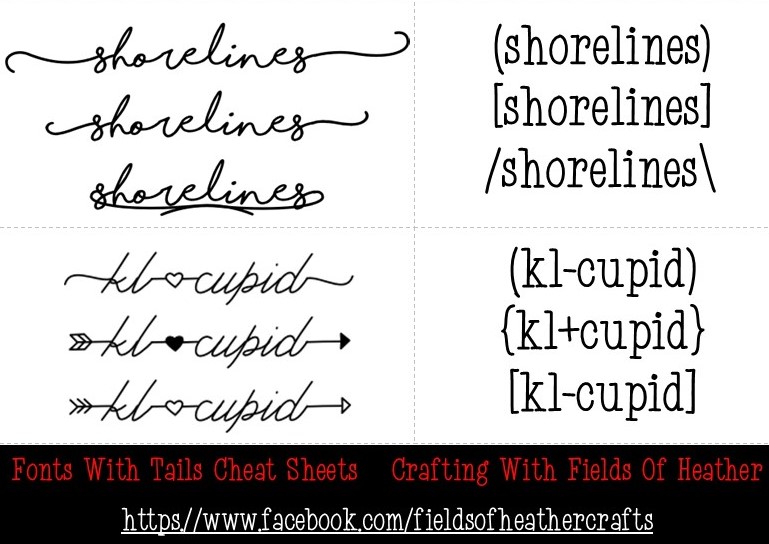
Shorelines kl cupid
=================================================

Veni
===============================================
Fonts With Swash Tails
Fonts With Swash Tails
========================================

To find these, and many more, try this link:
===============================================
Misti Fonts
Misti Fonts
========================================


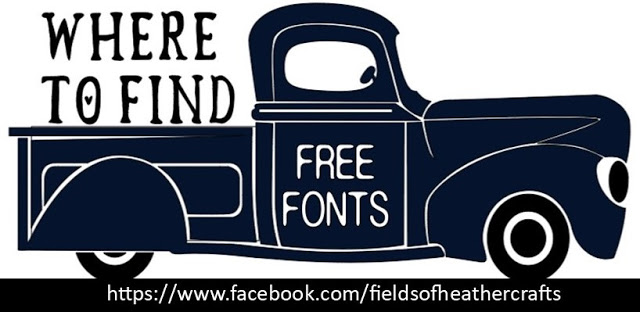
Where To Find Free Fonts By Style, By Type, And By Holiday
The Crafting With Fields Of Heather Font Index
And Tips & Tricks For Properly Spacing, Adding Glyphs, Organizing, Making Shadow Text, and more!
========================

OLD VERSION Easy Glyph Cheat Sheets
If that link does not work (too much traffic) Try This One.


