Showing posts with label Crafts. Show all posts

Cricut Easter Baskets


Cliff Notes:
  • Baskets are from the Dollar Tree, Target, & DH Gate.  Details are below, for each.
  • Designs are from all over.  I've started this post with a list of places to find free bunny faces, then later in the post I describe each design I used and where I got the elements for it.
  • I used a regular iron for all of these.  It's what I always use, I never have any problem using an iron.  I use a silicone baking sheet inside (or behind) items when Ironing on my designs, I think it helps.  
  • Siser Easyweed HTV.  I buy it on Amazon, with prime free shipping, it's always the cheapest that way, for me.

Free Bunny Face SVG Files:

Fonts I liked for the names: Pharmacy, Twinable, Messy Marker, Moonlight, Chuck Noon


The Bags & Baskets:


Burlap Bunny Bags:
 
On Amazon, these are around $30 for 6.  Free Shipping with Prime, and a variety of additional colors, shapes, and designs are available. 

DH Gate has these at a lower price, but you have to buy a larger amount, and shipping may  take weeks - but it is also free.  


Ironing  on them:


I used the silicone baking sheet inside the bags, as I do with most items, but because of the way the burlap and fabric are layered here, I'm not sure how much it helped.  I used it anyway.  :-)

The seams and layers at the bottom made it a little more difficult to get the good pressure on the letters, but they have held up well.

Dollar Tree Baskets:
Find them online on the Dollar Tree Site Here -
 https://www.dollartree.com/easter-bunny-shaped-baskets/302822
  For $1.25 each, these are by far the quickest and easiest and cheapest to make!  Big Lots has similar baskets, but not nearly as cheap.

Ironing Them On - 

You have 4 inches in length to work with on these ears.
I chose the font Moonlight - one of my current faves.  As much as I love beautiful scripty fonts, when making things for young children, I like to keep the letters clear and readable so they easily recognize their own name.


Target Baskets
In 208 these were inside the door, in the "Dollar Spot" aisles.  (Why is this called Dollar Spot?  Almost nothing there is just $1....)  They cost $3, and are sturdy - with a plastic bucket inside the layers of canvas material.  The ears have wire in them.

Five Below has similar buckets, just a bit larger, with a bunny silhouette already on them, for $5 each.  They are 3 for $18 on amazon here - https://amzn.to/30OKGeP

Ironing On Them:
This is the only time I have used my iron more like an iron than a "press" for htv.  Because of the curve of the bucket, I kind of ran the iron around over the design.  It attached quickly and easily - the htv seems to like this material!   I didn't put anything inside of the buckets, just my hand. I kind of held the bucket in the air with one hand, and moved the iron around the design with my other hand.  It sounds difficult, I know, but this was actually much easier than the burlap bags. 

The Designs:


For the Bunny with the sunglasses:
I used the llama face with sunglasses from Caluya design, ungrouped, deleted the ears.
Selected both areas on the glasses, and sliced, so the cut outs are cut out, not layered.
Changed the circle behind the nose to pale blue
I added the whiskers from the printable cuttable creatables face
Font is chuck noon.

Because I have a LOT of black scraps, rather than fuss with how to place everything to use up scraps, I just changed the whiskers & nose, sunglasses, and letters all to different colors and cut each one.  I put black on the mat each time, but because the software thought I was using different colors, it automatically prompted me to put in a new mat for each item.  It was a little more (but not much!) time consuming to do it this way, but I did almost all of these with just my scraps - and I found it quicker to put in a new mat than any other option.


This is the face I used for the girls burlap bags.  It was in my svg files names BunnyFace.svg - but there is no information in the properties for me to know where i downloaded it from.  I downloaded it in November of 2017...  The links above give similar faces, but if anyone knows where I got this particular svg (I'm positive it was free) I'd love to link to it.

The font I used for the girls burlap bags was DK Jambo.


Molly's basket was made with a photo of her.  I used graphics software to convert it to an svg, for Christmas ornaments last year.  For this, I simply had to make the graphic larger.  Font is Moonlight.  Here's a variety of software that will convert a photo to svg - 
https://fieldsofhether.blogspot.com/2019/02/programs-sites-for-converting-to-svg.html


How To Curve Text in Phonto - for Cricut Design Space


I don't have the patience to create a circle in design space and then add one letter at a time to curve text.  I like to use curved text WAY too often for that, especially on all of these Christmas ornaments.


So I use phonto.
http://www.phon.to/
Phonto works on Android and Apple.  I use an android, so my screen shots are from Android.

Open that app.  Tap in the middle of the screen.
Choose Use Plain image
choose the first white box you see.  All you need is a plain background.
Click on the pencil at the top of the app.
 Type the first half of your text.  

(Helpful comment from an iphone user -   Just an FYI on the iPhone, no pencil image comes up. You swipe left once you type the text to find the ‘curve’ option.)


Now choose style, then click on the little arrow to the right of "Text Color"
   a menu will drop down, choose curve.

Once you get the curve for the top half of your circle, click on the pencil again, and add the bottom part of your text.  This time when you choose curve, move the curve negative - to the left.  


Once you have your text in a circle, you can click on the three dots at the top and choose share.  Most people use email  - I share mine to facebook messnger, sent to myself.  It just feels faster to me.

Then go to your computer, save the image, open it in design space.  I choose simple, then make sure to erase your background - don't forget to erase the areas inside the e's and a's..  

That's all there is to it!


Who, What, Where, When & How - 9/29/17

Who I am listening to; What I am reading, Using, Making ; Where I am traveling; and When New books are releasing or events are happening, How to's I discovered or used,  this week.

Who
I've been listening to John Grisham this week.  He did a 13 week book tour in podcasts.  It is fabulous.  Each week he is in a different bookstore, with different authors from the area of the bookstore, and they talk about the writing process, books, and all sorts of things.  Stop 13, with Lisa Scottoline, was one of my favorites - she's very funny, I definitely want to look for her weekly column.

What
My favorites were Seven Years in Tibet by Heinrich Harrer, All the Missing Girls by Megan Miranda, and The Madwoman Upstairs by Catherine Lowell.  (A lot of Bronte readers were disappointed by the book - but I am not familiar enough with the facts about Brontes to pick up on any discrepancies that would irritate me, and I thoroughly enjoyed this as a light read)  

Little Fires Everywhere started slow for me, and I almost didn't finish it.  I head John Grisham say, in one of his podcasts, that he gives a book 50 pages, and if he doesn't like it, he puts it down and reads something else.  I immediately thought I should move on from this book, then I looked and saw I was only 30 pages in.  I decided to give it 50 - and by then I was hooked and had trouble putting it back down until I had finished reading it.

Genuine Fraud was another one that I really liked a lot.  The book is told in reverse.  Week 9, then week 8...  and it was fun to see how things we thought we understood had different meaning when we heard what had happened earlier.  It kept me off balance, making it take longer for me to "figure out" the mystery.  I kind of loved it.  Some have said it's a pretty direct rip off of another book - The Talented Mr Riply by Patricia Highsmith.  I haven't read that, but I have added it to my to read list.

I have never read a Harlan Coben book I wouldn't recommend.  I love his books.  He was on one of Grisham's podcasts too - so I got to hear him talk about the book, and about his writing process, the same week I read his latest book.  I enjoyed that a lot.


From my goodreads list - what I have read in September:


Where
"Today's adventure was supposed to be a train ride to bike 25 miles on the Lehigh gorge. But they sold out before we got our tickets.  I try to push my knee a bit harder on our Sunday trips... so today we decided to tackle the red trail at Bushkill falls. 1267 steps. Not walking steps - 1267 stairs. It's not a bad hike at all - I'm just still really struggling with this knee. But it's progress - I could at least do this today!" - fb post from 9/24

We certainly have traveled a lot this month!  We have this HUGE shed project, and a zillion farm projects in progress.  But on Sundays, we do not do farm work.  To get away from all the work, and stress of the half done projects, we often take trips on Sundays.  These double as therapy for my knee (still recovering from MCL surgery - apparently recovery is not nearly as fast as I thought it would be).  So we take hikes and try things that I know will stretch me and my knee out of it's comfort zone.  This past week-end, we traveled to Bushkill Falls.  It was 90 degrees, but not so bad on the wooded trail.  That was a LOT of steps for my knee, but I did well.  

Afterwards we went to a geocaching event in NJ - but we were the only ones who showed up, besides the organizers.

I'm working on posts on all of our trips - this month alone we have taken road trips to Bushkill Falls, Wellsboro & The PA Grand Canyon, Worlds End & The Forksville General Store.


When
Coming Up - 
Fort Freeland Heritage Days in Watsontown Pa
Our sons wedding!

September Events In The Valley - 
http://susquehannavalley.blogspot.com/2017/09/events-in-valley-september-2017.html

How:

I made a vinyl decal for our mailbox, using Cricut.  Step by step how to here:
http://fieldsofhether.blogspot.com/2017/09/truck-mailbox-decal.html


What Do I Need To Get Started With A New Cricut?

What tools & supplies to buy, and what not to buy, when starting out with a new cricut.

If you just got a new cricut machine, you are probably wondering what else you should buy to go with it.  I know you are excited and want to have everything right away - but don't buy too much just yet.  Wait and see what projects you truly enjoy, and will be making the most of.  Because the supplies you need for making paper flowers are drastically different than the supplies you need for making t-shirts, and those supplies are different than what you need to make designs for coffee mugs, and those supplies are different than what you need to make faux leather earrings.....

The Basic Tools Most Everyone Uses At Some Point:

The Tool Set


Although I am often not a fan of cricut products (I have NO luck with their vinyl), I do recommend their tool set.  You can buy much cheaper weeding tools (a dental pick from the dollar tree, or a tool set from harbor freight) but personally, I prefer the cricut weeding tool.  Update - I ordered vinyl from htvront and it came with a free weeding tool that I like just as much, if not more, than the Cricut version.  But I still am glad I started with the cricut tool set - I've used all of the tools, frequently.


I've been meaning to try the pin pen - many rave over these as well, but I've yet to make or buy one.  


The Dollar Tree now carries a complete line of knock off tools, nearly identical to the cricut brand.  My only suggestion is to look for a metal scraper, like the one shown in the cricut tools, and not one with a plastic head.  I find that the metal one is much better for lifting paper from the mat.

A Fabric Tape Measure
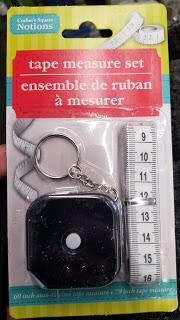


A fabric tape measure is the first thing I recommend to everyone with a cricut.  No matter what you are making, you are likely to need to measure it.  (Ok, maybe not for some of the paper projects...  but everything else.)  Making a t-shirt?  You'll want to see the measurements of your design on the shirt to see if it's the right size.  Making a cup?  Measure the space where you are placing the design...  etc.  You can buy this two pack at the Dollar Tree.  

Transfer Tape
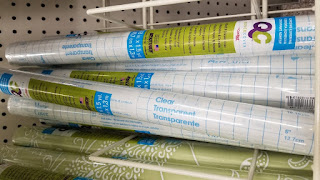


Transfer Tape is what you use to transfer your cut design onto the item.  Htv (which is used for fabric) comes with it's own transfer tape right on it, but if you are doing a design on a coffee mug, you will want to use 651 vinyl - and then you will need something to transfer the design.  

Here is an example of how to use transfer tape, step by step:

http://fieldsofhether.blogspot.com/2018/01/thrift-store-redo-simple-vinyl-transfer.html

While at the Dollar Tree, pick up a roll of cheap contact paper.  This is my favorite "transfer tape".  Which transfer tape works best for you will be trial and error, but at $1 a roll, this is a great one to try when starting out.  Pick up a roll of painters tape if they have it, while here too.


Other options for transfer tape:

  • Cricut Transfer Tape This comes by the roll and has a grid on it.  It's VERY sticky, and often if someone asks "why can't I get my design off the transfer tape?" it's because they used this.  This is, however, the BEST, and sometimes the only, transfer tape that works with glitter vinyl.  
  • Duck Brand Contact Paper This is one of the most popular choices for transfer tape.  You can buy it at Wal-mart, near the shelf liners.  It's a little thicker and stickier than the contact paper from the Dollar Tree.  
  • Painters Tape/Masking Tape This is great to keep on hand for smaller projects - it's one of the easiest ways to transfer small designs onto Christmas ornaments.
  • Press & Seal I've had NO luck with this method, but I see others rave over it.  If you have some on hand, it might be worth giving it a try!  
  • Craftopia Transfer Tape I have never used this one myself, but it comes up as a recommended option by others, repeatedly.  They swear it is the best.  :-)  I have great luck with the Dollar Tree contact paper, painters tape, and occasionally the thicker duck brand contact paper...  so I have never purchased this. You can find it on amazon, here.  
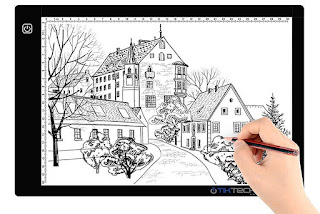

A Light  (Possibly A Light Pad)
As with almost everything, you will need to figure out what works best for you, and there are a lot of options.  Some people work better with a light underneath their design (like the cricut lightpad) while others work better with a light over their design, like an ott light.  And still others work just fine with whatever light is in the room.  

General opinion seems to be that the cricut lightpad is really not worth the money.  (Although some people think they are the best thing ever - so again, it depends on your preference!)  Other options, if you like light under your design, are to make your own light box with a rubbermaid container and a light inside.  Crayola makes a lightbox for kids, that I've seen a lot of people use with their cricut.  And there's a much cheaper lightpad option on amazon that seems to be the most popular choice.

I bought the amazon option, but for me, I found I much prefer a good overhead light.  I love the Ott lights.  In my cricut craft area (part of my laundry room) I use a shoplight from Sams club.  It's one of my favorite things - although again, it's not something that would work for everyone!

Mats - 
I made the mistake of buying my mats on sale at Michaels.  They are MUCH cheaper at Wal-mart and on Amazon.  (A 2 pack of standard grip is $8.39 currently on Amazon) 

Again, what you need will vary drastically from person to person. I find that I use the green mats the most, and I have about 6 of those...  When first cleaned and super sticky, they work with the faux leather.  When they have been used quite a few times and need cleaned, they work well for paper.  But I work mostly with vinyl - so the green mats are what I would expect to need the most in general.
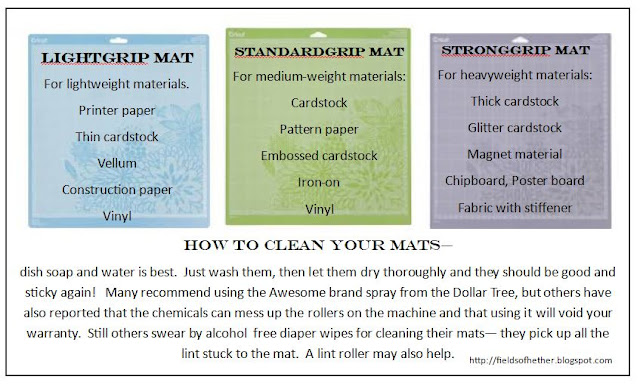
There is also a pink mat for the maker, for fabric.

These Nicapa Mats are the one I buy most often.  Watch for them to go on sale, 3 mats for $7.99.  https://amzn.to/3F32Dvk
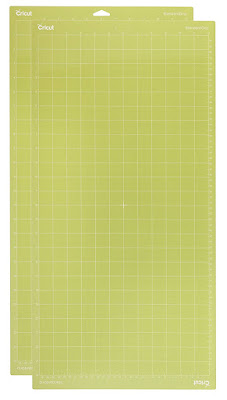

Eventually you may want an extra long mat as well.  They come in 24 inches long, for longer projects.  And if you cut a lot of really large items, you will want to research "off the mat" projects.  Apparently cricut CAN cut without a mat - although I've never tried it myself.  I've "needed" the longer mat exactly twice in the last year, and I make hundreds of items.  You can use them for smaller projects, so it won't go to waste if this is what you buy, 

SVGs

Svg - Scalable Vector Graphic.  Svgs are what the cricut most commonly uses.  It will have each color in a separate "layer" and will resize without making rough lines.  


Some cricut users LOVE cricut access and gladly pay the fee to have access to some of the designs built right into the software.  Cricut access allows you to "rent" many of the designs in design space.  If you stop paying the fee, you will no longer have access to those images.


I am cheap.  I prefer free, and luckily, there are SO MANY free options for free svgs, that I have never had any need to subscribe.  


I have a long list of good sites with free svgs here:

https://fieldsofhether.blogspot.com/2018/11/where-to-find-free-cut-files-for-cricut.html
and here's more about where to find free svgs and how to use them:
https://fieldsofhether.blogspot.com/2018/12/freebies-for-cricut-how-to-use-design.html


A Note About Etsy
While there are some great, reputable, designers on Etsy...  there are a lot of others too.

A few months after buying my cricut, I saw a post on a facebook group from a designer who had shared an svg freely in this facebook group, but asked that it "not be sold".  I assumed she meant do not use the svg to make shirts to sell.  No.  She meant please do not take the free svg that she made and upload it to Etsy and sell the svg to others.  I figured this  out when it actually happened.  Someone took the design she had made freely for a member of the group, and uploaded it to Etsy and sold it as their own.

And then I found out that that is SUPER common.  I had actually purchased two designs from Etsy that I later learned were not made by the person selling them.  One was taken from a free svg site and resold on Etsy, another was stolen from a facebook group.


I know - unbelievable, isn't it?  But it is very, very common.


Here's another common Etsy problem.  If the design is Harry Potter, or Disney, or an NFL logo...  they do not have the legal right to sell the image, even if they created it.  How you feel about that, and what you do about it, is a personal decision.  But you should know that just because you bought a Disney design "with commercial use license" on Etsy, you do not have the right to make a shirt with that design and sell it - because the Etsy seller did not have the right to make the design and sell it to you.  Those images and designs are copyrighted, and the licensing fee to be legally allowed to use them is so astronomical, and so rarely even granted,  that anyone paying for that license is extremely unlikely to be selling in an Etsy shop.  


Fonts
Fonts are installed on your device, and then can be used in design space.  There are millions and millions of great free fonts!  For those who are completely new to this, I have a very detailed step by step on how to download fonts and use them in design space:
https://fieldsofhether.blogspot.com/2017/12/all-about-fonts-text-in-cricut-design.html


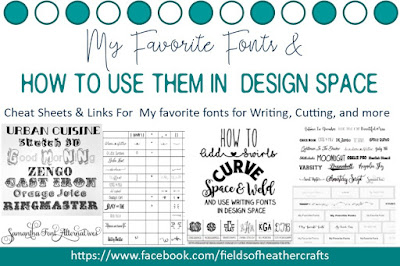
Here's where to find a list of my favorites, with cheat sheets on how to use them:

Paper - 

 There are so many great 3d paper projects you can make with cricut (including beautiful paper flowers!)  - I keep a list of free svgs for making them here:


I tend to buy my paper from Hobby Lobby, locally that is the best selection for me. It's typically 40% off every other week.  Sometimes I buy from Michaels too, but the sales have not been as good, and our local stores selection has been disappointing.  However, Michaels is the only place locally I can buy 12x24 cardstock - not that I use that often.

Pens

My favorite pens for the cricut (no adaptor needed) are currently  the Jot markers from the Dollar Tree!  Really - they work great, are super cheap, and fit right in the pen holder the same as the cricut markers.  


I have samples & Examples and a long list of others that are reported two work well, here:


Iron, Heat Press, Or Easy Press

You will need a heat source of some type, if you want to apply htv to fabric such as a design on a t-shirt or pillow.  If you ask on any facebook group, you will be told that you absolutely have to have a heat press.    And if you do want to use an iron, you will have to "stand on it with all of your body weight" .  (No, no you do not.)

I don't sell my items.   But I can tell you that I have successfully made hundreds of shirts now (we have a huge family) with no problems, with an iron.  And it does NOT require that much pressure. You have to press, yes, but it shouldn't make your arms hurt.  You definitely do not need to stand on the iron.  I also do not wash our shirts specially - they are tossed into the regular laundry and just washed and dried with everything else.  

I can't imagine telling my daughter in law that the shirts I made for my grandsons have to be turned inside out and never put in the dryer... she has her hands full enough with those boys as it is!  They hold up great.  I have some that have been washed dozens of times now - no problems.  

Since the iron works so well for me, I've never really even looked at the easy press...  but I have heard so many say that it's really just an iron, and that if you are going to spend the money, that same amount would buy you a heat press.  I really don't know..


 Vinyl - 
You don't  need vinyl if you are only doing paper projects, but most of us who buy a cricut also "need" vinyl.  There are different types of vinyl, and many, many places to buy it.  It can be a bit confusing.  It is much cheaper to buy online, and no matter what you buy, you likely will "need" something different every time you find a new project.  But if you start with a black and a white, it's very likely you will use them somewhere and they won't go to waste.  

"Blanks" - The Things You Put Vinyl On
 A quick trip to the Dollar Tree will be great - you can find all sorts of "blanks" to get started on.  Coffee mugs, pot holders, etc.  I have a list here of Dollar Tree projects I have made, and suggestions for what to look for when shopping there:


T-shirts are often cheap at Michaels on Sale.

Your local thrift store is also likely to have a lot of great items you can practice on!  

Apps


There are a variety of apps & websites that will help  a lot when using Design Space!  Especially sites like Wordmark.it that will show your text in every font installed on your computer, and the utility FontLab Pad, which will properly read and display system fonts and save them as svgs (Design space cannot read font kerning properly, and will not space/connect script fonts properly)

Tutorials
The quickest way to figure out exactly what you need, is to choose a project, then list the materials.  Most people LOVE youtube for cricut tutorials.  I have no patience for youtube myself, and prefer step by step tutorials I can read through, so when I make a project, that is what I do - I list the step by steps and walk through exactly how I did it.  I have those all listed here: https://fieldsofhether.blogspot.com/2018/10/heathers-cricut-tutorials-step-by-steps.html


https://fieldsofhether.blogspot.com/2018/03/cricut-dollar-tree.html
The Dollar Tree is a great place to start.  Practice on items that only cost $1.  


I hope that helps you get started!  If you are looking for more, I keep an index of my posts here:


You can find me on facebook here:

==================================================


Pin This:


How to Make a Chalkboard Graphic


I'm going to assume you already have a basic knowledge of some sort of graphics program.  Gimp is free.  I use Paint Shop Pro - because I have used it for many years, and I lack the attention span (& budget!) to keep up with photoshop.  

First, The Background.
  Thank you google image search....


These sites also offer free downloads - 


Next The Fonts:

This site has links to all of the fonts on the poster above
(most of my favorites are on her list, so I didn't see any sense in replicating it. Plus, she did it better than I would have.)

I personally recommend going to Dafont and downloading just about everything ever created by Kimberly Geiswein.  I can't believe all of these gorgeous fonts are free.  
http://www.dafont.com/kimberly-geswein.d1468
Some of my favorites:
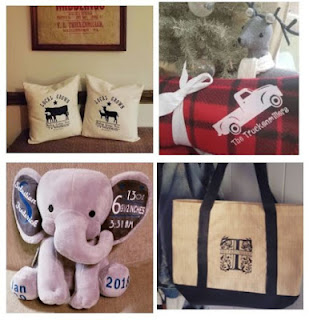
Installing new fonts is super easy.  In most cases, you can unzip them, open 
Control Panel\Appearance and Personalization\Fonts 
or in your windows start menu, search "fonts"
Then copy the fonts and paste them in the font folder
If you have a graphics program open, you'll probably have to close it and restart it for the new fonts to appear.
If you need more detailed instructions:


Then, The Dingbats:
All those banners & frames?  Even mustaches and animals, or cars, or whatever... they can be found in dingbat fonts.
I'd start with:

KG Flavor & Frames
That will give you all sorts of banners and buntings to work with

But the options are pretty endless.  Use google and search for things like "snowman dingbat font", etc.  KG has several varieties of frames. I've downloaded them all.

Those who are pretty serious about this stuff use software to organize their fonts, or they print them into a binder. Me? I google the dingbat font I'm using to remember which letter/number = which graphic.  Probably not the best way, but it really is the easiest.  :-)

Organize with Software:
http://fudgeandjoy.com/crafting-2/how-do-you-organize-your-fonts-download-available/

Organize In a Binder:
https://thefrugalcrafter.wordpress.com/2010/09/13/dingbats-for-dummies/

The graphic above, for KG Flavor & frames, does not show all of the options - just a good sampling of them.  


Some Examples:

(Have I gone 10 minutes without mentioning that I have a gorgeous new grandson?  Let's rectify that quickly!!)