Paper Crafting Easter Projects - And Where To Find Free SVGS For Them

 Where To Find Free SVGS for Paper Easter Baskets, Layered Easter Mandalas, and more Cricut & Silhouette Easter Projects You Can Make With Paper

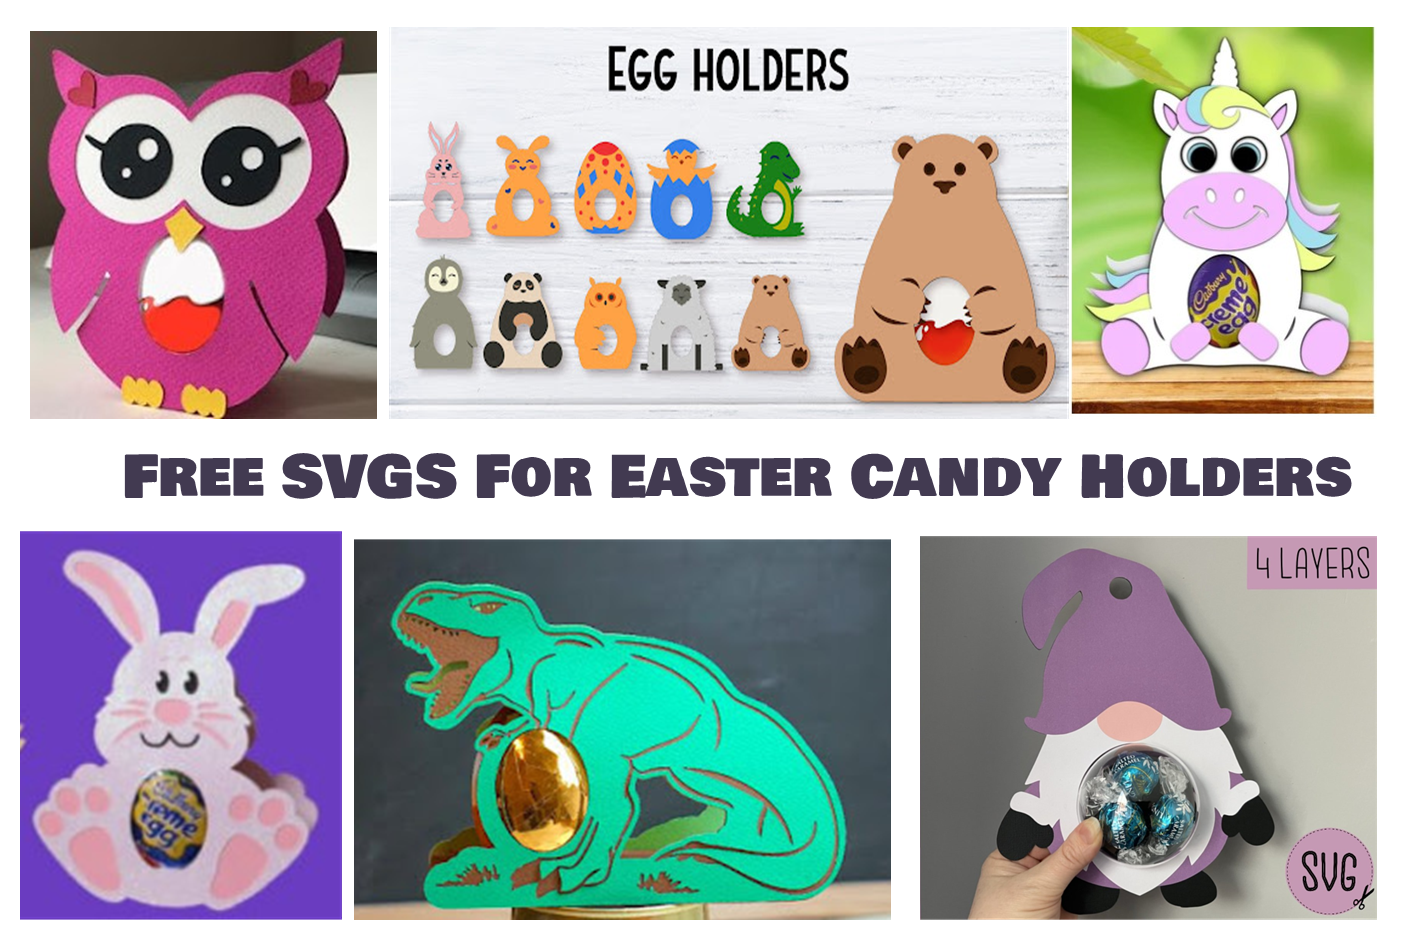
DISCLAIMER  - NOT ALL OF THE DESIGNS SHOWN IN THE ABOVE PHOTO ARE FREE! These were just some of the ones I made in 2021.  There are dozens of free ones on this list, but at the bottom there is also a section of NOT free designs.

Related Links:
===========
MORE FREE EASTER SVGS
==============


Bunny Box


Click on the photo to download - 


=========================


Quick Links:

==========================

==========================

To See All Of My Latest Free SVG Finds, 
Join Cricut Tips, Tutorials, & Free SVGS
There you will find themed posts with all of the latest links in the comments
And you can share your projects, tutorials, and ask questions there too!

Where To Find Free Egg & Candy Holder SVGs


Where To Find Free Egg Holder, 
& Other Easter Candy Holder, SVGS

If Your SVGS Turned Into Edge Icons - Don't Panic


If your svgs now look like the Microsoft Edge Browser—Don’t Panic!

Nothing has actually changed, your svgs are still svgs, and they can still be uploaded the same as always.  All that has changed is that in the windows made Edge the default option to open the file when you click on them.

For a look at what files typically come in a download, and what they all look like, see the quick tip here: https://fieldsofhether.blogspot.com/2020/07/quick-tip-svgs-look-like-html-files.html

If you right click on any svg and choose properties, you can change the program svgs open in. You can not automatically open an svg in Design Space—it has to be uploaded.

Don’t forget—there’s an extension that allows you to see previews instead of the browser icon, too!


=============

An Index Of My Quick Tip Cards
Also a slideshow of them, & A printable pdf version

==================


Making A Spiral Betty With Cricut


Spiral Betty projects with cricut are so much easier than they look.  A website creates the photo for you, and then the eraser tool removes the white in one click - quick and easy!  Here's a step by step with a couple of tips:

The website is:
Upload your photo, then choose the black and white option, second from the left, at the bottom of the screen.  Although you can cut this from any color of vinyl, here you will want to choose the black and white option, to get the clearest cut lines.

There are 4 options you can play with, but be careful here.  
Try to keep the "Rings" option at the half way mark or under - so move it to the left if you want, but moving it to the right will make the file much larger, and it's already a huge file.    Same with contrast - the darker you make it, the more problems you may run into.  

When you are done, click on that little download arrow to the right of your image, and it will download as a jpg.

Now upload this to cricut Design Space.

When prompted, choose Complex

I really thought this would be a pain to clean up, but it's not - just one click with the wand (all the way on the top left in this photo) and it erased ALL of the white.

Save as a Cut Image.

Here is my image as it looks in Design Space, resized to 6 inches wide.  Note that it is darker than the original, because I have made it smaller.  Keep that in mind when playing with the contrast option early on.

You can cut this from either regular vinyl, or htv - but HTV will be much easier to weed and transfer.  

=======================