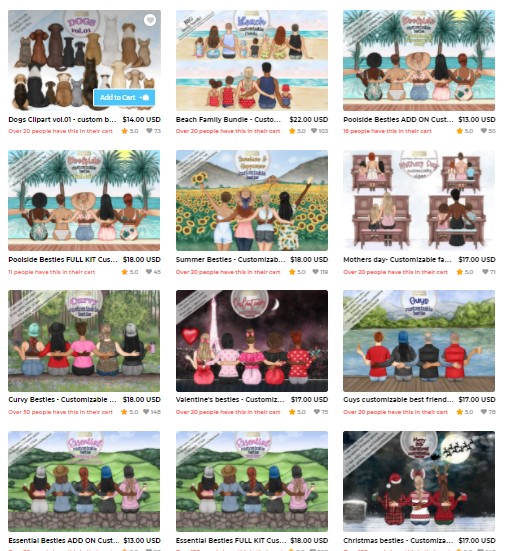
Mix & Match Family Illustrations

 
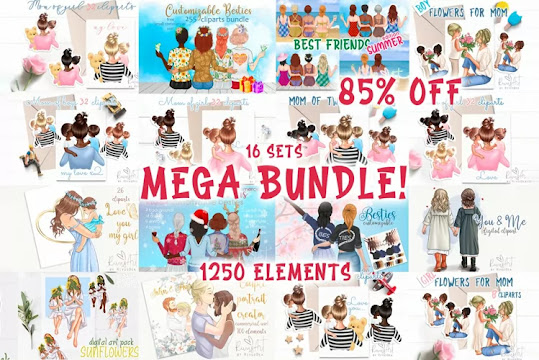
Have you seen the customized Family, or Besties, Ornaments, and wondered how they were done? 

It's really pretty simple.  The graphics sets come in pieces. 
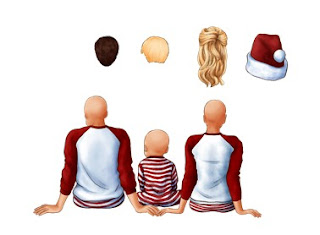
 You upload hair, bodies, and outfits or accessories, all separately, then layer them together to create the combination that represents your family, or friendships.

Although you can upload each individual element to design space, it's tedious.  It's much easier to add all the images to any other program - Microsoft publisher or even word will work, it doesn't even have to be a graphics program.  Then once you have your design, either save it as a jpg or if that is not an option, screenshot and crop your image.

If you want to add a background scene, and the package you downloaded did not come with one, do a google search for Free Christmas Digital Wallpaper designs.

These are meant for print then cut [which includes sublimation] only - they are not suited for layering in vinyl.
Many of them come with backgrounds that make them perfect for designing your own personalized Christmas Cards


Or you can just add text, and use no background at all.


What is included in each set varies greatly.  Some have limited hairstyles.  Some have limited body shapes.  Some include animals, some include backgrounds.  Look carefully at the description and included preview photos, before purchasing, to know exactly what you are getting.


They come in all seasons and occupations - from military and nursing, to graduation, summer, and Halloween.  I've listed a variety below, including some designers that tend to make a lot of these packages.


================
Although most of this blog is lists of where to find FREE svgs, these are neither free, nor are they svgs.  Occasionally there will be a set of these illustrations offered free for a limited time, but it is much more rare to find these.  They are almost always pngs - perfect for print then cut projects.


This one is just $2 right now, and includes a Moose


This one includes dogs


This one includes angel wings


===============
HALLOWEEN
=============
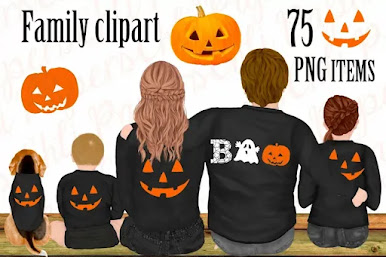
Halloween Families

Halloween Besties


==========
DESIGNERS
============
Pony has a large selection of simpler designs, with curvy versions included
https://designbundles.net/pony/best-friends-clipart-family?ref=mno4va

Chili Papers has a lot of options.  When searching their store, try searching Friends, or Family, to narrow down the search results.


This shop has one of the largest selections I have seen



On My Desk 10/9/21 - Halloween Paper Crafts

 
On My Desk The Week Of 10/9/21 - Halloween Paper Crafts

Throughout the week, I post what I am working on on my facebook page, along with notes on what worked, and didn't work, for me when making the project.  Occasionally I will then copy all of those facebook posts into one blog post.

Quick List Of Where To Find The SVGS:
Jointed Witch [CF]
Jolly Jointed Pumpkin  [CF]
Cats Meow Tea Lamp [ CF]
3D Haunted House [FREE svg]
Paper Halloween Lanterns [FREE svg]

For scale - and because I just loved seeing these all lined up together on my desk.  :-)
The house and lantern are both about 12 inches tall.  Winney Witch is closer to 15 inches.

From Shadow Box Design to Charger Plate Sign - Using Slice In Design Space

Turning a shadow box design into a circular design that will work on a Dollar Tree Charger Plate.  [See more Dollar Tree Charger Ideas Here]

 Or as the "O" in a seasonal Home Sign.

This particular svg had been on sale - it's $7 normally.

The same basic concept will work with any shadow box design.

For this design, there are squares at the bottom for the lights to run through, when used as a shadow box.  I used the contour button to remove those bottom rectangles.


The charger plates I have currently have an center circle of 8.25.  So I wanted my finished paper cutting to be 8.25 in diameter.

In Design Space, I created one circle 8.25 in diameter, and then I sized the original shadow box design so that the circle would slice a nice "rim" around the design. For this specific svg, I resized the shadow box design to 9.926.  

Next I duplicated the circle. Then I selected both circles, duplicated again.  Then I selected all 4 circles and duplicated again - giving me 8 8.25 inch in diameter circles.  I needed 8 for this project, because there are 8 square layers that need sliced.

At the top of the screen (on a computer) choose select all, then align/center

More about using Align in Design Space:

Now over in the layers panel on the right, while holding down the cntrl button, select one square layer, and one circle.  That will select two items.  If only one item is selected, or more than 2 or selected, the slice button will be greyed out.  You can only slice when two items are selected.  Exactly two.

After you slice, you will have a bunch of extra pieces labeled "Slice Result"  Delete all but the one you want to keep.  If you look at the layers panel in the photo above, I selected three images to delete, saving the blue circle to cut.

Repeat this for each layer, until you are left with only circles.


The circles cut, and laid out in order for assembly.

For my ceramic floor tile Home Sign, I cut the design at 4 inches in diameter.
Here's a step by step tutorial for the making the  home sign, and lists of free svgs for each season:


Tool Talk Tuesday - The Tools I Prefer When Working With Cricut

All of the "Tool Talk Tuesday" facebook posts in one long list.  

Some of the crafting  tools regularly found on my desk

See My Amazon "Favorite Craft Products" List here:

On My Desk 9/8/21 - Layered Paper Fall Designs

 My intention is for these to be strung together as a fall banner - but I have not gotten quite that far yet.  :-)

This is the first time I have used textured, and pearlized, papers in layered svgs.  I combined regular cardstock (I most often use Recollections brand from Michaels) with 12x12 cardstock I bought in packs at Hobby Lobby.  I love the dimension and shine the "fancier" papers add to these designs.

The Pumpkin Sunflower Mandala is a free svg from:

The Sunflower is a free svg from:

The layered crow mandala is a free svg from:

The layered mandala Scarecrow Gnome is not a free file, but if you purchased the Gigantic Halloween Papercut Bundle in the August $1 deals, he is included in that bundle:

You can find him available for purchase on his own, here: https://tinyurl.com/mhw7kvcr

==============


New Book Releases September 2020

 
New Book Releases, September 2020
The Books I'm Adding To My Fall To Read List

Quick Tip - Screenshot the colors panel

Tip - When I'm cutting projects with a lot of layers, I sometimes open the color sync panel on the right, make sure I combined as much as I could, and then I take a screenshot.

Then I click make it, and sort out my cardstock. The screenshot helps me to decipher subtle shade differences that can be difficult to figure out from the "make it" screens.

A lot of these complex mandalas - especially from Okadee - have SO many shades. I don't always have that many shades of one color in my cardstock collection.

Often I can combine a few - especially when combining projects. For instance, that scarecrow originally had more brown layers. When I looked at the color panel, I realized I'd like him to have more orange, so I drug a few pieces to the same colors used in the pumpkin.

If I didn't like a change, I just clicked the undo button. This project still has a LOT of colors, but it's more manageable than when I started.

Jennifer maker has a long post on how to change your project colors so they cut in the order you want them to cut - but that is too confusing to me, I want the mat to show me what color the pieces should be, so if I want to cut out of order, I simply click on the mat (from the cut screen, after choosing make it) and it cuts whatever mat is selected. The chart above tells you which order cricut will use when sending the project to the mat. It starts with the white and works to purple.

================

Thirty - A Dice Game


Thirty

Objective: To be the last person with points left, whilst attempting to knock the player to your left out of the game.

Equipment:  6 dice, Pen and paper for scoring    Number of players:  As many as you want

Game play:
Every players starts out with 30 points. The player takes the 6 dice and rolls them with the primary objective of scoring 30 or over. With each roll, the player must set aside at least one die, but is allowed to set aside as many as they wish. The play continues until all 6 dice have been set aside, and then the face value is added up to determine the total for that player.

If a total value of 30 is achieved, the player scores 0 points, and the dice are passed to the player to the left.

If the total is LESS than 30, the player will subtract that number from their own points, and then the dice are passed to the left.

If the total is MORE than 30, the player takes all 6 dice and rolls again. For every die they roll with the face value being the number of points over 30 they had rolled, the die is set aside and the player to their left gets those points subtracted. This continues until for as long as they continue to roll dice of the correct number. Play then continues to the left.

Example:
Player A rolls the 6 dice to reveal 6, 6, 5, 2, 3, 4
He sets aside the two 6s and rolls the remaining four dice to reveal 4, 1, 1, 2
He MUST take something from each roll so he sets aside the 4
On his next roll he reveals 6, 5, 1 so he takes the 6
He rolls again and reveals 5, 2 and takes the 5
On his last roll he manages a 4 and sets it aside
The dice set aside are 6, 6, 4, 6, 5, 4 to give him a total of 31 points.

Player A now takes all 6 dice again to attempt to roll as many 1s as he can. For each 1 he rolls, Player B to his left will get 1 point subtracted from his total score.

Player A rolls 6, 2, 4, 5, 1, 1 on his first go and sets aside the two 1s
On his second go he rolls 3, 6, 1, 4 and sets the 1 aside
On his third roll he has 5, 2, 5, 3 and as he has no 1s, his turn is over. Player B subtracts 3 points from his score which are written down on the score sheet and play passes to him.

Player B is not so lucky. After his rolls, he has ended up with a face value of only 28 points. As he is under 30 by 2, those 2 points are subtracted from his previous score of 28 to leave him a total of 25 points. Play continues to his left.

Player C is relatively lucky after his rolls, he scores a face value of exactly 30, which means he does not subtract any of his points, but he also does not have an opportunity to subtract points to player D on his left. Play passes to player D.
In this way play continues around the table until game over.

Game Over: When a player runs out of points he is out. The game ends when everyone has run out of points except one person, and he is the winner.

======================


Card Game Storage - Free svgs

 
Cosmetic bags make great storage for our favorite card games.  
Download the SVGS For The Bags In One Zip File Here

Printable Hand & Foot Rules, Cheat Sheets, & Score Sheets

 
The Hand & Foot Card Game is a variant of Canasta. It is typically played with 4 players, two teams.  But up to 6 can play, using one deck of cards per a player.

Download a pdf file of rules, cheat sheets for the players to keep track of the rules, and scoring sheets, here:   https://drive.google.com/file/d/19LVdLgJxNRD_F8x8abO5Cn7BDHsVPA8X/view?usp=sharing