

Making Felt Roses With Cricut & The Rotary Blade
This is what I bought the Maker for. Well, projects like this at least. I've been able to cut just about everything with my Air 2 - except felt. For felt, you really do want the rotary blade, which means, you have to use a Maker. The Air 2 cannot use a rotary blade. All the frustration I've been through with trying to get a Maker that works (THREE machines. it took me THREE to get one that works - and I'm not convinced this 3rd one truly works as well as it should.. but at least it works.) And I've barely made anything at all with felt.
It's time to change that. I started with an easy one - felt roses. These are really quick and easy to make!
Materials:
- Free SVG
- Red Felt - I cut two out of one 9x12 sheet, with plenty of scrap to spare.
- Green Felt - just a scrap really, for the leaves
- Floral tape & a skewer were what I used for the stem - but years ago, cut by hand, I used twigs,
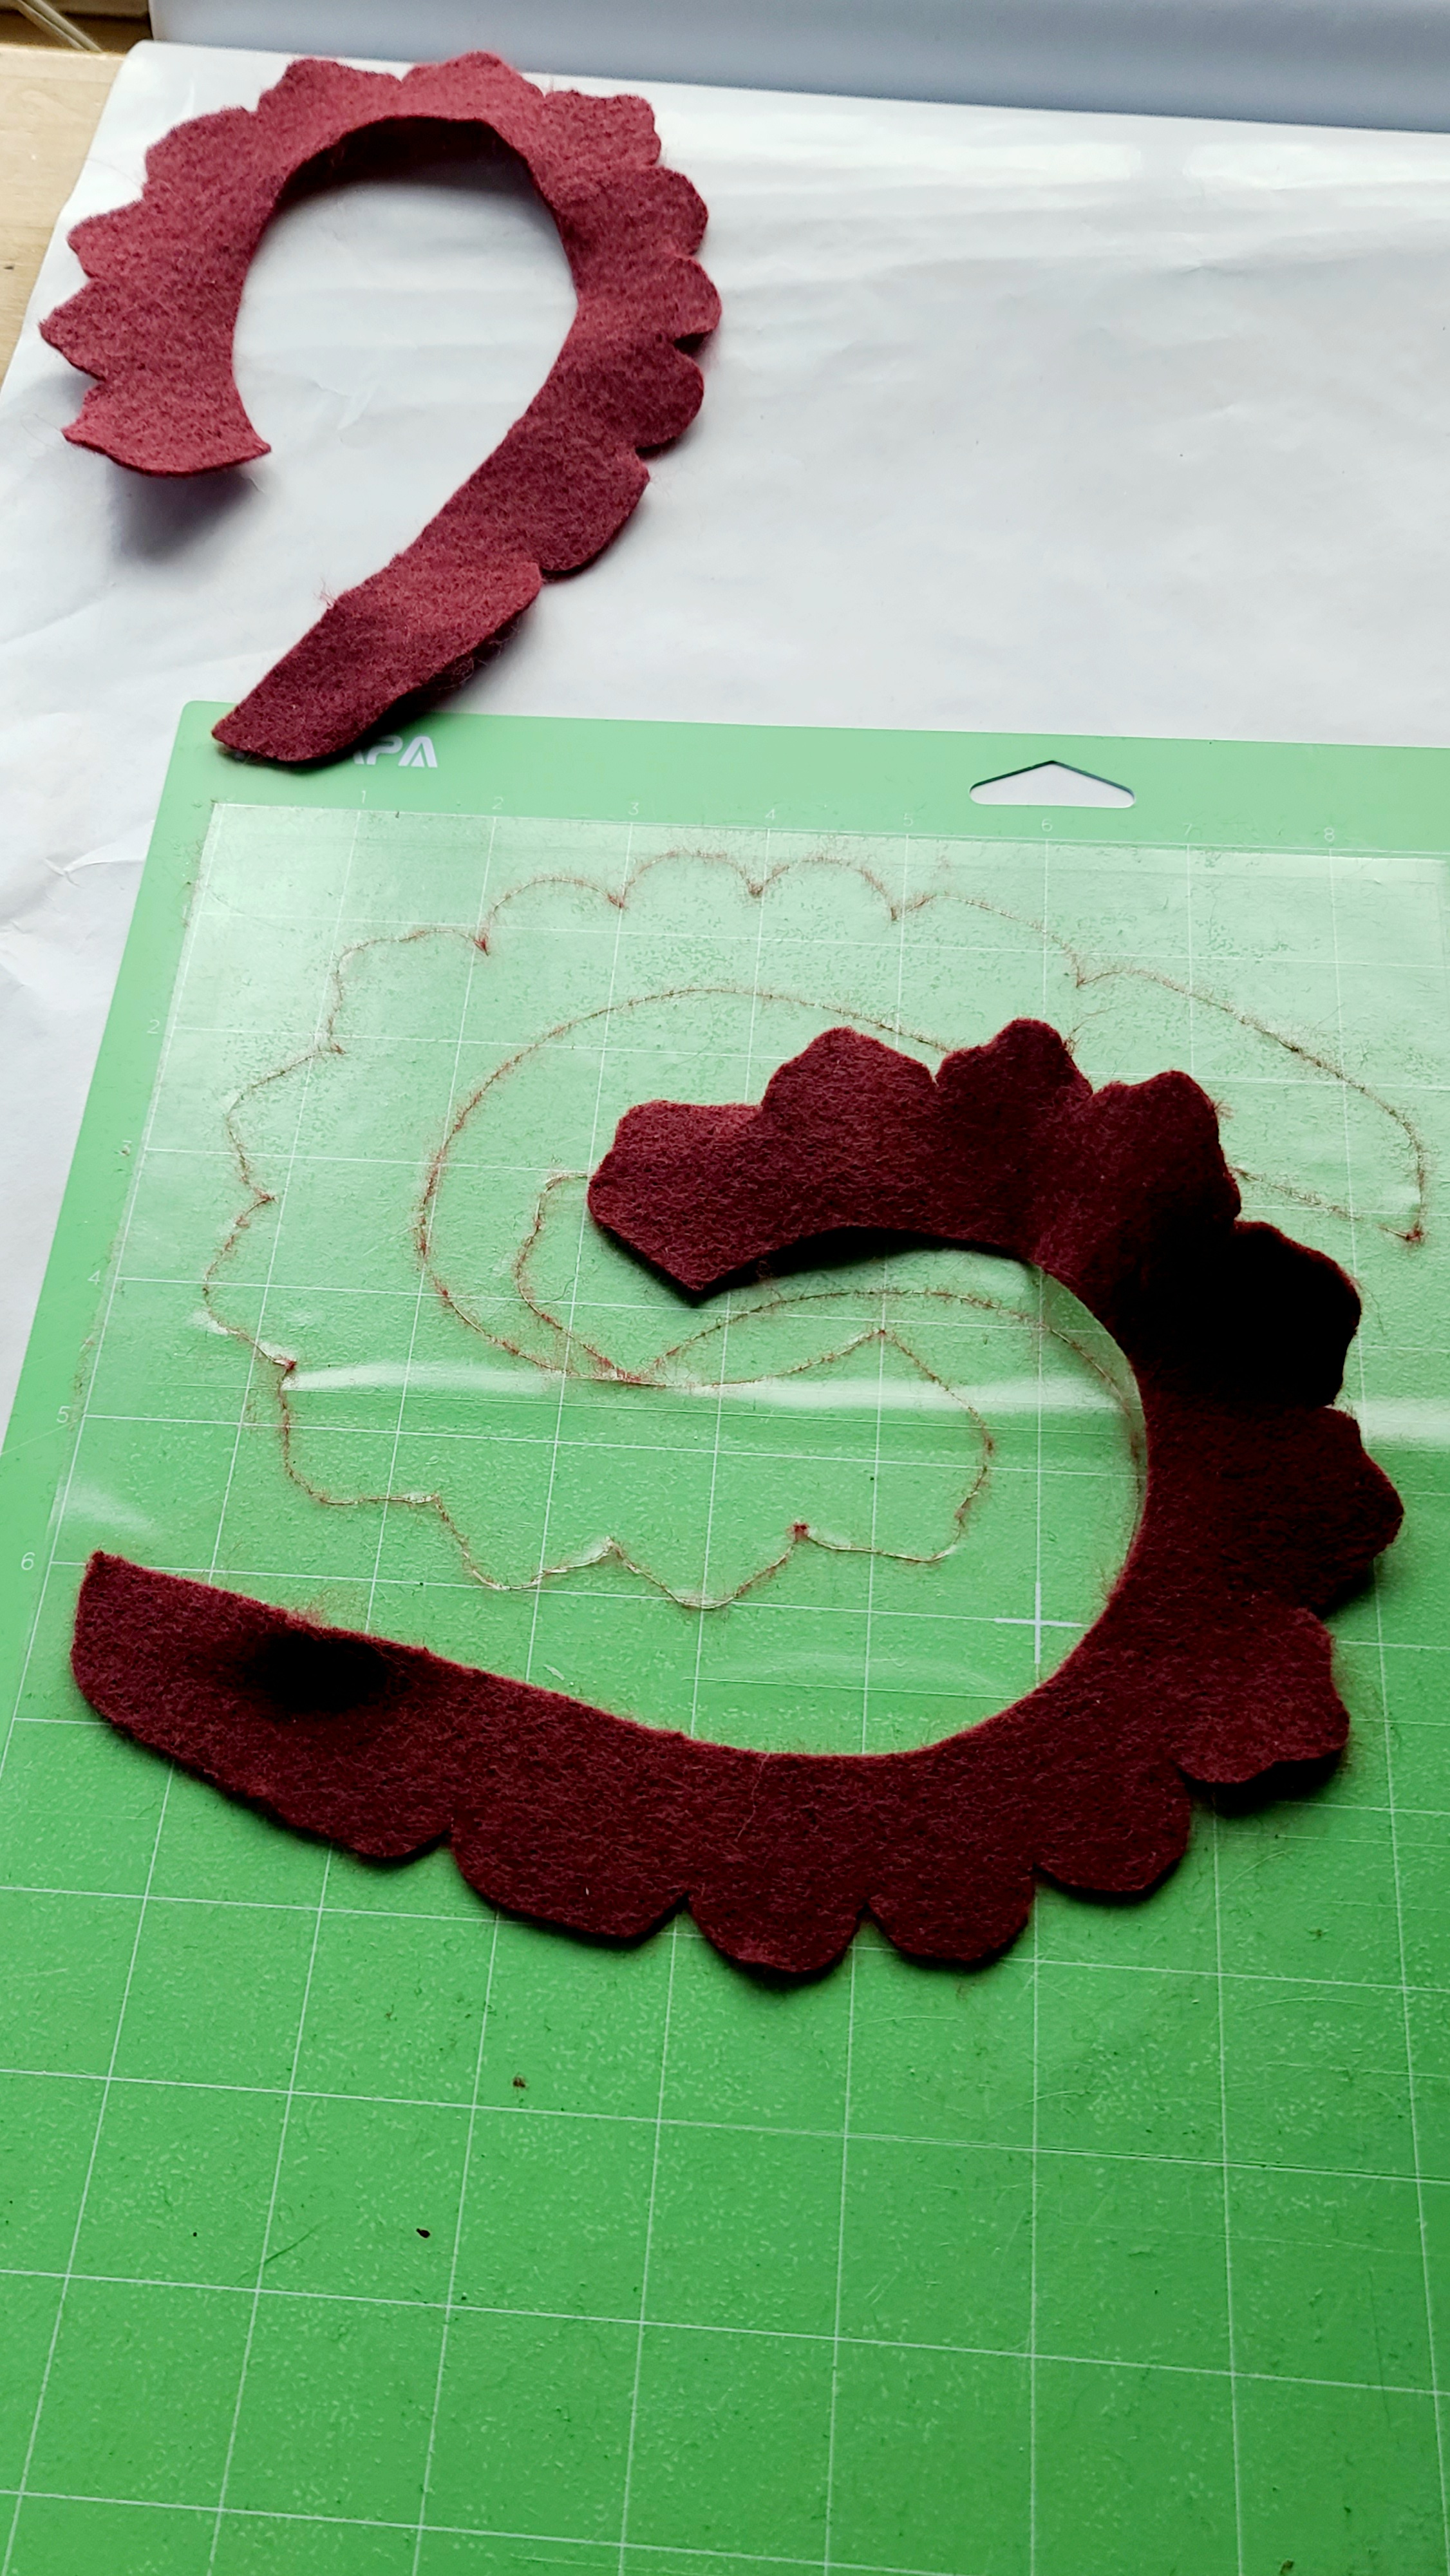
There are a variety of free rolled paper flower svgs that work great with felt. But for this, I went back to an old design that I like it a little better, for roses, and a fully circular design. I converted the pattern to an svg,

This svg is for two roses.
When it uploads in cricut, it will likely be smaller than shown here. Resize the entire group to 11.98 wide for the size I made in these photos.


I put contact paper on my mat when cutting felt, to make clean up a bit easier.
I used this same mat, with the same sheet of contact paper, for ALL of my roses - you can use it over and over. Standard felt sheets are 9x12. So I cut a 9x12 sheet of contact paper, placed it on the mat with the paper side up...

Removed the paper backing and stuck the felt on the contact paper.
When you click "Make it" in Design Space, choose "Felt" as your material.
For some unknown reason, the software will then tell you it recommends the fine point blade. ??????
That's nuts. A fine point blade will not cut felt - at least not well. If it would, I would just use my Air 2.
Switch the tool setting to the rotary blade, and insert the blade into the machine. For some cuts I have to switch the setting so that it cuts with more pressure, but these cut great on the felt setting with the rotary blade.
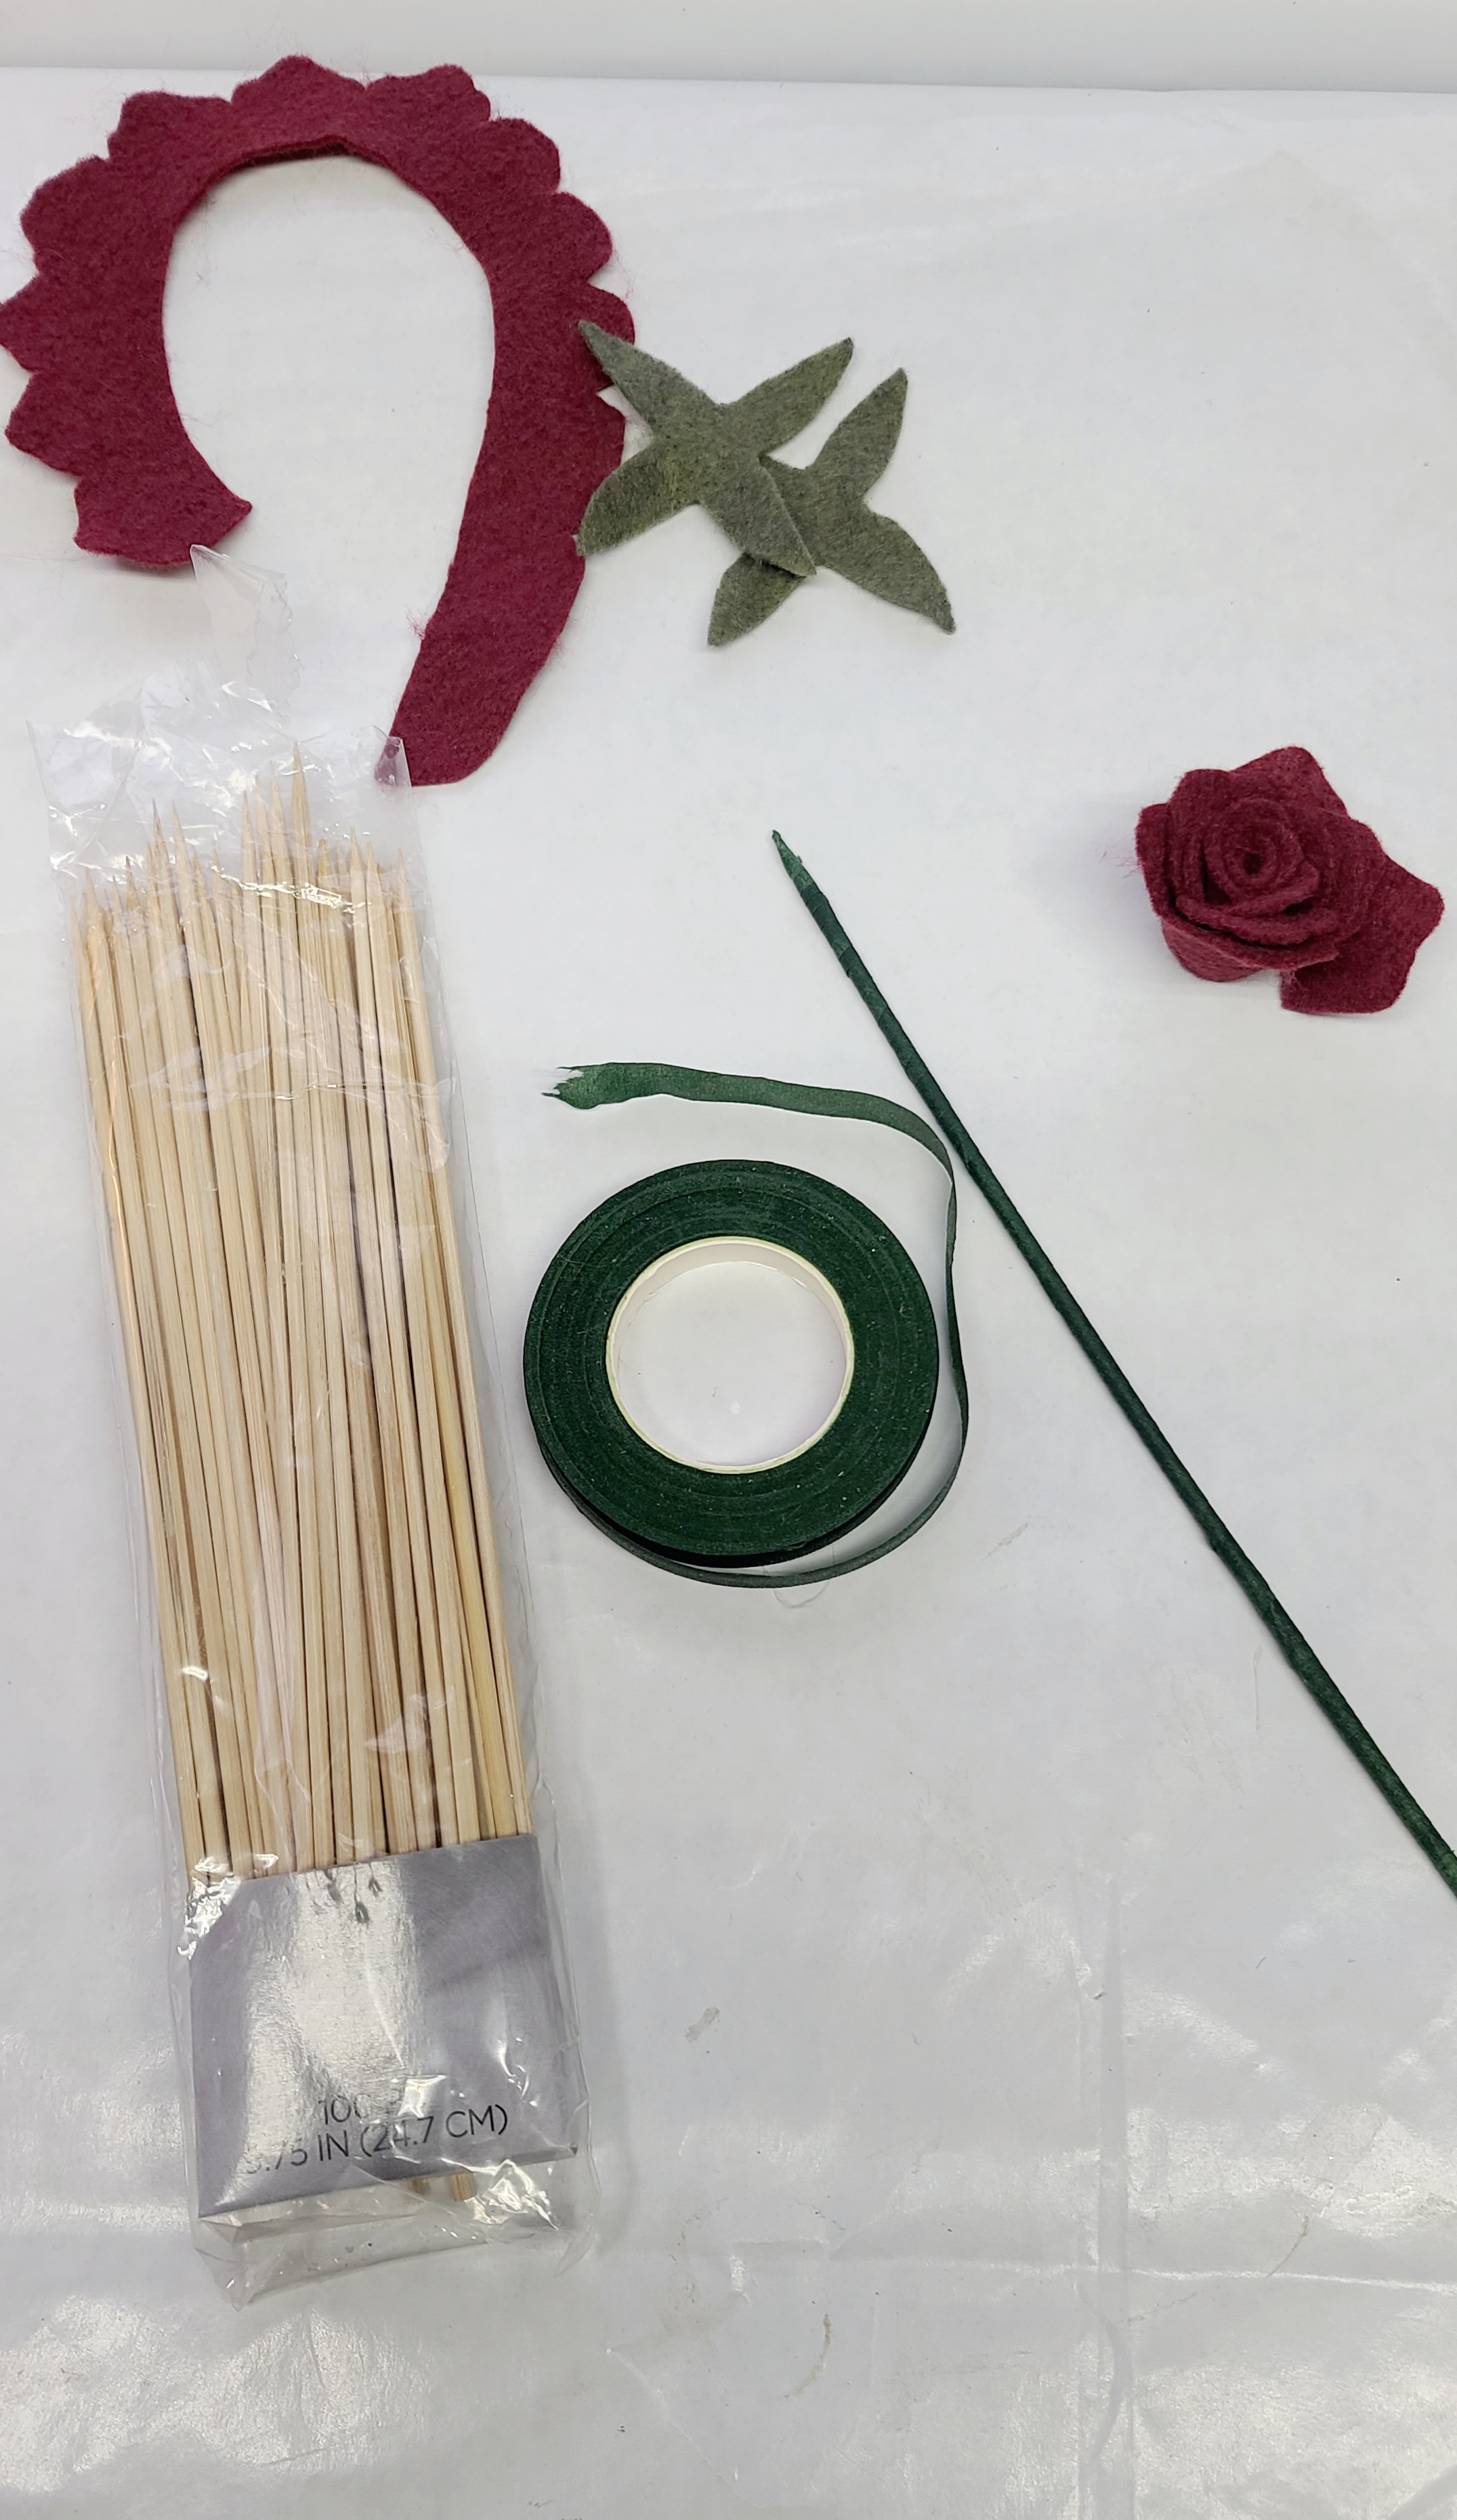
For my stems, I wrapped wooden skewers in floral tape.

Then poke the skewer through the leaves. The cricut weeding tool can be poked through the center first, to make a small hole, if needed. You can have cricut cut a small hole in the center of these, but I don't do that because I am never certain how large I want the hole to be for my stems. I like the leaves to sit tightly on the stem with no gap, so punching a hole worked best, this time.

Next I hot glued the tip of the stem to the tail end of the flower.

Roll from the outside in. When it is all rolled, use hot glue to attach the outer edge.

Then pull up the leaves, and glue them to the rose sides.

You can pull on the petals and fluff them out, or roll them down, for different looks - or keep them rolled tight, for rosebuds.

The off white filler stems are super quick and easy - and I don't even bother with cricut for these.

Just take a scrap of felt - this was about an inch wide - maybe an inch and a half? And about 9 inches long. Fold it in half, and cut through the fold, almost to the edge, but without cutting it into pieces.

Hot glue the end to a stem, then roll the felt down the stem.
This same cut will make great centers for other flowers, so if you find your piece is too long, just cut off the end and save it to use as a center later.

Good
ReplyDelete