
 |
| Step By Step How to Make A Card & Envelope, & How To Address Envelopes With Pens In Cricut |
We're half way through the 12 week Christmas Challenge! If you have completed all of the lessons, you now know how to use pens in cricut, how to apply a vinyl decal, how to layer, how to use htv, and more! Find the index of previous lesson here: https://fieldsofhether.blogspot.com/2020/10/the-12-week-christmas-craft-challenge.html
This week we're back to paper and pens, learning about card making, and specifically addressing envelopes.
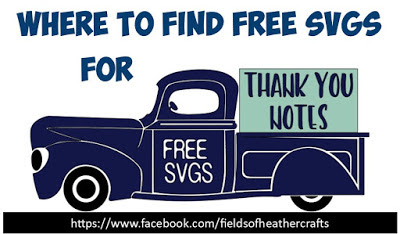
For "Choose Your Own Adventure" section this week, there's a section of free svgs for making Thank You notes.
As always, I'd love to see what you make! Join the group for this page to share your progress, ask questions, and be absolutely inundated with free svgs, posted by themes. :-) Join The FB Group For This Blog By Clicking Here
For which vinyl to buy, I have a list of my favorites, and price guidelines, here:
============
Step By Step
Making Cards & Addressing Envelopes
=================
Supplies:
- Cardstock
- Free Thank You Note SVG Or find more here
- Free Envelope SVG I used the A2 Size, which fits a 4.25″ x 5.5″ card
- Pens that work in cricut (no adaptor needed)
- Free Writing Fonts that work with the pens in cricut

Most often, when you download an svg, it will download as a zip file. For this week, I wanted to show you something different. Sometimes a file will be in google drive just as an svg. When you click on the link for this download:
You should see something like the screen above. In the top right,
beside the printer icon, is a down arrow. Click on that to download the svg. It will download just an svg - not a zip file. Open Design Space, and upload the file.
When you upload it, it wil be the wrong size, and it will be many pieces. Select all, and either weld or attach. Normally Weld is only used for script fonts, to make them cut as one word instead of individual letters. But sometimes for things like this, I like weld because it cleans up the layers panel and I can clearly see its going to cut as one piece.

Once you have it either attached or welded, click on it to select it, then click on the lock to unlock the size tool. Change the width to 4.25 and the Height to 5.5.
For many items you do not want to unlock the size tool - you can resize without unlocking it. The lock keeps the ratio the same. For this, we want a specific size, not the same ratio, so click to unlock and resize.

Now find the shape tool in design space, and add a square. Click on the square, then click on the lock to once again unlock the ratio, and size the square to 8.5 x5.5. This will be the actual card.

You can change the color of the front of the card to whatever you would like, or you can just leave the color as black and put whatever color paper in the machine. If Design Space shows it as black, but you use green paper, your design will be green. :-)
Once cut, flip your mat upside down, and peel the mat gently away from the cardstock.

Fold the white piece in half, then glue the design to the front.
Note - I used spray adhesive for the first time. Apparently you need to shake the can a lot longer than I did, it really made a goopy mess. Which ended up looking a bit like textured snow, so it worked out ok. :-) I lost the two mountain pieces, but I think that works out ok. I had meant for this to cut as one solid piece and somehow missed hat the mountain caps were not attached. You can either glue them on separately, or just ignore them.
Next upload your envelope svg. When you upload it, the score lines will upload as cut lines.

Click on the lines in the layers panel, then find "line type" and change it to "Score".

Select the Text Box, and add your address. Then click on the text, and change the line type to draw.
Now select all, and attach.
Two Important Things:
1. MOST free fonts will "bubble" or write as an outline, in cricut. The pen will follow the path of the blade. There are hundreds of free fonts that will "collapse on themselves" and appear single line, as well as some that are truly single line. I keep lists of free fonts that work as writing fonts, sorted by pen size, here: https://fieldsofhether.blogspot.com/2017/11/6-single-line-fonts-that-will-write.html For this, I used Always Here. It's one of my go to favorites for using the draw feature in cricut.
2. ATTACH. You have to make sure your score lines and your text are attached to your shape. If your text is attached to the envelope, it will write exactly where you attached it.

As you can see, my pen died halfway through writing. This was purely an old pen that ran out of ink, it was no fault of the machine or the technique. :-) The Dollar Tree Markers and a Bic Pen are my go to favorites. Both fit right in the machine, no adaptor needed. Here are more pens that work without an adaptor: https://fieldsofhether.blogspot.com/2017/12/alternative-markers-for-cricut.html
Addressing A Pre-Made Envelope

To address a premade envelope, simply type your address in a text box, and set the line type to draw. Click Make it. Do not actually Make it yet!
Place your envelope on your matt. Look at the grid and decide where you would like the machine to write. For my envelope, I decided on 2.5 inches in, 2 inches down.
Look at the screen, click on the mat, then click on the address, and drag the address to the spot on the grid where you want it to draw. See the image above? I've moved the address down.
Now click make it.

This time I used a plain old bic pen to write. I use these a lot!

That's it! Addressing envelopes with cricut is time consuming. It is MUCH faster to use a program like word, and a printer, to print labels for on envelopes, or print right on envelopes with your printer. But it's still nice to know how to do it with cricut too.
============
Choose Your Own Adventure
Free Card Making SVGS
=================

Where To Find Free SVGS For Making Christmas Cards

Find a more free card making svgs here:
================
Preparing For Next Week - Glass Etching With Cricut
Next week, week 7, we'll be doing glass etching.
Etching Creams (I use the Armor Etch)
- Armor Etch - $20 for 10 ounces (or 3oz for $11)
- Etchall - $18 for 4 ounces
- Etch-I-M - $30 a qt. I have never used this, but have read it works. It's WAY more than the average person would ever need.. 3 ounces lasted me two years.
You'll also need vinyl or contact paper, for cutting the stencil, and a glass item to etch. I'm going to be working on glass plates from the Dollar Tree.
=====================

The Christmas Craft Challenge Index
====================

The Christmas Index
Where To Find: Free Christmas SVGS By Theme (Nativity, Grinch, A Christmas Story, Etc), Where To Find Free Christmas SVGS By Project (Gift Tags, 3D Paper, Earrings, etc) and Where To Find Free Christmas Project Tutorials & Gift Ideas. Including an entire extra index just for making Christmas Ornaments. Find it all here:
Getting Started With Cricut
A Quick Overview - I just bought a cricut! Now what?
Supplies To Buy - I just bought a cricut! What else should I buy to use with it?
Vinyl - Which Vinyl Do I Need, And Where To Buy It
Pens (Markers) - Alternative Pens & Markers that work w/ no adapter needed.
Fonts - How to download & install fonts to use in Design Space
Fonts - Where To Find Free Fonts
SVGS - How To Download & Use Free SVGS In Design Space
SVGS - Where To Find Free SVGS by theme
Facebook Group For This Page - Come ask your questions, share your projects, and find so, so many free svgs, here - Cricut Tips, Tutorials, & Free SVGS
==========================

==========================
No comments:
Post a Comment