How To Make A "Sweat Activated" Gym Shirt With Cricut

 
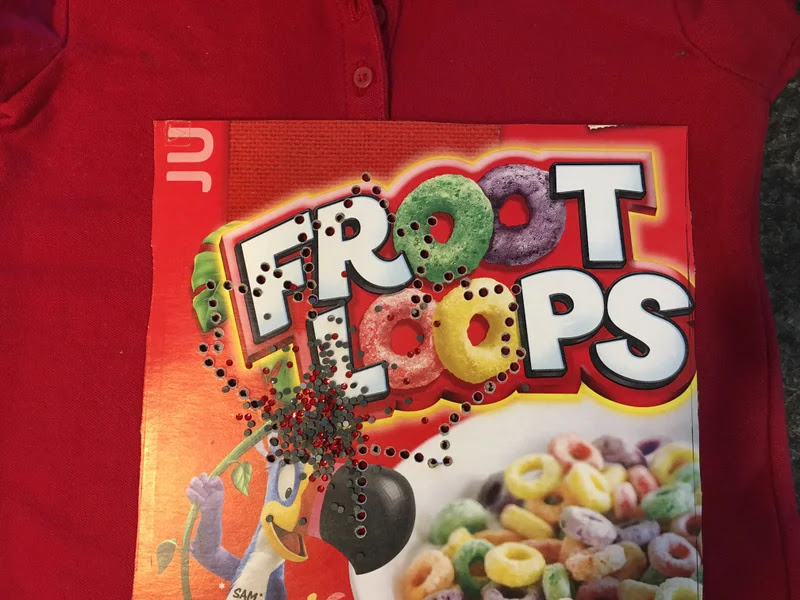
How To Make A Sweat Activated Design For A Gym Shirt

There are three ways to make these shirts:
1. Apply Vinyl  to The Inside Of The Shirt
2. Apply Iron On Transfer Paper To The Outside Of The Shirt
3. Use a "Water Resistant" spray and a stencil.  (This method does not appear to hold up for more than couple of washings)


Method #1
Use a grey htv, on a grey shirt.  
DO NOT MIRROR YOUR DESIGN
Turn the shirt inside out, and apply.


Method #2
Use a Printable Iron On Transfer Paper For Lights (normally this is used for print then cut projects, but for this project, you will not print, only cut.)
Place the transfer paper on your mat upside down (Do Not use a mat that is too sticky! Use this as if you were cutting paper.)
Do Not Mirror your design
Cut on the light cardstock setting
Weed off the excess paper, right from the mat, leaving your text behind
Apply Heat Transfer Tape (clear plastic sheet leftover from HTV)
Flip Matt to remove the design (as you would when removing paper)
Iron, then let cool before peeling off the backing.

METHOD #3

Method 3 involves using a stencil, and spraying the shirt with a waterproofing spray.  This method however, will not hold up to multiple washings.

Font Suggestions - Arial Black, Impact, Chuck Noon

=============================

Find More Cricut Project Tutorials Here:

https://fieldsofhether.blogspot.com/2019/04/cricut-step-by-step-project-tutorials.html

==========================


HTV On Umbrellas

 
Decorating Umbrellas With HTV

Thrift Store Redo's With Cricut


Thrift Store Redo's With Cricut

A little rustoleum spray paint (my favorite is smokey beige) and black matte vinyl (my favorite is Frisco brand Craft Matte - free shipping with Amazon Prime) and a few items from the thrift store are completely transformed.  

===============

Thrift Store Basket Redo


 Gather All Trash Here Trash Can - A Thrift Store Redo - https://fieldsofhether.blogspot.com/2019/04/gather-all-trash-here-trash-can-thrift.html


A breakfast tray Redo -  

====================

==========================

Where To Find Free Farmhouse Themed SVGS - 

https://fieldsofhether.blogspot.com/2020/07/where-to-find-free-farmhouse-style-svgs.html

========================

Find More Cricut Project Tutorials Here:

https://fieldsofhether.blogspot.com/2019/04/cricut-step-by-step-project-tutorials.html

==========================


Where To Find Free Rhinestone SVGS


Where To Find Free SVGS For Rhinestone Templates

When someone first asked me for free svgs for rhinestone templates, I thought they were using tweezers and applying each rhinestone individually in the design.  I couldn't imagine doing that myself, so I posted some links for the person in the fb group, but I didn't consider trying them myself. 

 And then I saw that you just dump the rhinestones onto the template, and they settle in, then you iron them on.  Well, that's not too bad.  But it required sticky flock, a board, heat fix transfer tape (the used transfer material from my htv projects would probably work...)  and I just didn't want to invest in a bunch of materials for a project that is purely a novelty for me - not something I was likely to use often.


THEN I came across an instructables tutorial.  All you need to buy is the rhinestones!  It may not be practical for more complex designs, but just to try it out - all you need is an old cereal box, and some paper (I'd use parchment paper, but they literally just used paper.)  Cut the template from the cereal box, place it on the fabric, dump the rhinestones on, brush the extras off, make sure the stones in the template are all right side up (so you may need tweezers after all, but just for a few stones, not all of them!) place the paper over the top, and press!  That's it!  That's a little more my speed.  I still have not tried it - I need to order rhinestones, but below is a list of free svgs, if you want to try too - or if you already know what you are doing and just want more free designs.  :-)

Related Links:

  • Rhinestone Starter Kit (Silhouette brand, but  this will work with cricut!) includes all the supplies you need to start
  • Step By Step How To Apply (Summary - you cut the design, apply the design to a board, dump the rhinestones on the board, shake so they fall into the template, remove the extras, apply a heat or "hot fix" transfer tape, then iron the design on.)
  • Cheaper Option Step By Step - Instead of purchasing a backing board, special transfer tape, and sticky flock, this tutorial uses an old cereal box.  Cut your template out of the cereal box, place the template on your fabric, shake the rhinestones over the top, remove the extras.  Cover with paper and iron.

============
Free From Bgart Designs
The best collection of rhinestone freebies is from Bgart Designs.  They are one of the many new sites that now require you to join their facebook group to get the password.  It used to come in their email newsletter, but they have discontinued that, the only way to access the files is to join their fb group.  
Find the group here:
https://www.facebook.com/groups/3204394239786732 and once you find the password in the announcement post, you can access the files here: https://bgartdesigner.com/free-files/
I've included quite a few examples, because I haven't seen a collection anywhere near as nice anywhere else - but there are some nice designs (just not nearly as many) from other designers, on down in this post
===================


Free Rhinestone Alphabet

================================
Free From Other Designers
===============================
This site has a nice collection!  Some are always free, some are "On Sale For Free"

Find a weekly list of "On Sale For Free" Svgs from a variety of sites, here:


=============
NOT FREE
==============

Rhinestone Monogram Font - On sale for $6.50  as of 9/6/20

==================
POSSIBLE FONTS
Not tested.  But theoretically, any dotted font should work?  Rhinestone fonts are very expensive!  These dotted fonts are free - but making sure the cuts are the right size for the stones you are using may be challenging.  It will take a little more research for me to know for sure how these work.

=====================
Tutorials & Projects
====================

How to make rhinestone templates in Inkscape

Step By Step How To Apply (Summary - you cut the design, apply the design to a board, dump the rhinestones on the board, shake so they fall into the template, remove the extras, apply a heat or "hot fix" transfer tape, then iron the design on.)

Cheaper Option Step By Step - Instead of purchasing a backing board, special transfer tape, and sticky flock, this tutorial uses an old cereal box.  Cut your template out of the cereal box, place the template on your fabric, shake the rhinestones over the top, remove the extras.  Cover with paper and iron.


Amazon First Reads - A Free Book Each Month For Prime Members


Each month editors choose one book in each genre, for pre-release. Amazon prime members can choose one to download each month for free. They've had some really great selections, from popular and best selling authors - and even a category for book club reads. 

Find This Months Selections Here:

Cricut Crafts For Kids

Kids Crafts With Cricut

Kids Craft - Tissue Paper "Stained Glass" Butterflies

A Quick & Easy Kids Craft With Cricut

Supplies:
Upload the svg, Ungroup, then change the color of the solid butterflies so that cricut knows to send them to a separate mat.  
Top Butterfly Size: 5.8 x 3.9
Bottom Butterfly Size: 4.5 x 3.9
Cut:

  • 1 of each butterfly from the black paper
  • 2 of each of the solid butterflies from the contact paper


Assemble:
  • Apply one solid butterfly to the black cut out.  
  • Tear tissue paper into pieces, apply randomly. Don't worry if it overlaps.  If too much hangs over the edge, you can trim it later.
  • Once the tissue paper is all applied, place the second piece of contact paper over the tissue paper.
  • Add a string through the hole to hang.


OPTION 2 - 
You can also skip cutting out the contact paper.  Just apply the black cut out to a square piece of contact paper, add the tissue, place another piece of contact paper over top, then you could trim around it with scissors.  This may be the easier route for younger children.


OPTION 3 - 
You could also cut the solid butterflies (meant to be cut from contact paper here) out on white cardstock, let the children color the white butterfly, then glue the black over the top.

===================