

A Quick & Easy Kids Craft With Cricut
Supplies:
- One sheet black construction paper
- Clear Contact Paper (I used the Dollar Tree Brand)
- Tissue Paper
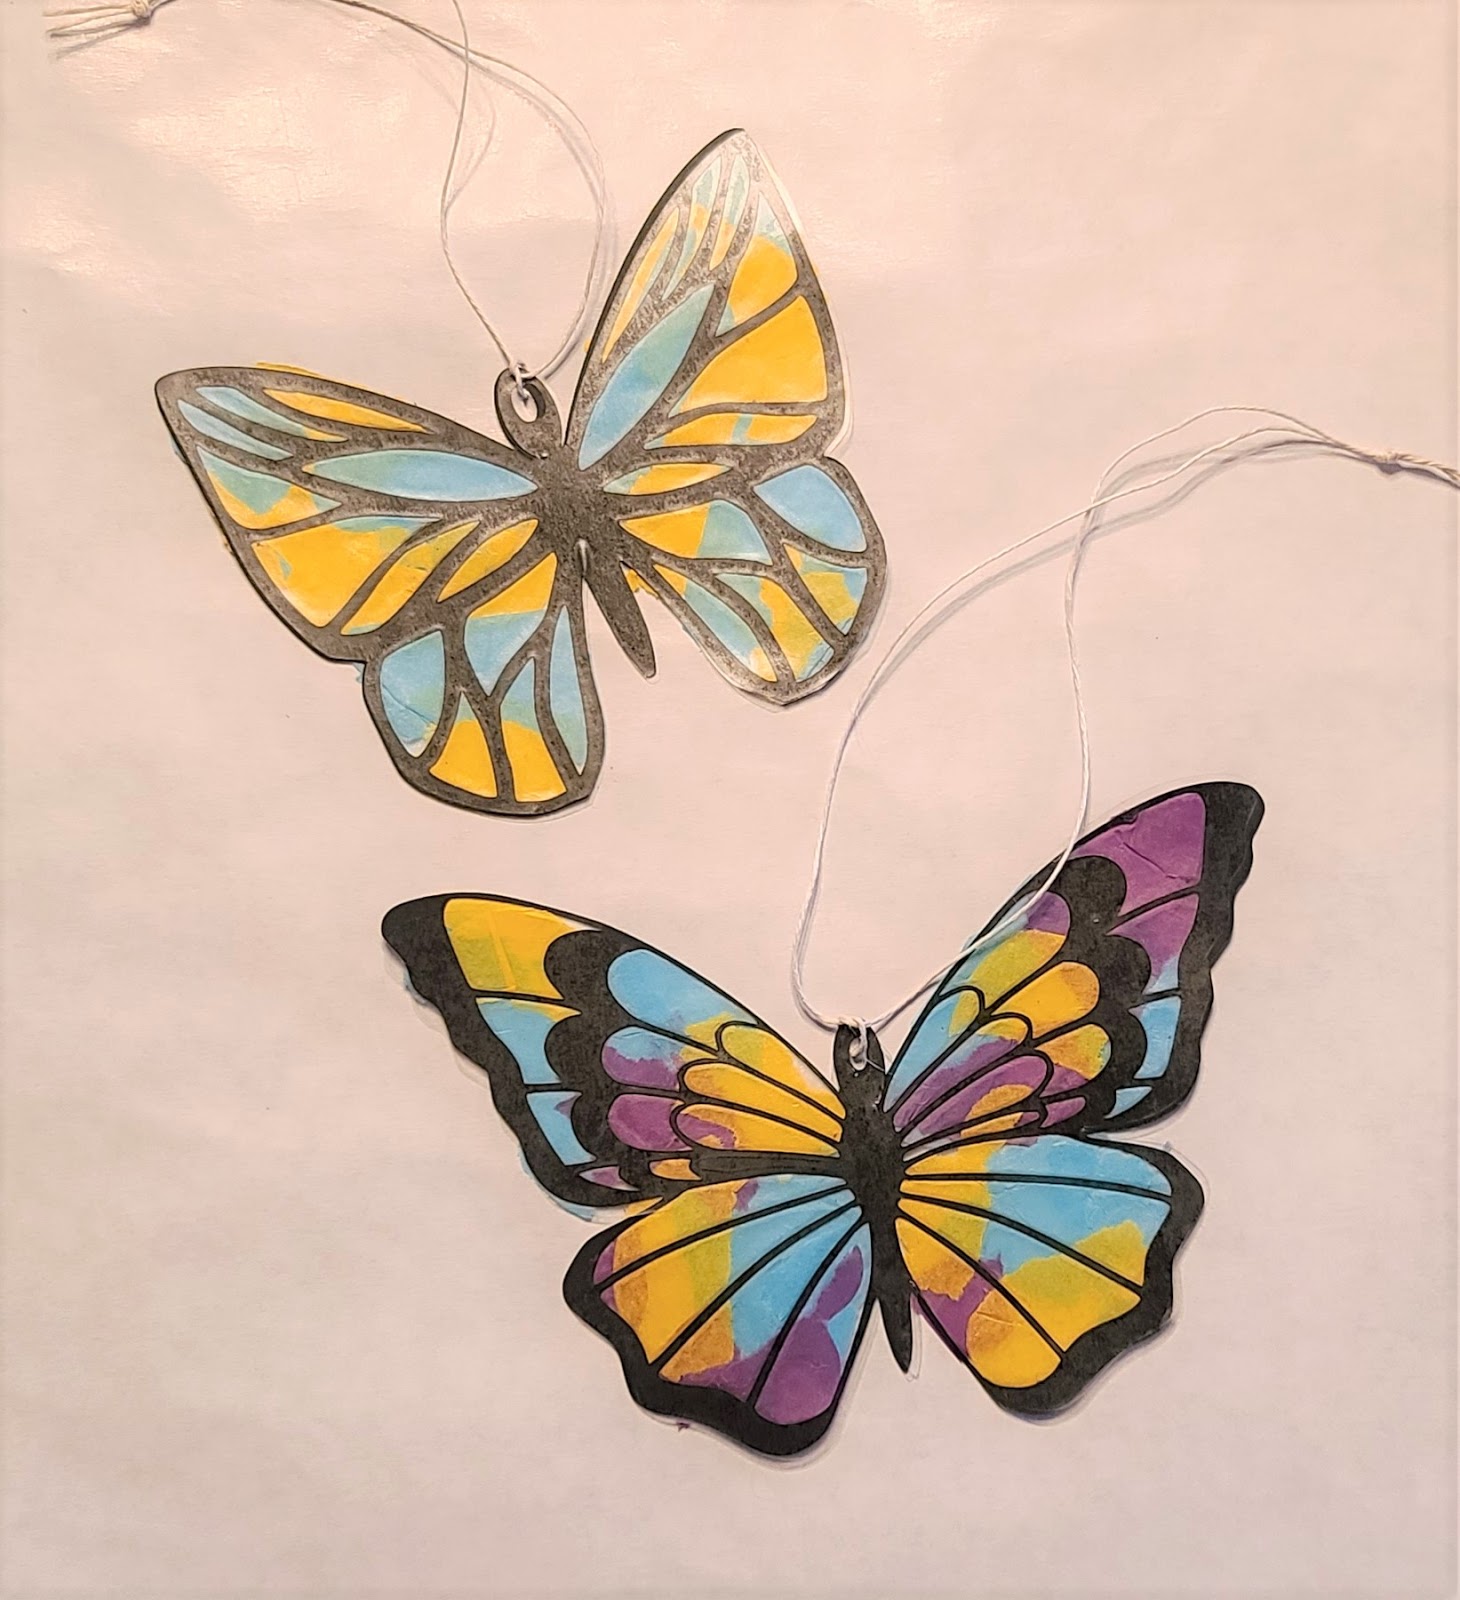
- Free Butterfly SVG (These have wider heads and a hole to run string through, but you can find dozens more free butterfly svgs here.)

Upload the svg, Ungroup, then change the color of the solid butterflies so that cricut knows to send them to a separate mat.
Top Butterfly Size: 5.8 x 3.9
Bottom Butterfly Size: 4.5 x 3.9
Cut:
- 1 of each butterfly from the black paper
- 2 of each of the solid butterflies from the contact paper

Assemble:
- Apply one solid butterfly to the black cut out.
- Tear tissue paper into pieces, apply randomly. Don't worry if it overlaps. If too much hangs over the edge, you can trim it later.
- Once the tissue paper is all applied, place the second piece of contact paper over the tissue paper.
- Add a string through the hole to hang.

OPTION 2 -
You can also skip cutting out the contact paper. Just apply the black cut out to a square piece of contact paper, add the tissue, place another piece of contact paper over top, then you could trim around it with scissors. This may be the easier route for younger children.
OPTION 3 -
You could also cut the solid butterflies (meant to be cut from contact paper here) out on white cardstock, let the children color the white butterfly, then glue the black over the top.
===================

Find More Kids Craft Projects
hhttps://fieldsofhether.blogspot.com/2020/08/cricut-crafts-for-kids.html
hhttps://fieldsofhether.blogspot.com/2020/08/cricut-crafts-for-kids.html

No comments:
Post a Comment