
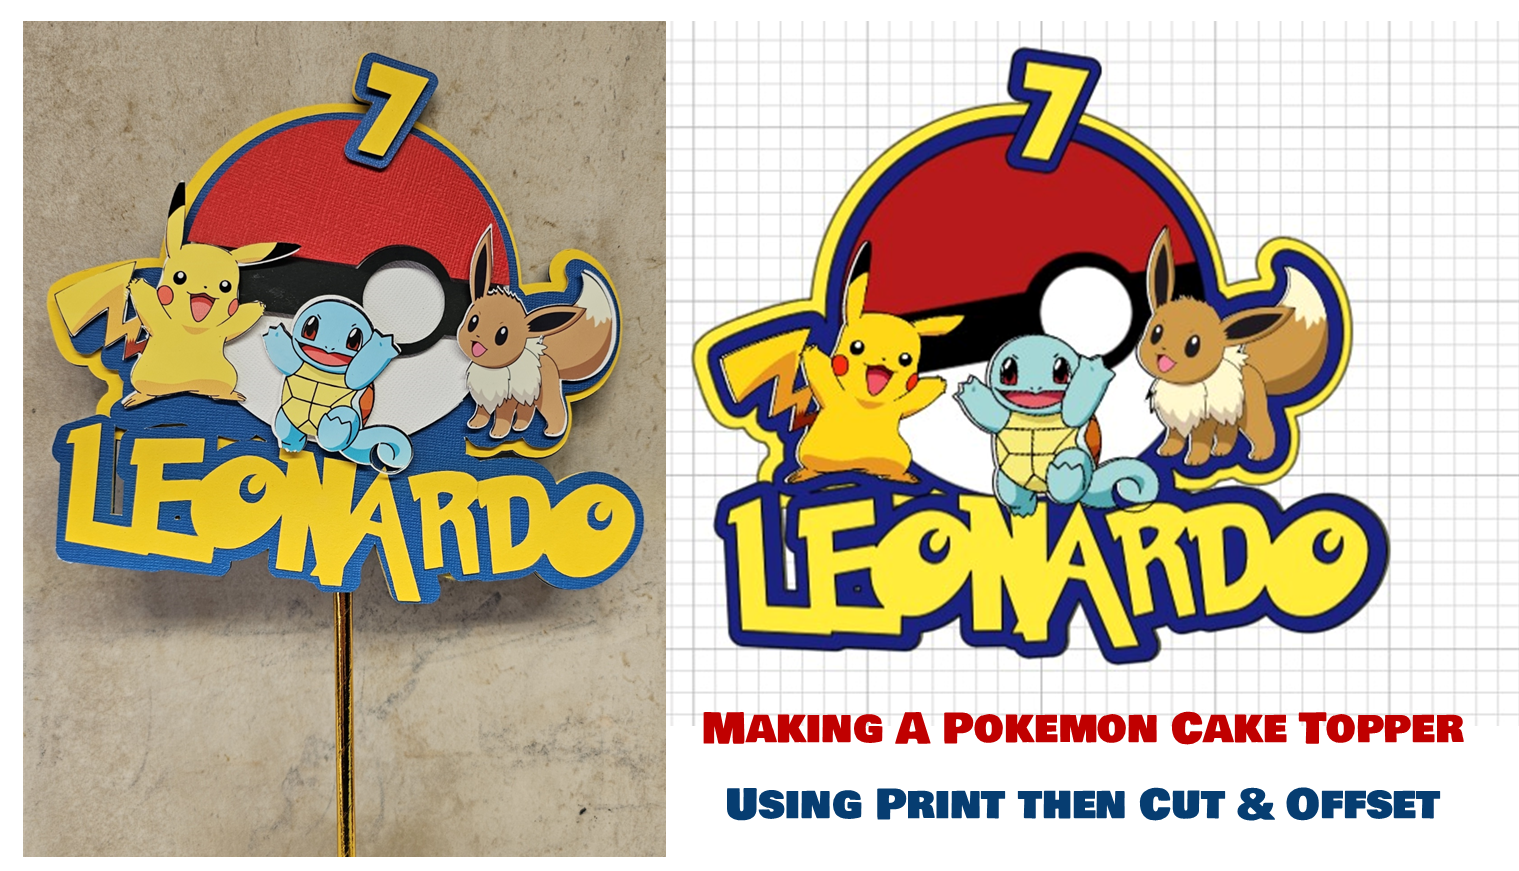
Cake Toppers are really quite simple to make with Cricut Design Space. To Save on layering, use print then cut for the detailed images, then add a series of offsets.
Here's a step by step:

First, I found images through a google search.
If they are png images, they will cut just fine for stickers. If you upload a jpg, the quality will not be quite as good as a PNG, but it often will work fine at this size - just be sure to remove the white background.
For best results, choose "complex" when uploading.

On the left, scroll down and find the wand, click on the white space, and remove it.

Choose the "Print Then Cut" Option on the right.
Once the images are uploaded into DS (and you can do that one at a time - I just combined them for ease here) then:

Select all, duplicate, and change the duplicate layer to "cut" instead of print then cut. This isn't strictly necessary, but I found that since I printed the images on a glossy sticker paper, the cardstock layer behind the stickers gave them a little more substance.
======================

For the pokeball, I used shapes and welded and sliced - but then I saved it as an svg, in case anyone else needed it. (Change the black circle to white once uploaded)
=========================
Next I added the Name

There's a free Pokemon font on Dafont:
Once the text is in Design Space, weld it - so there are no cut lines on letters that overlap.
======================
What we have so far:

Now we have the basic design - we just need the "backing" to attach all of this so it's one piece.

If your items are not where you want them, you can use the "Arrange" button to move a layer forward, or backward, until they display in the proper order.
Once you have them all placed properly, select all, and group. Then duplicate. Select one - just one - of your two image groups, and weld.

=======================
OFFSET

Select the image you welded, and choose "offset". I used a .15 offset for the first layer - the blue layer.

Select the Blue offset you created, and create an offset for that offset. Again, I used .15
Change the newest layer to yellow.

Next, add your number. Then add an offset to the number. Then place it on the design where you want it to be. Duplicate the offset. Select the number and both offsets, and align/center so that all three layers are one on top of the other.
Then select JUST the bottom offset of the 7, and the bottom yellow offset, and weld.

I duplicated my bottom layer here, just so you can see the 7 welded on.
I did NOT weld this to the blue layer, because I wanted a blue layer on top of the pokeball, for the number.
You may want to duplicate that bottom layer, for a finished look on the back of the topper. Attach the stick (or straw) to the back, then cover it with the extra back layer.
====================
Assembly

For some layers, I used a glue stick. For others, I used pop dots. It depended on where I wanted dimension.

I had a heavy gold paper straw that I used for the "stick" on this. Regular scotch tape held it fast. Cover this with another layer of cardstock- a duplicate of the yellow base layer.
==================
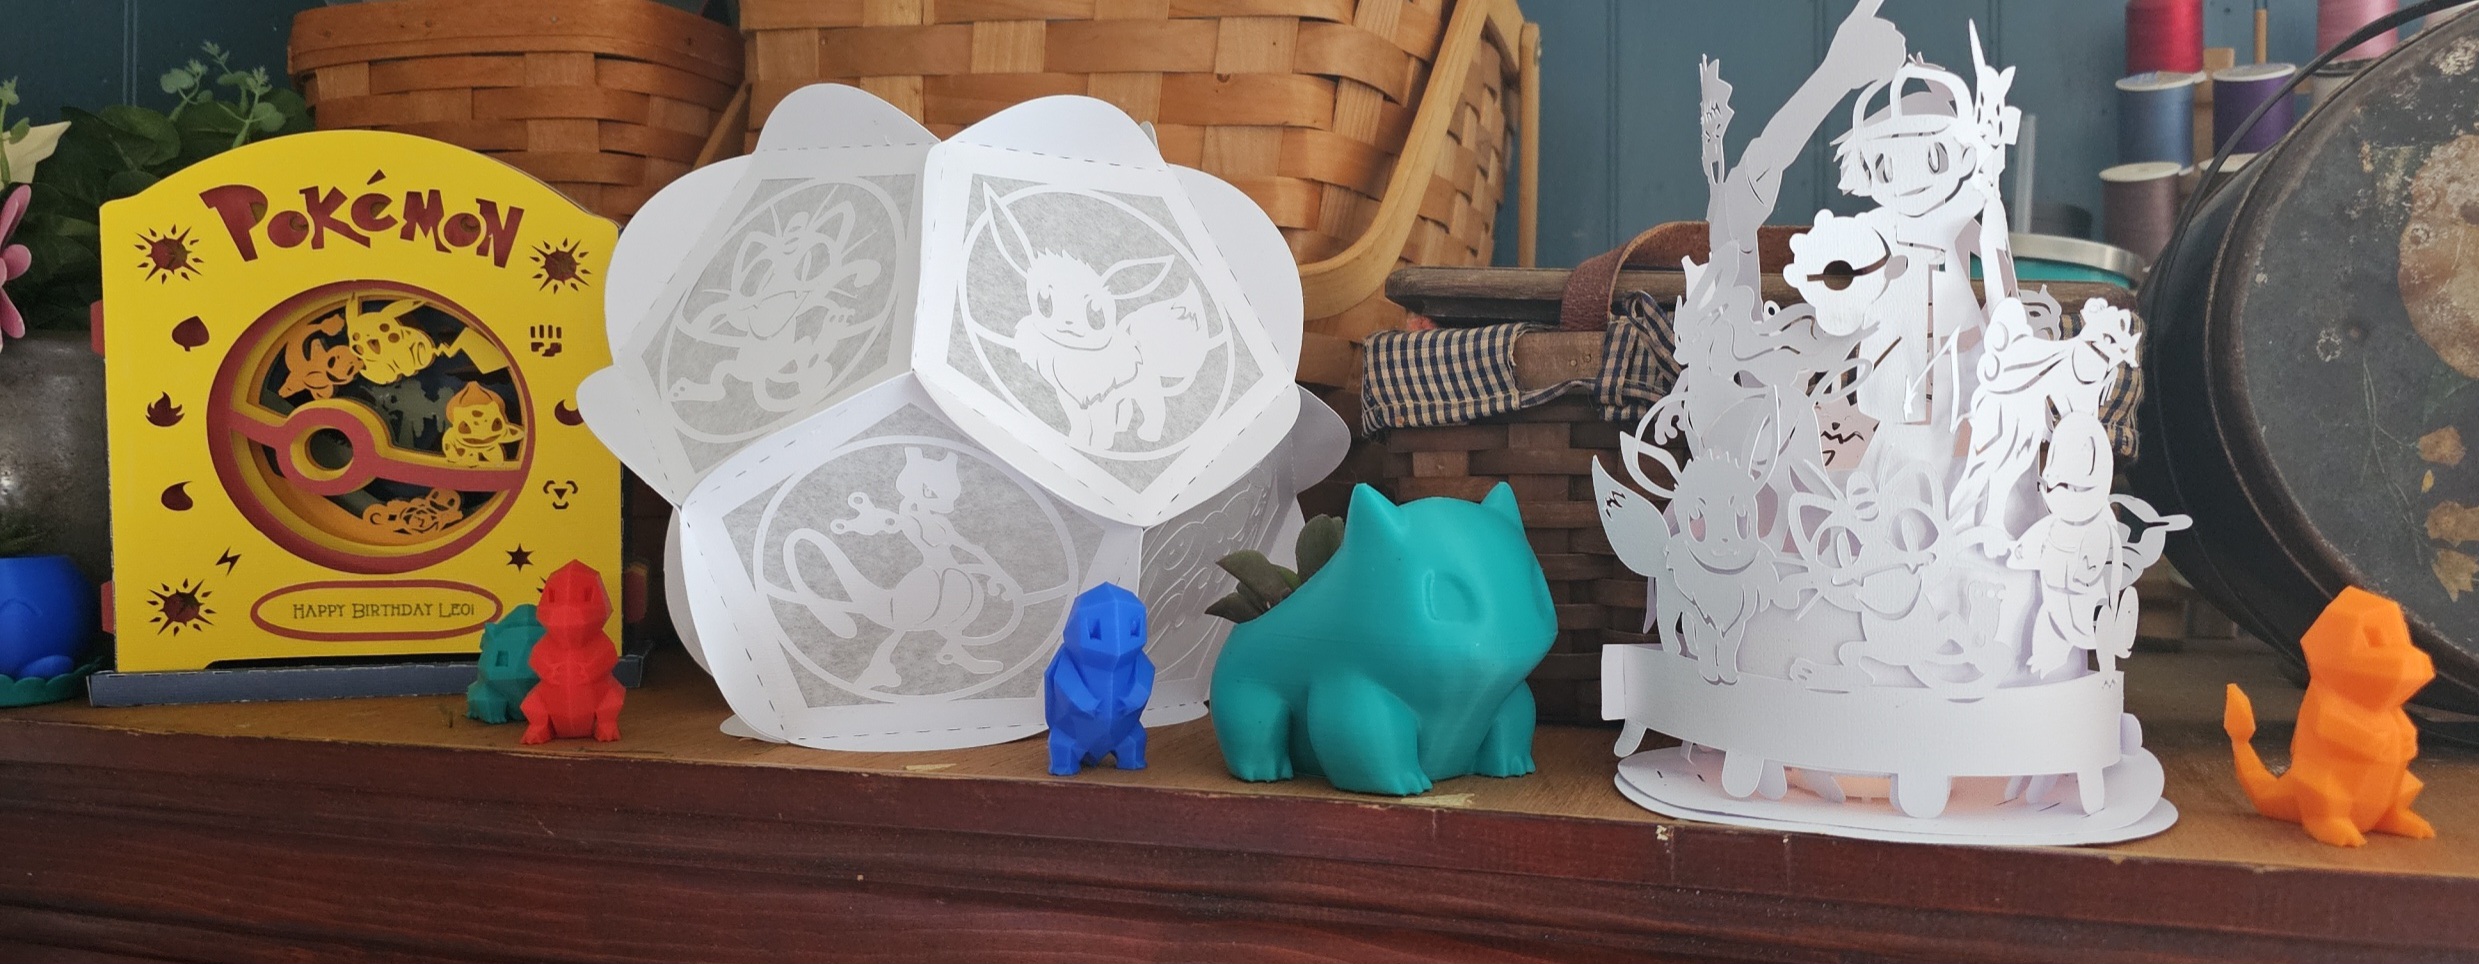
Some of the other Pokemon Projects I made for our grandsons birthday
See where I found the files, and how I made them, here:
No comments:
Post a Comment