

These personalized snowman ornaments are super quick and easy to make! Find all of the instructions, measurements, and where to find free snowman face svgs below.
Materials:
- 1/2 a sheet of 9/12 felt
- string or ribbon
- white htv (Caregy, HTVront & Transwonder are my favorite brands)
- black and orange vinyl
- A white glittered Christmas Ornament (Here's how to make your own)
- A snowman face svg - Caluya Design has a great set for free
Quick Measurements:
- 3.15 Disc Ornament (This was the best price I found on amazon, they were cheaper at Michaels, on sale)
- height of name .5 of an inch
- fold on hat 3/4 of an inch
- snowman face 2 inches tall
- length of slits for hat fringe
- fold the hat into 3rds, the middle 3 inches is where the htv name should go (see photos below)
===============
STEP BY STEP
===============

First, if you do not already have a white glitter ornament, you will want to glitter one.
Find a step by step for doing that, here:
Then you will want to cut out the face for on your ornament. I used frisco craft black matte vinyl (my favorite, and a scrap of orange that is probably orcal.
I sized it 2 inches tall, and attached all the black pieces, so that could all be transferred at once. For the nose, I didn't even bother with transfer tape, I simply peeled it off and stuck it on like a sticker.
If you have never transferred a vinyl design before, here's a step by step. I use dollar tree contact paper as my transfer tape.

I used half a sheet of felt, because it is convenient and easy. You cold make it less than 9 inhces wide, there will be a good overlap on the back of your ornament, but I like the amount of "fringe" made by this width, and I would just end up throwing way the extra scrap anyway, if I cut it any smaller. One sheet of 9x12 felt will make 2 ornaments.
From the top, cut down about two inches, to create your "fringe". Yes, you could technically do this in the maker with the rotary blade... but it would be so time consuming, and then you'd have to clean the mat. Scissors are MUCH quicker and easier, for this. Mine are really not uniform at all, because I was still figuring out sizes and lengths when I made this one. when it is assembled, that didn't matter at all.
I made the name 1/2 inch tall - or .5 tall - in Design Space. Don't forget to flip, or mirror your design, when using htv. Always use htv on fabric - regular vinyl will hold temporarily, but not for long.
I then folded about 3/4 of an inch over, and ironed it in place. Then I folded the felt into 3rds, and ironed it lightly, to give me creases.
Then I placed the name in the middle 1/3.

I used hot glue to attach the felt to the ornament, starting with the front section, and letting that dry for a minute before flipping it over and gluing the back.
The font I used is Biosha Sans. It was a limited time freebie a year or so ago, but is no longer free.

There's a good amount of overlap in the back.

I haven't decided how I am going to add a hook to these, so for now, I ran a long string through the top of the ornament, and then pulled it down between the fringe pieces, as shown above.
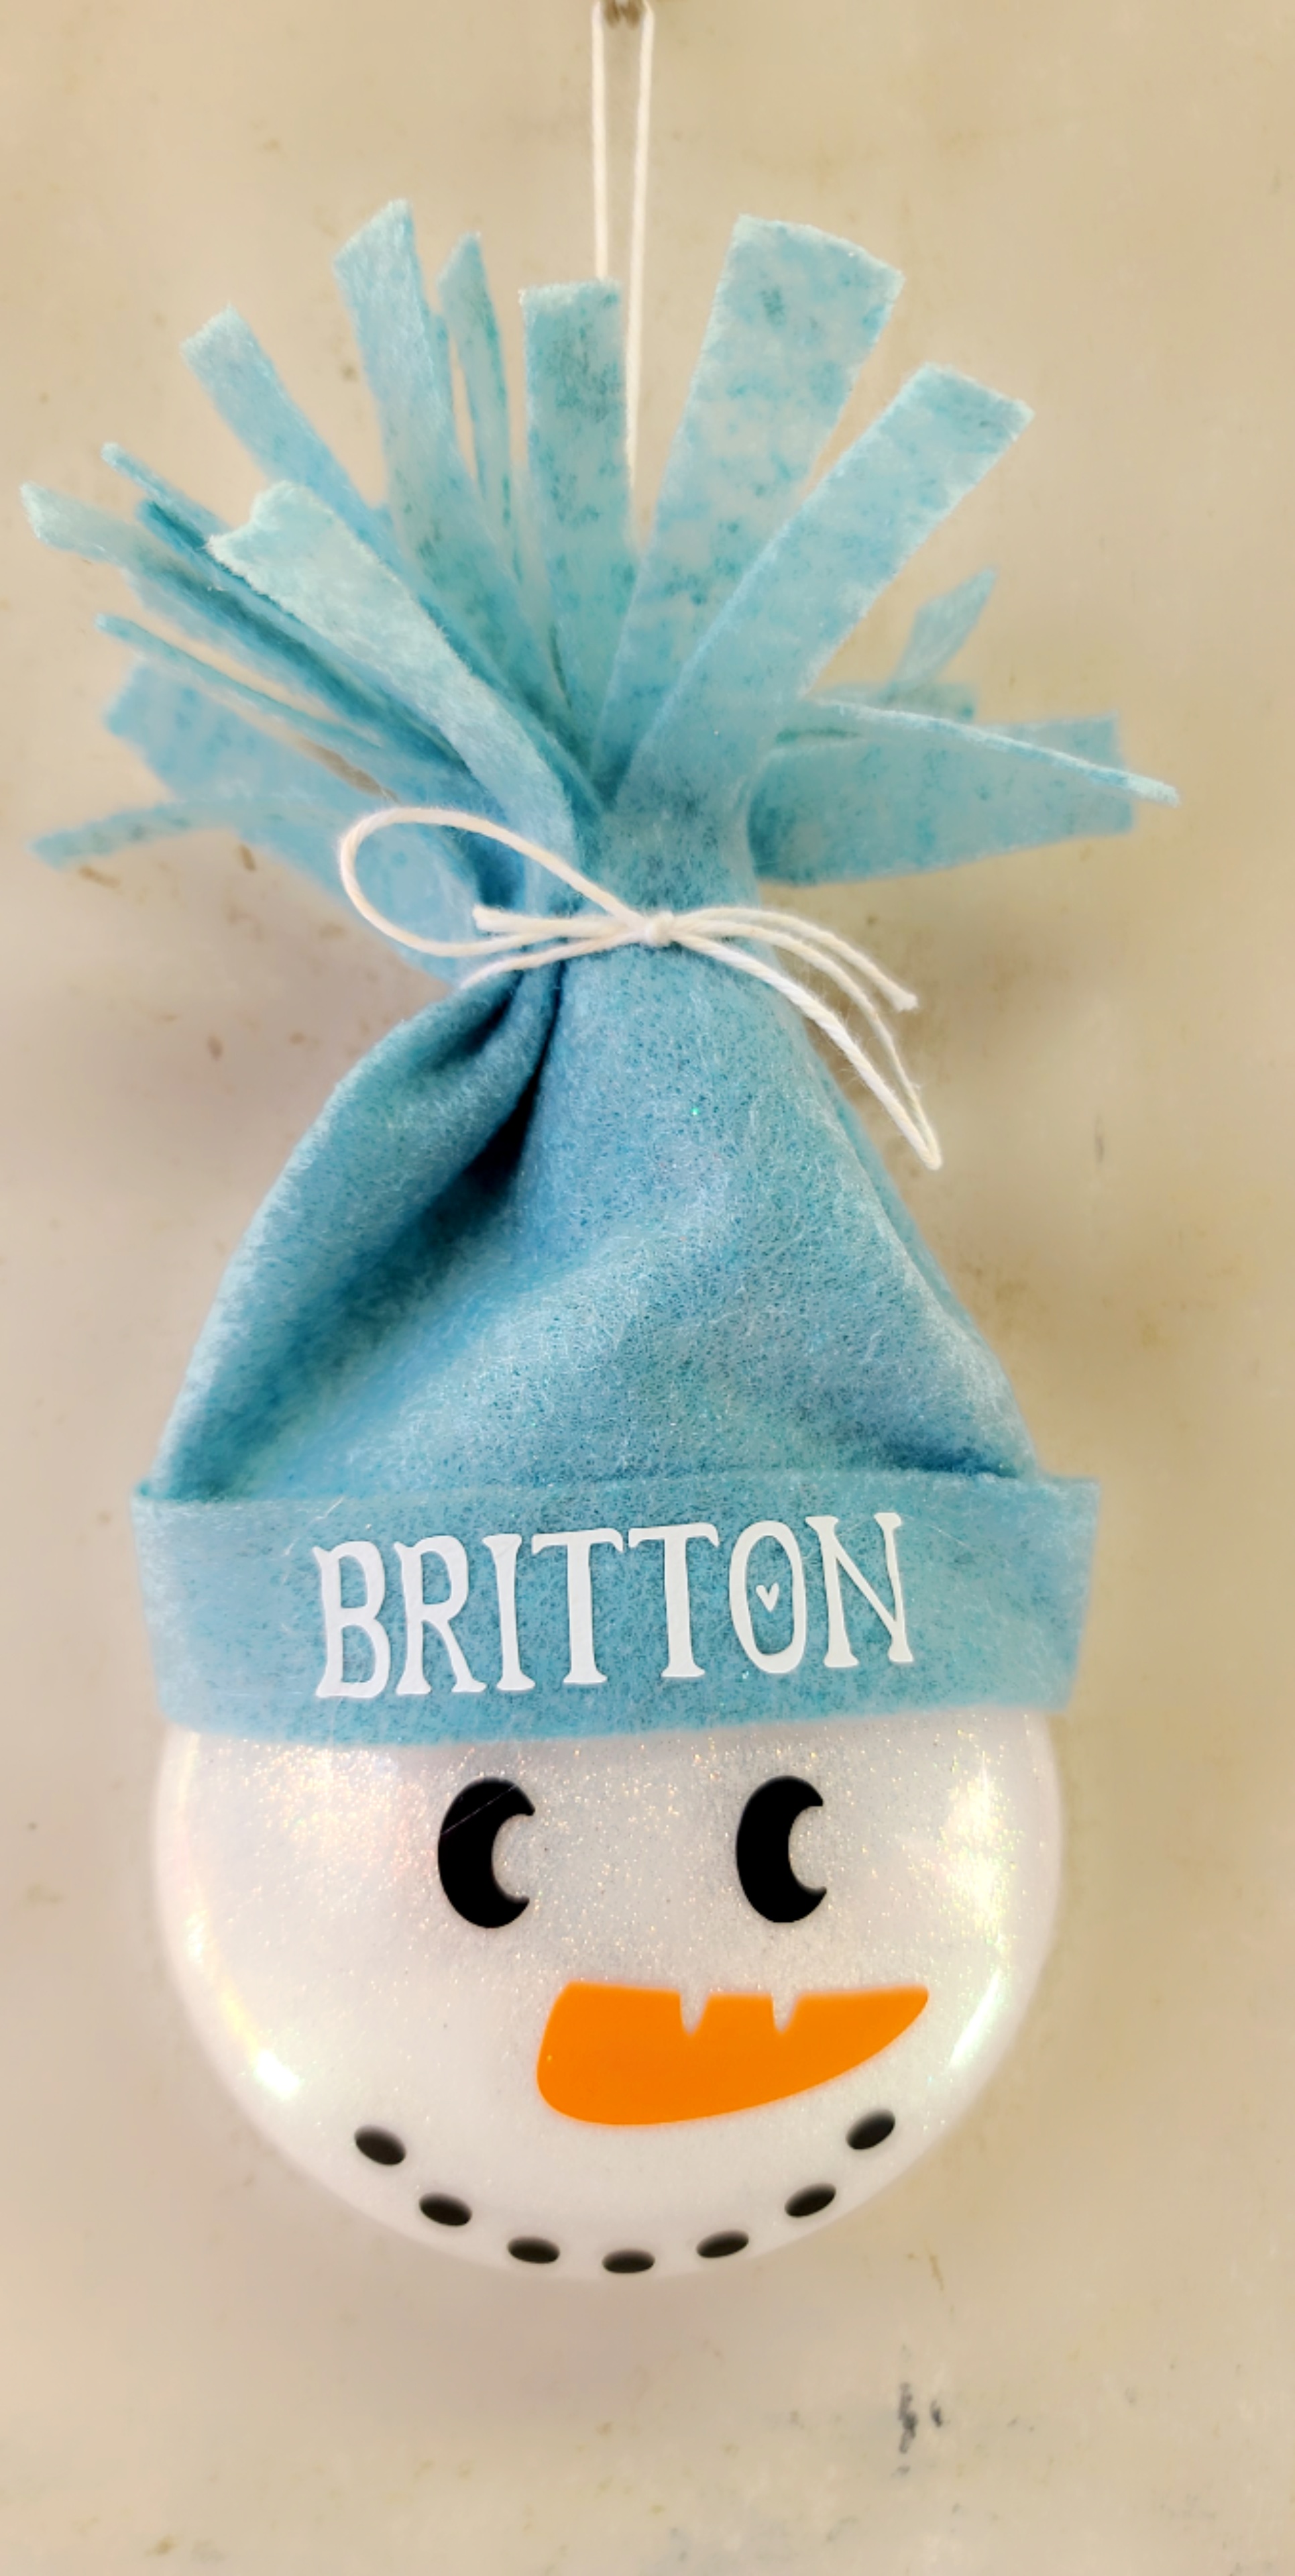
Then I tied string at the base of the fringe cut, and tied a bow.
=================
Find a facebook photo album of my Christmas Ornament Tutorials here:
This is adorable ❤️ Thank you for the details and measurements. Can’t wait to try it!
ReplyDeleteHi Heather. I have never seen anyone be as detailed as you. That was so wonderful. Thanks for describing everything to a T! Can you tell me if that cute little heart in the letter O is part of that font? Thanks so much!
ReplyDeleteThank you! Yes - the heart is part of the font. :-)
Delete