
 |
| Organizing all of my cricut "in progress" projects I know some of you likely only ever work on one project at a time. I admire that. But it's not how I work. :-) Very frequently I will sit here at my desk writing about local history while a variety of Cricut Projects cut. I may design and plan while my husband watches tv in the evenings, and then send them all to cut a day or two later. Sometimes my daughter will "babysit the cricut" for me, feeding in the various materials & colors to cut. Other times, she will help weed projects. I have always had a mess of projects in progress. I've recut pieces that were lost, more times than I care to admit. |
Quick Links:
- My [old] Cricut Craft Space (not yet updated since we've redone the room)
- How I Store My Vinyl Scraps (Also old - Same concept, but I now use two separate scrapbooks, and they are binder style instead of post style)
- Dollar Tree Plastic Folders - thicker, $1 each
- Dollar Tree Plastic Folders - thinner, 3 for $1
- Projects In Progress Printable Planner Sheet
- The font I used to label the folders is the free GT Herina. Be sure to use something other than Design space, such as the free fontlab pad, if you want to see those pretty ligatures appear.
Last week we ripped apart our laundry room to solve a plumbing issue, and in the process, redid my entire craft area. As I organize my new space, I asked how you all store your transfer tape - those pieces we use over and over again. I am currently using a clipboard for mine, but someone recommended these plastic folders from the Dollar Tree. And that solved an entirely different problem for me!
For the last two years, I've had a basket where I tossed pretty much everything. Projects in progress, stuff that needed weeded, vinyl scraps, transfer tape, even an assortment of tools. Impractical, and a mess, I was constantly frustrated by it and could never find what I was looking for.

I'm still using a basket. It's just organized with these plastic folders now! Three of the thicker folders, $1 each, 13 inches wide by 9x5 tall, are labeled WEED, APPLY, SORT. Two packs of thinner folders, sold 3 for $1 at the Dollar Tree, are labeled "Projects". The projects folder have all the items for a project such as the Amazon ornaments, where there are print then cut stickers, boxes cut and ready to be folded, and vinyl to be applied to the outside. My "APPLY" folder is more for single cut projects. Say a name for on a cup, or a decal to iron onto a tote bag. If a project has a lot of colors and pieces, I put it in it's own PROJECTS folder instead. A lot of paper projects, especially the 3d paper projects, go straight to a PROJECTS folder, for instance. One project per a folder.
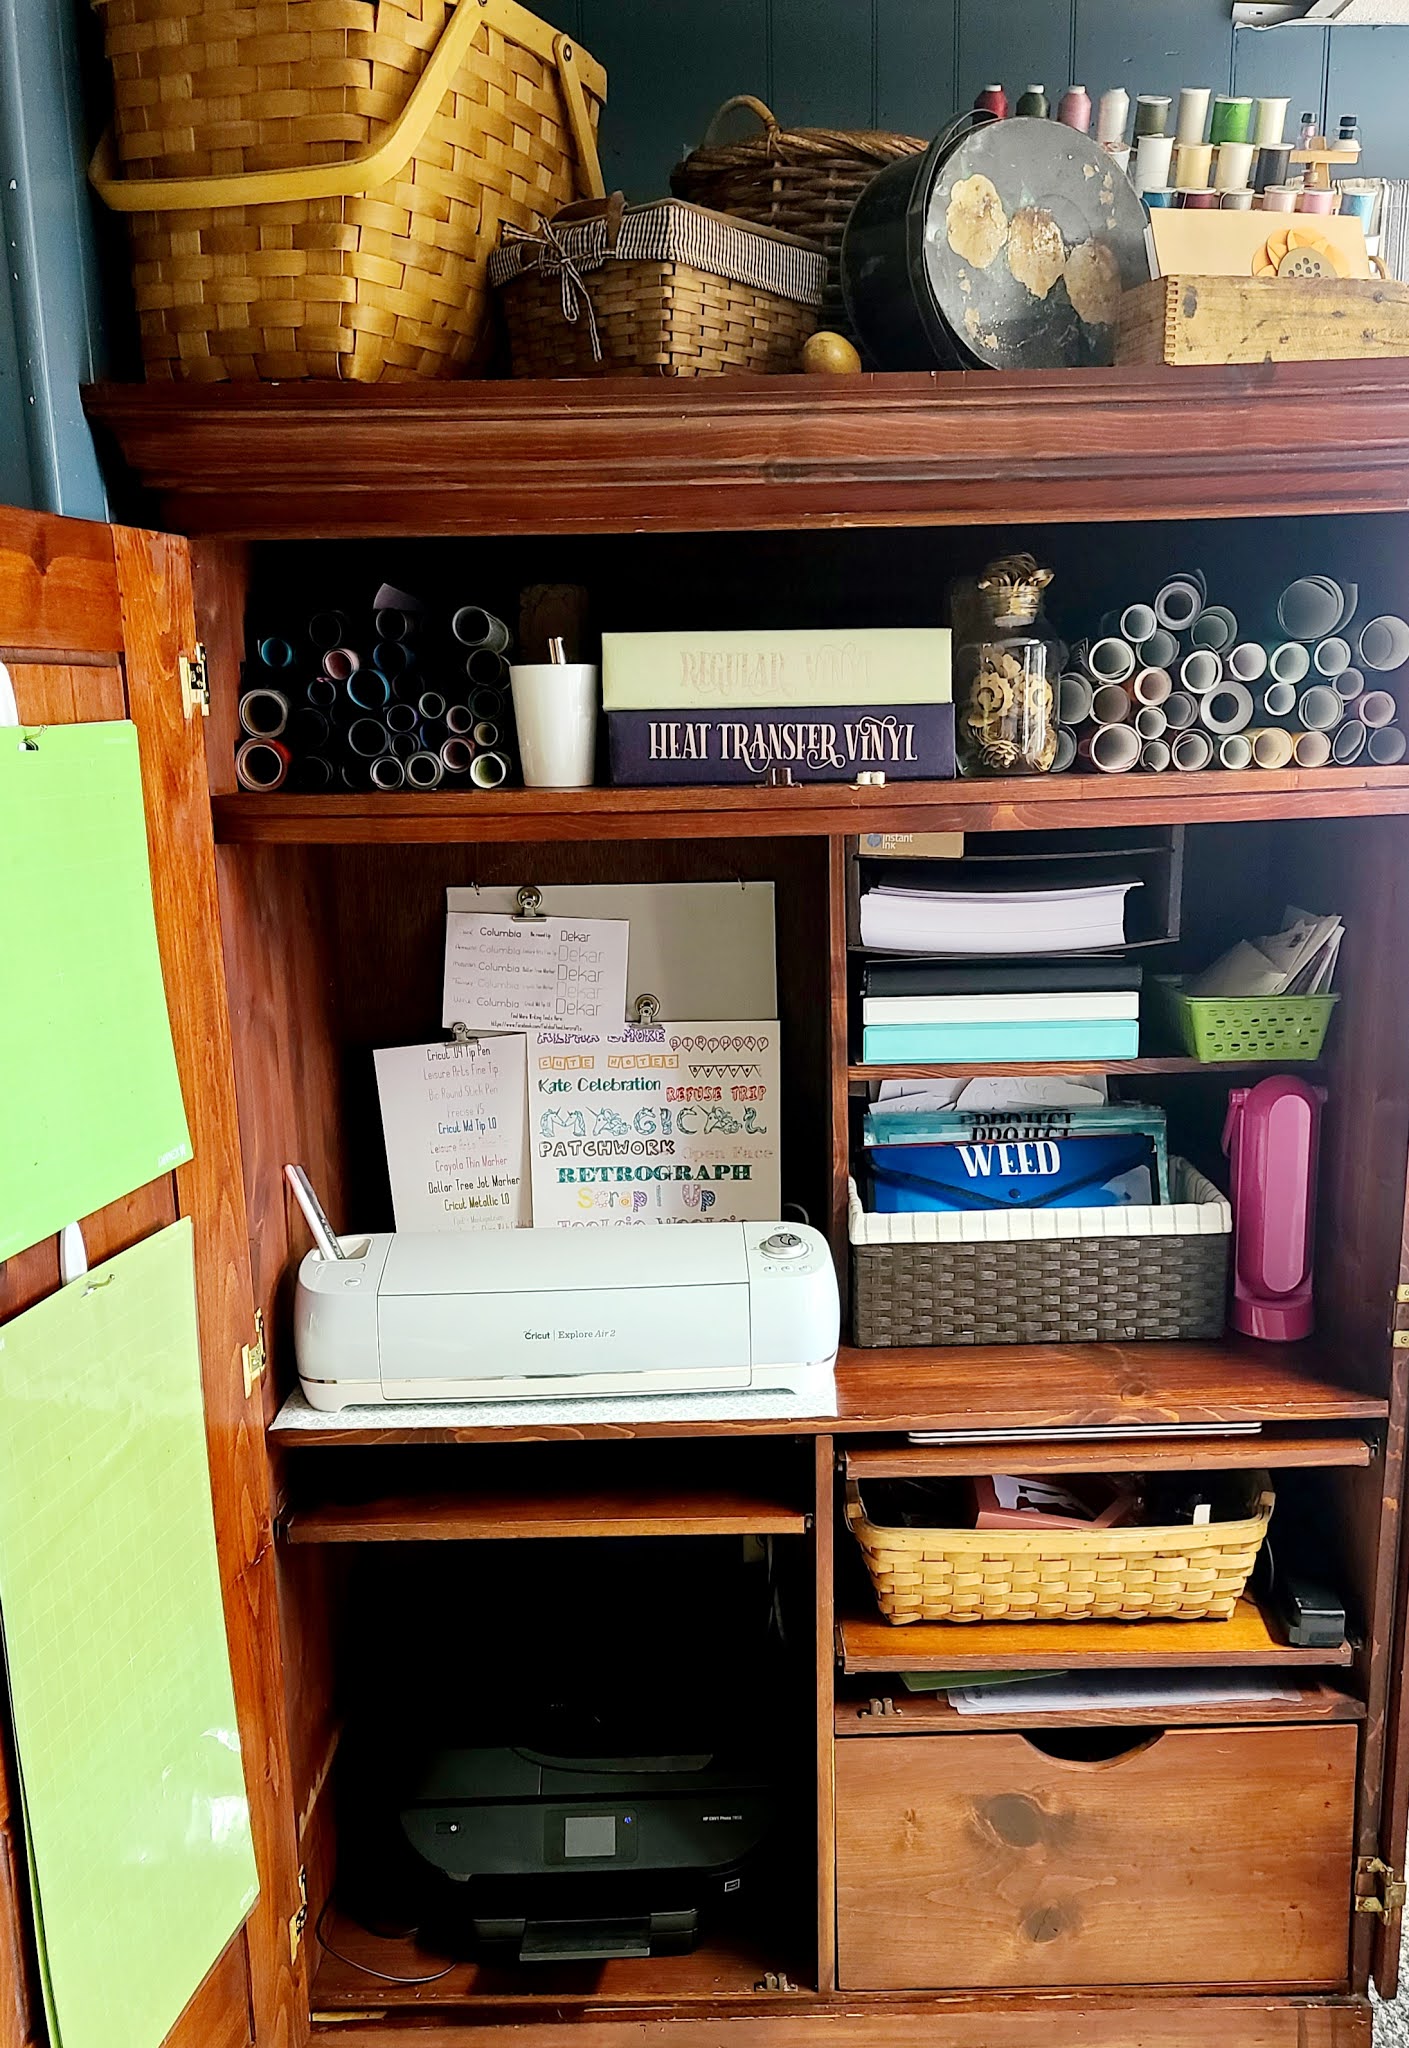
I found this old office armoire, which looks like it may have come out of a hotel room, at our local thrift store. There's a counter to the right where I work most of the time, but this closes up and hides all of my cricut supplies, most of the time. The top shelf holds my rolls vinyl and the two binders of vinyl scraps & 12x12 scraps.
Each of these folders has a piece of cardstock inside. That's mainly to help the folder stand up a bit better - they are pretty flimsy. But they also work as dividers. I put htv on one side of the cardstock divider, and "regular" vinyl on the other.

My "SORT" folder is for vinyl scraps - this is where I toss them until I pull the binders down and sort the scraps into the pages where they belong. Originally I had one 12x12 scrapbook for my scraps, but when that got ruined in the above mentioned plumbing issue [frozen pipes - flooded the room] that necessitated the remodeling of this room, I replaced it with two binder style 12x12 scrapbooks [These are made by Stampin Up] that I had found in my attic. I now have one binder for htv, and one for regular vinyl - each color is in it's own page protector.

Inside of the "APPLY" folder, behind the cardstock divider, is a pack of "Index Dividers" - also from the Dollar Tree. These are typically used in binders. I am using them to hold htv projects. because they are plastic, I can stick the weeded htv right to the divider.
============

In my Planner, I keep a "Projects At A Glance" Planner Sheet.
You can download it to use yourself, for FREE, here:
=======================

=============
Oh my! Such great ideas. Thank you for sharing them!
ReplyDelete