 I made these specifically for our local Lioness Lions club, while I was secretary. Now that I am no longer a member, some of the members were wondering how to make more of the items.
 I'm certain Lions Club is copyrighted, none of these items should be made to sell.
But to make for yourselves, you should be completely fine.
Lioness Tote Bag
After uploading the svg, I deleted [contoured] the word "international"
Because it was too much of a pain to cut and weed at that size. In later versions, I deleted the "Lions" in that same circle, for the same reason.
===========================
Lioness Thank You Notes
The purple were the favorites, but remember that if you use purple, you will need to add white on the inside to write on. These did work nicely to print the thank you message on a white rectangle and glue it inside.
=========================
Lioness Christmas Card
This is the Thank You Note, Minus the Thank you, and with a few additions.
I did not include the text in the svg.
The font I used is Montepetrum, it's free on Dafont.
I changed the text to "Draw" and had cricut write the text using the pen.
===========================
=========================
EPS & PNG versions of the logos can be found on the Lions Club Site here:
=================================
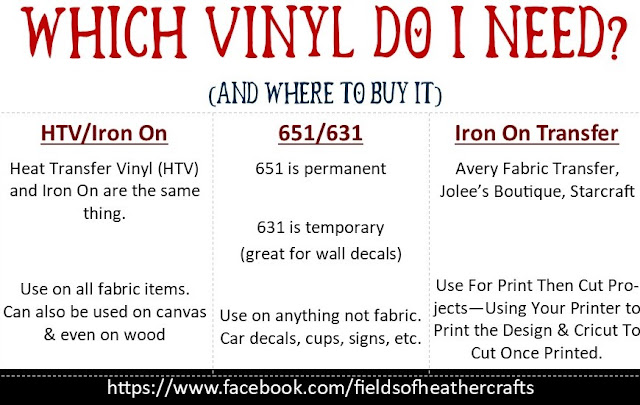
Tips For Using HTV
================================


.png)


