There are two versions of this card - one using strips folded into loops, and one with petals with tabs. The one with the petals and tabs may be easier for younger children to glue themselves.


Elements Needed
- One stem from the svg (green paper)
- One circle 3.8 in diameter (yellow paper)
- One circle 3.4 in diamter (white paper)
- 10 rectangles 5 x. 075 (outside petal color)
- 10 rectangles 4 x .075 (inside petal color)
- Photo cut into a circle 3 inches in diameter (Print Then Cut)

There are two stem options in the svg - a longer one, and a shorter one. You can delete one of them, you only need one stem for the flower. The little piece in the middle is only needed for option 2 of the flower, for the first option, you can delete that as well.

10 rectangles 5x.075
10 rectangles 4x.075
In Design Space, Click on Shapes, Choose Square
Select the square, click on the lock to unlock the size, and resize to 5 wide by 0.75 tall
Duplicate - you will want 10 rectangles of this size.
Now add a new square, unlock and resize to 4x.075, and duplicate to create 10 in this size.

Next add two circles.
The yellow one will go on the front of the card and should be 3.7 in diameter
The white one is for the inside of the card, and should be 3.4 in diameter

You can just add the white circle plain for the kids to write - or you can add the text and have cricut either write with the pen, or print then cut.
For Print Then Cut - Place your text on the circle, select the circle and the text and Flatten.
For Draw, Use a font that will work as a writing font, select the circle and the text & Attach.

For the photo - upload your photo, add a 3 inch circle, place it over the photo and slice. Use print then cut. OR - cut a 3 inch circle and use it as a template to cut the shape out of an existing photo.
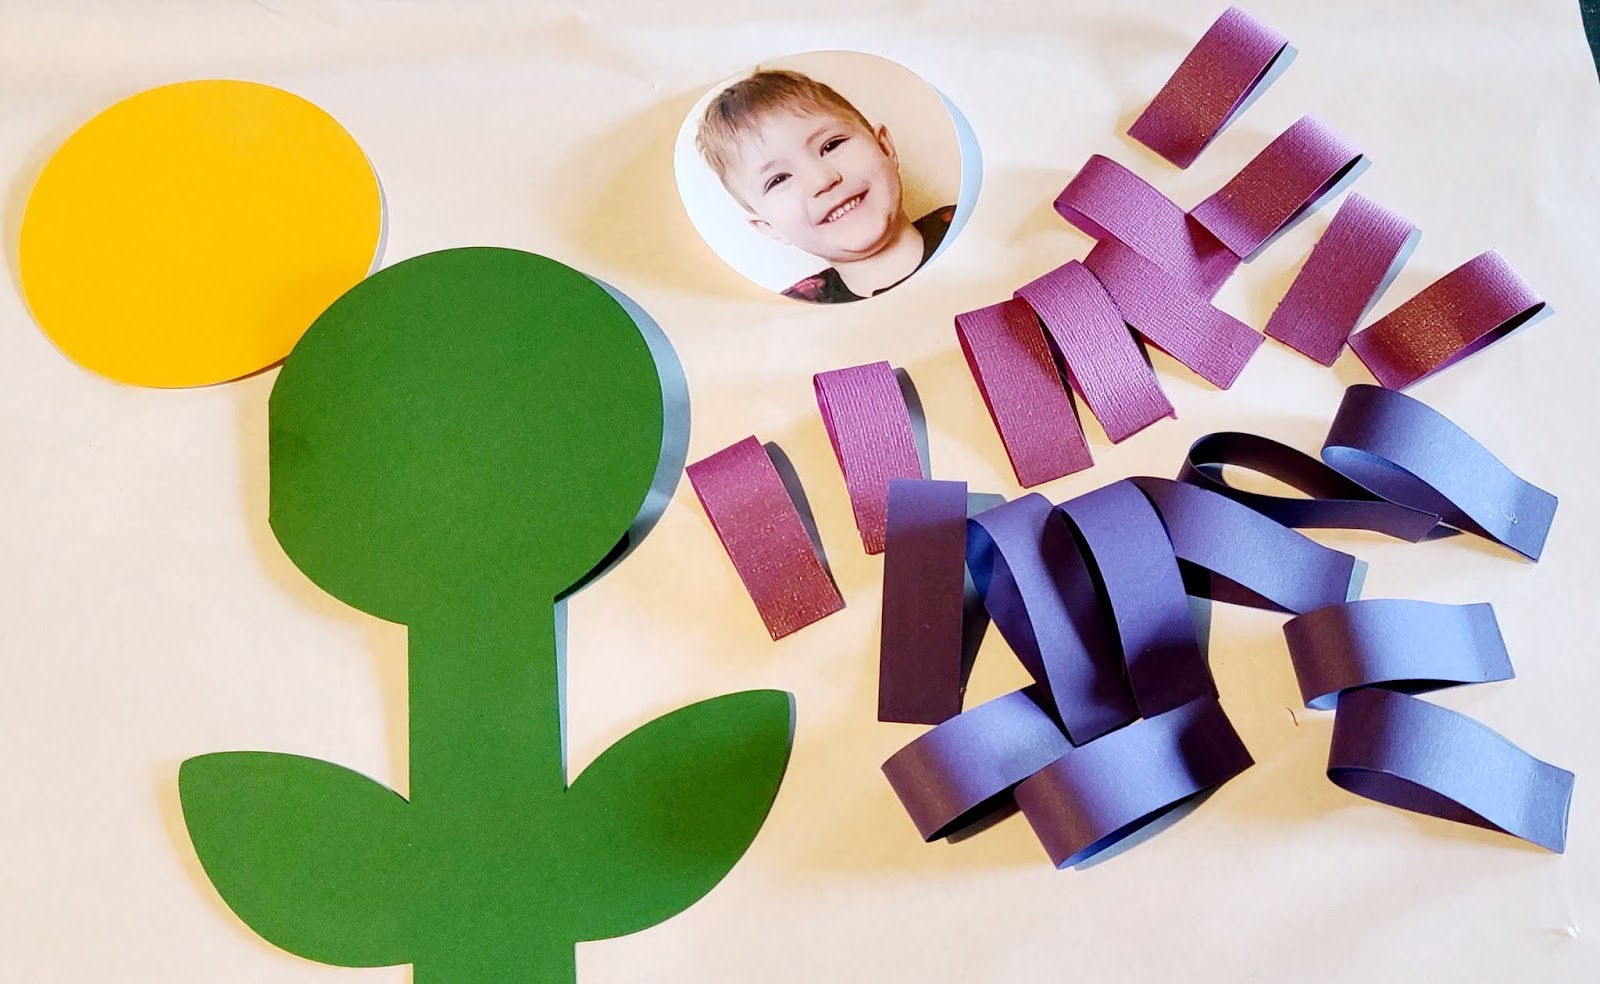
The circle part of the flower gets folded, and each of the strips gets folded in half, and the bottoms glued together.

Glue the larger strips onto the green stem, then layer in the smaller ones.
Glue the yellow circle and photo on top of the petals.

Mothers Day Flower Card Option Two

Elements Needed
- One stem from the svg (green paper)
- One circle 3.8 in diameter (yellow paper)
- One circle 3.4 in diamter (white paper)
- 10 Small Petals 10 Petals 1.04 x 2.2 (outside petal color)
- 10 Large Petals 1.23 x 2.6 (inside petal color)
- Photo cut into a circle 3 inches in diameter (Print Then Cut)
Choose one stem from the svg, and this time keep the petal (it looks like a light bulb)

10 Petals 1.23 x 2.6
10 Petals 1.04 x 2.2
Next add two circles.
The yellow one will go on the front of the card and should be 3.7 in diameter
The white one is for the inside of the card, and should be 3.4 in diameter
You can just add the white circle plain for the kids to write - or you can add the text and have cricut either write with the pen, or print then cut.
For Print Then Cut - Place your text on the circle, select the circle and the text and Flatten.
For Draw, Use a font that will work as a writing font, select the circle and the text & Attach.
For the photo - upload your photo, add a 3 inch circle, place it over the photo and slice. Use print then cut. OR - cut a 3 inch circle and use it as a template to cut the shape out of an existing photo.

Ignore my glue mess - I pulled the yellow circle off to show how the petals are layered.

=========================
A magnet fits nicely between the layers, making these great to hang on the fridge too!

=================

==================

Find More Cricut Crafts For Kids Here:
=========================

Find more free svgs for kids games, toys, activities and more!