

Stitched with embroidery thread, the tree on this Christmas card can be removed and used as a Christmas ornament.
Inspired by the Spellbinders die cut designs. They have AMAZING card inspiration and dies, be sure to check out their website. I'm not yet ready to commit to another machine, so I came up with my own version, using the machines I already own.

Note: I have no plans to become an svg designer. I'm including my files for the card base - but they are not perfect files. You may just want to use the tree svg, which seems to be working well, and design your own card base... or you can make my card base work, if you are willing to weld and slice. :-)
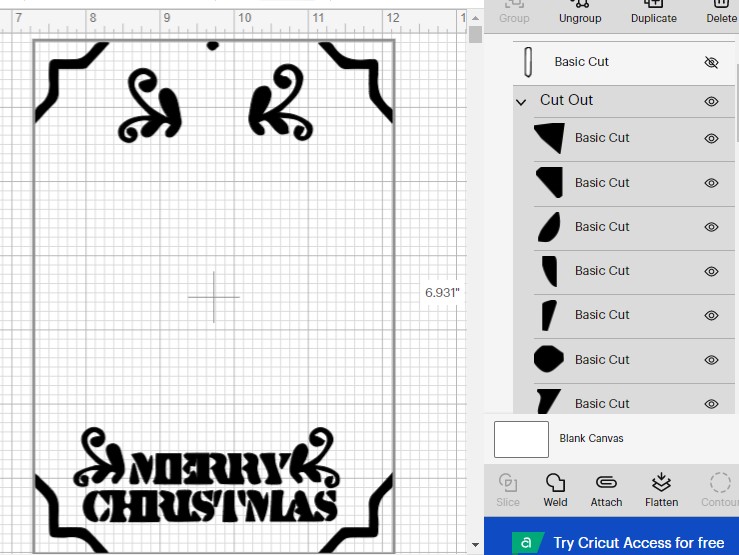
This is how the svg will upload - with a dozen or so little pieces. Click on the group and choose weld. Resize to 4.8 wide by 6.8 tall.
Next I changed the color to white, just to make it easier to see for the next step.

Using the shape tool option on the left, add a rectangle. Unlock it (top of the screen) and resize it to 10 wide by 7 tall. Place the svg on top of the rectangle, and make sure the corner cuts do not reach the edge of your card. Choose Select All (top left) and then slice (bottom right)

Once you have sliced, there will be two extra layers to remove. Delete those.
One more shape to insert - another rectangle. That will be the insert that slides into those corner cuts on your card.
One more shape to insert - another rectangle. That will be the insert that slides into those corner cuts on your card.

Next upload the stitch tree svg. Note that when you upload it will have both a pink and white layer, both "hidden". That's because I am not an svg designer and really don't know what I am doing. :-) But it's ok - just ignore them, or delete them. You just need that tree.
Resize it to 3.611 x 4.859 or something thereabouts. Make it fit into the space on the card.

Select the tree, then on the top right choose duplicate. Select one of the trees, and choose, from the bottom right, contour. Then choose "hide all contours". That will leave you with a solid tree silhouette, to place on the back of the stitched tree to form the ornament.

Two trees, and the card base.
Note - now that you know how to contour, if you want to contour out the "Merry Christmas" and use a different font.. or use the Merry Christmas SVG I have included in the zip file. If you add the text from the zip file you can just attach it to the base, no need to slice.

One more shape to add - the insert that fits into the card.
Add a rectangle 4.59 x 6.57

Card 10x7
Insert 4.59 x 6.57
Tree 3.611 x 4.859

I added a 7 inch score line, then selected the card and score line and chose "Align, Center".
Then Attach the score line to the card.

Once I stitched the card, I attached the backing with hot glue.
The strings at the top of the tree ornament can go through the whole at the top of the base card.

I then added a small pop dot to make the tree "stay put" in the center of the card.

For now I just taped the string on the inside of the card - but I think I'll make print then cut stickers that tell the recipient that the tree is made to be removed.

The finished card fits beautifully into the 5x7 envelopes I purchased for much less than I could make them. I don't think these will need extra postage - but I will check before mailing them.
Thanks for the file and the details of how to make the card. Do you mind saying what software you used to design your svg file? I'm also not an svg designer, but have dabbled in Inkscape so I'm just wondering. I've seen these stitched cards online, but do not want a die cutting machine that uses plates so I find what you did interesting and exciting!
ReplyDeleteFor this I tried both inkscape and adobe illustrator. I had a miserable time with both. I think it takes a lot of time to learn the programs, none of it is intuitive for me, and I find the entire process just too time consuming and frustrating. Silhouette Studio Professional version allows you to export svgs - I think that may be my personal best bet, as I want to learn to use that software anyway. (I may purchase another cricut Air 2 - but I dislike my Maker so much that I can't imagine I would ever purchase another - most likely I'll go to silhouette next)
DeleteThanks for the reply. Although I can't speak to Illustrator, I agree that Inkscape is not intuitive, although Design Space wasn't intuitive to me at all in the beginning. For me, one of the issues is just consistency of use. I've taken two good online classes on Inkscape and I do understand things as I work through the courses, but then I don't use it enough and I forget how to create things in Inkscape. That's too bad about your Maker. I have an Explore Air 2 as well and have been very happy with it. I've used a Maker at my local library a few times and it has worked well. Hopefully it will continue to do so as it gets more use from library patrons.
Delete