Quick Tip - Use Attach Instead Of Slice


Although there are times you will want to use slice, often there is no need—Attach will do the exact same thing in less steps!  When you attach, you tell cricut where to cut the text.  So if it is attached to the shape, it will cut out of the shape, exactly the same as if you had gone through all the steps to slice


Update - Did you see that we no longer need to weld text before we slice?  Apparently in one of the latest updates, text boxes became "one" item, no matter how many letters you used.  So you can now type your text, place it on a shape, and slice, WITHOUT welding the text first.

===================


Quick Tip - When Uploaded Images Are Not Showing In A Project

When You Can See The Image In The Layers Panel, But Not On The Canvas

Sometimes when you upload an image to Design Space, it does not show up on the screen, although it appears in the layers panel.  That is usually because the default upload placed them off the main grid area.  It's a quick and simple fix. 

 Select the  item in the layers panel (or "select all")
, then at the top of the screen find the "position" box.  
Change it to 2, and 2.  

You should then see the items in your work area.


========================


Quick Tip - How To Use Color Sync


Beside your layers panel, there is a "Color Sync" option.  
This is useful if you have accidentally used several shades of one color, but only have one shade of that color of vinyl;.  To quickly change all of your yellows to the same yellow, simply drag the ones you want to change to the color you would like them to be.

In 2022 Cricut Updates, the Color Sync Menu has changed it's appearance, but it still works essentially the same.


If you only want to change the color of one iems,  drag and change the color, make sure you have the item (for instance, "rolledflowers 2" selected, and NOT the square group icon above the item, unless you want to change the color

If you want to change the entire group, making all of the light purple items dark purple, for instance, drag the square group icon to the color you want all of the items to be.

Read More:
Which Vinyl To Use For Each Project, Price Guidelines, and My Favorite Brands


Quick Tip - When To Attach, Weld, & Flatten


Attach - Attach tells cricut to cut exactly as you have it in design space.  You will only have one color of vinyl on the mat at a time, so you also only want to attach one color at a time.  If you attach all, your entire design will cut in one color.  Select all the Blue, Attach.  Select all the red, attach.  Etc.  Then all of the blue items will cut exactly as you have placed them in your design, and all of the red items will cut, etc.  

Where To Find Free Leopard Print SVGS


=====================
Leopard Print Themed Free SVGS
====================
COMMERCIAL USE
Commercial use svgs can be used on projects you plan to sell.  You may not sell the svg, but you can use the svg on an item and sell that item.

How To Make A Leopard Print Design In Cricut


Step 1  - Download/ Upload Free Leopard Print SVG

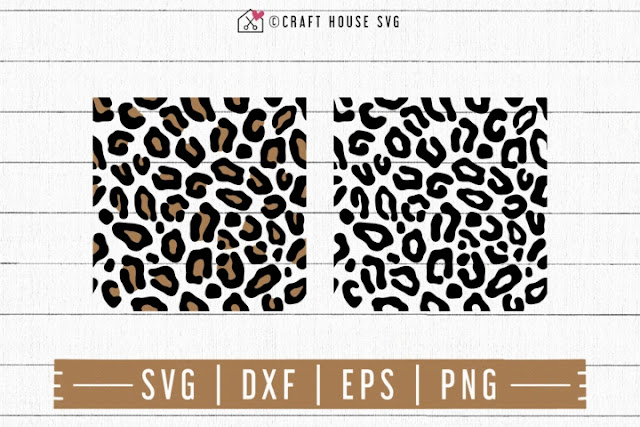
Notice that it comes in two versions.  You will need to decide how many colors of vinyl you want to layer.  I started by uploading the pattern on the left, and making the truck a dark brown.  That would have been a LOT of layering, and I quickly decided to just make the truck the lighter brown, and only use the black part of the pattern.  
Upload the SVG to design space.
Remember that you have to unzip the file first, then upload the one that looks like an html file - it will most likely have the icon of whichever internet browser you use (Chrome, safari, etc)

Step 2 - Weld
 The example is still using multiple colors - again, I chose to make the truck brown and only use the black part of the pattern.

FIRST - If Using Two Colors  - Ungroup.
You do not have to ungroup each color, just ungroup the two colors from each other.    So the black and the brown are no longer grouped. 

If  two colors are grouped together, even if you only select one color, it may disappear in design space when you weld. 
Ungroup the two colors from each other first, then weld.

See in the photo above, on the right in the layers panel, where the down arrow is beside "Leopard-print-pattern"?  Click on that line.  It will select all of the brown below.  Once the brown is all selected, click weld.

Step 3 - Duplicate
At this point I knew I did not want to use three colors, so I deleted the brown, and made the truck that shade of brown.  Now when I add the black, I will have just two colors.
How many times you duplicate your pattern will depend on how large you want the print to be on your design, placement, etc.  I used 4 copies to cover my truck.

Step 4 - Weld Again, Then Slice
Over in the layers panel, select all of your leopard print patterns, and weld them.  Remember that for slice, you can only have two items selected at a time. Welding the 4 leopard print images shown in the photo above made them into one image.  The truck is also welded, so it is one image.  1+1=2 - so now I can select the truck and the leopard print, and slice.   
One sliced, drag the pieces around, and delete the extras.

I had the tires for he truck hidden out of the way, because I did not want the tires to be leopard print. Once I deleted the extras, and lined up the brown and black pieces I put the tires back in my design and attached them to the black version of the truck.


 Voila - A Leopard Print Truck.

If you prefer not to weed two colors and layer, you can purchase Leopard Print HTV instead.

Be sure to read the instructions, often patterned htv is different than regular htv.  You often will NOT reverse your design but rather use a special transfer sheet (mask) like you would with regular htv.  Save your clear plastic from regular htv to use as the mask, if one is not included with the patterned vinyl you order.


Duct Tape also comes in Leopard Print

https://amzn.to/3jh7c7P

====================================
Where To Find Free Leopard Print SVGS
https://fieldsofhether.blogspot.com/2020/08/where-to-find-free-leopard-print-svgs.html

==========================
Facebook Page - For Tips, Tricks, & Free SVGS
 https://www.facebook.com/fieldsofheathercrafts/

Facebook Group- For Questions, Support, Sharing Projects, 
and LOADS More Free SVGS in themed posts with links in the comments
https://www.facebook.com/groups/1121399284857845
==================

Cricuting Through The Seasons - Projects & Free SVGS For Every Holiday & Season


Where To Find Loads Of Free SVGS, & Projects Month By Month
A List of Seasonal & Holiday Themes

Find a full, alphabetical, index of 
"Where To Find Loads Of Free SVGS For..." Here:
https://fieldsofhether.blogspot.com/2017/11/svg-freebies.html

Project - Ceramic Tile Home Sign With Interchangeable Seasonal Tiles