Free Cricut Craft Projects Planner Sheet


Just right click and "save as" to download

Cricut Progress Sheet
On the far right, the boxes stand for:
D- Designed
C- Cut
A - Assembled

A fall version

And a Christmas version

===========
See More Of My Planner Here:

My DIY Planner (And Free Printables)

  
 My planner is a combination of "brain dumps", routine trackers, and project lists.
It's as chaotic as my life, and could never be fit into a pre-printed book.    :-)

Be patient with me as I work out how to best organize all of this.  Not all of the pages are added, I'm working on it.  :-)

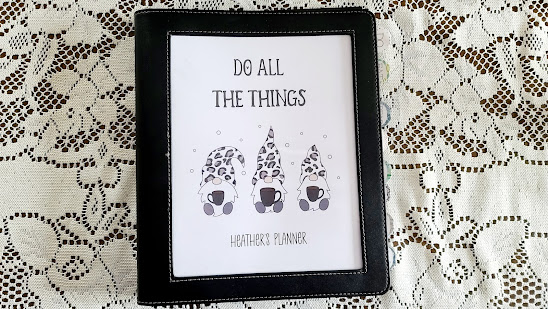
I start with this faux leather binder.  I love these. It's just a slightly fancier 3 ring binder.  https://amzn.to/3aoWcnK

In my head, I prefer the half size planners.  But in reality, I need a full size 8.5x11 sheet planner.  

The business card holder slot is perfect for holding a pad of sticky notes.

The back pocket holds a legal pad.

I work with a combination of digital apps, and printed pages, and find that the exact system that works best for me changes seasonally.   Below is what I have printed to start with in December of 2020/January 2021.  I've included links to the free printable used, as well as some of my own, in each section. 

 My sections include:
 
Do
Eat
Farm
Celebrate 
Remember
Earn

The two most used sections in my planner are DO, and CRAFT, so I put one at the front, and one at the back, to make them the quickest to access.

"CELEBRATE" is really just Christmas planning.  There will be a sheet in there for Easter, and maybe a Thanksgiving check list..  but pretty much, that's just for Christmas.  And I need to be planning for Christmas ALL year.  :-)

Most years, there would be extra sections for each of my volunteer commitments: Blue Star Moms, Wreaths Across America, 4-H...  but the reality is, in 2020 I stepped away from most of my commitments, as I find Zoom meetings to be annoying time wasters, and almost everything else was cancelled.  I'm sure I'll add things back in time, but for now, I'm focusing more on areas where I can be a bit more productive.

Tip - did you know that if you tell Alexa to add things to your to do list, you can then tell her print the list and have it sent to your printer?  

I tried to put all of the pages in one post, but it was just too...  hard to navigate.  Clicking on each section will take you to a page showing what that section looks like, with the free printables when they are available.

===========
Divider Pages & Tabs 
============
I know - the tabs are not evenly spaced. I will add sections throughout the year, so many will end up overlapping.

I print my divider pages on cardstock.  My favorite cardstock is always the recollections brand from Michaels - it's cheap, and cuts well in cricut.  For this it really doesn't matter, but because of that, it's what I have on hand.  

Tip - Use Packing Tape along the edge of your divider pages before punching holes in them, for extra durability.

I do not put my divider pages in page protectors, because I do not like the way they fit into the binder.  Purely my preference.  For the first section, the To DO section, I cover the page in clear contact paper - a cheap and easy "laminating" solution.  I only do this page because it gets the most wear and tear.  I put my days to do list on top of this section each day

There are a large variety of tabs available inexpensively on Amazon:

I make my own.   I use Print Then Cut  with cricut, printed on sticker paper.  Then I cover the sticker paper in clear contact paper before cutting.  Cut twice, on the cardstock setting.
For a detailed Step by Step:
(Writing this up now, I'll add the link soon!)
===========
Weekly & Daily 
Plan Section

===========
Each section of my planner has a cover page.  :-)
Free Printable Here:
The next two pages I print on one paper - the front is the Daily Routine page, the second is my Weekly Plan.  
A good bit of my to do list is the same every day.  For these items, I use a routine chart that can be checked off each day of the week.  Examples from what is on my list:

First Thing: Devotions, Empty Dishwasher, (Then I have 3 tasks related to my blog work)
Morning: Workout, Animal Chores, Walk, Supper Prep, Weekly Cleaning
After Dinner: Run Dishwasher, Sweep Floors, Quick Evening Walk, Update Planner (also, send my alexa notes from the day to the printer, to add to my planner)
Bedtime: House Straightened, Dishwasher Opened (so the dishes air dry over night) Contacts Out (because I have a bad habit of sleeping in them) Yoga (15 minutes - using the DownDog app)

Weekly Plan
I started with page from this site:
Then I added it to a Microsoft publisher document, where I add my own graphics for each season.  I also fill in some of the categories digitally before printing, depending on the week.  If you do not have Microsoft publisher, you can do the same thing in a graphics program, or possibly in Google Docs...

For each day, I started with the Today's Plan sheet from 
And again I added it to Microsoft publisher, then added text boxes so the basics of my week are already printed.  We have a complex schedule, so each day of my week is scheduled a bit differently.  I block schedule my days, assigning certain hours to certain task groups.  Weekly Chores, Daily chores, etc.

I also schedule my weekly cleaning my day - Mondays are for bedrooms, Tuesdays for the kitchen, Wednesdays for Errands, Thursday for Paperwork, the living room & dining room on Friday...  Rather than bother with long detailed lists for each room, I block out an hour (or more, if needed) for that area of the house. I don't really need a list to know what needs done in each room - I just need to make the time to clean that area.  

Next in this section I used to print "Brain Dump" pages.  Lines pages where I just jotted down anything and everything, to sort out later.  Recently I've switched to adding a legal pad to the back of my planner for this, rather than constantly printing new sheets.  

Tip - Did you know you can set up "flash briefings" in Alexa, even if you don't care about the news?  My morning flash briefing from Alexa tells me my schedule for the day, the weather, the word of the day, today in history, 

=========
Meal Section
===========

There are a gazillion meal planning worksheets out there.
To narrow down what you need - think about how you eat, and how you want to eat.
Sections that work for us include:
A Pantry/Freezer Staples Sheet 
Our Favorite Take Out Cheat Sheet (beneficial for my husband)
Quick Meals To Make At The Last Minute
Seasonal Favorites
Crock Pot Favorites

And then a "recipes to try" section  


=========
Craft Section
===========

Cricut Progress Sheet
On the far right, the boxes stand for:
D- Designed
C- Cut
A - Assembled
I made this in Publisher, where I make most of my planner pages, but you can right click and save as to use this if you'd like.  :-)


=========
Birthday Section
===========

=========
Money Section
===========


Free Income Tracker Printable

Free Financial Planner

More Budget Trackers

==============
More Free 
Planner Printables

==============

Fitness Planner
Month Goal Page


50+ Free Bullet Journal Printables


Goal Setting Planner Worksheets


Cricut Christmas Challenge Week Nine - Mixing Print Then Cut With VInyl

So many crafters get a new Cricut machine specifically to make Christmas gifts, but then are completely overwhelmed by how to use the machine.  To make it a little less overwhelming, I put together 12 weeks of Christmas Crafts, Step by Step, walking you through new skills each week  to help you become comfortable with your machine and how it works..  Find the index here:  https://fieldsofhether.blogspot.com/2020/10/the-12-week-christmas-craft-challenge.html

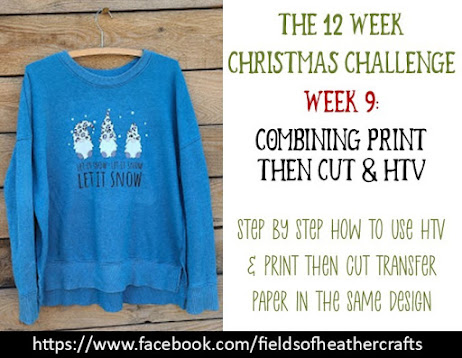
This week, step by step,  we're learning about using both print then cut t-shirt transfer paper and heat transfer vinyl in the same design.

For "Choose Your Own Adventure" section this week, there are a variety of ideas for more holiday shirts to make.

As always,  I'd love to see what you make!  Join the group for this page to share your progress, ask questions, and be absolutely inundated with free svgs, posted by themes.  :-) Join The FB Group For This Blog By Clicking Here

For which vinyl to buy, I have a list of my favorites, and price guidelines, here:

============
Step By Step
A Shirt made with both print then cut transfer paper  & HTV
=================

This was not a free svg.  It wasn't even an svg.
But it was in the Design Bundles $1 sale, and my daughter loved it.  So For $1, I bought it.  It is no longer $1. https://bit.ly/3pQy9rA

The process I used will work for just about any image!

Upload the png or jpg image to Design Space.  It will upload as a print then cut project.
Select it, and duplicate.
Now with the duplicate copy selected, change it to a cut image by selecting "no fill".


Now with the duplicate image still selected, choose contour, and click on the gnome shapes to make them go away.

Using the shape tool, add a square, click on the lock to unlock it, to make it a rectangle.
Cover the text, Select the image and the new rectangle, and choose slice.

Delete the extra pieces from the slice, turn the text black and the snow white, then select both and group.  These are your pieces to cut from heat transfer vinyl.  Don't forget to mirror them before you cut!  Once this part of the design is grouped, go ahead and drag it to the side, or hide it, while we get the next part ready.

Select the original image, and duplicate it again, just like we did the first time.
Again, change the duplicate copy to "no fill" so it is a cut file.
This time, select contour and at the bottom choose "hide all contours".
Then select each of the gnome shapes, so that only they appear.

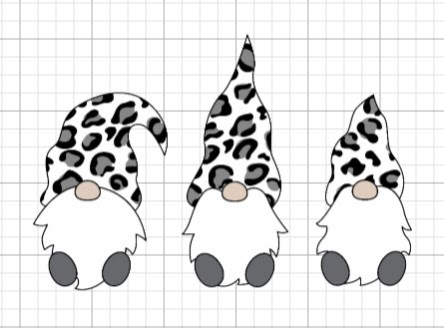
Now you will have your original image, and your new gnome shapes.
Next is the hardest part of this process.  Line the shapes up over the printed version

Once they are lined up, select both images and slice.
Delete all the extra, and you have just 3 individual gnomes ready to be print then cut.


unhide or bring back your cut pieces, and your canvas should look something like this:

Notice that in my layers panel, the gnomes are set to print then cut, and the text and snow are set just to cut.

The text definitely need to be flipped if you are cutting it from htv.  You can choose to select it and flip it horizontally, or on the make it screen you can remember to click "mirror".  I never remember to click mirror, so I always flip.

For the Gnomes, whether or not you need to flip them depends on your transfer paper.  You will need to read the instruction sheet that came with your printable iron on transfer paper.

I used Avery For Darks, which does NOT get mirrored.  (Avery for lights does get mirrored)

When you click make it, you will be prompted to print your design first.  Then cut that part of the design.

Print then cut projects always print with a black box around them.
There is a sensor in the cricut machine that will find that black box, and that is how it knows exactly where to cut.

For this paper, I set my dial to light cardstock.  

For tips for solving simple issues with print then cut projects:

As of December 2020, make sure your canvas is set to "classic" and not the new canvas before clicking make it.  The new canvas is causing all sorts of issues, including many with print then cut projects not printing properly. https://fieldsofhether.blogspot.com/2020/12/quick-tip-revert-to-classic-cricut.html

Once cut, I just pull up the side, and the images are left stuck on the mat

Again, be sure to read the instructions that come with your transfer paper!
For this paper, Avery For Darks, there's a backing that you peel off once printed.

Once the backing is peeled off, place the gnomes on the shirt right side up.
I then placed my snow vinyl over top, to make sure I had the gnomes spaced properly.
I didn't iron the snow on, just set it down for spacing.  I removed it, then added the paper that came in my pack of printable iron on transfer paper - 

And then I pressed, with a plain old regular iron, because that is what I always use.

How to use a regular old iron for HTV projects - 

Then once the gnomes were on, I added the snow and lettering htv, and pressed again.

Try not to press over the gnomes any more than you have to - it is possible to over press and burn both htv and iron on transfers.  With just two layers, it's not a big risk or concern, but if you are layering a lot, try to press the early layers as little as possible.


Here's another shirt where I mixed print then cut with htv:
For this one, I simply added text around an event logo.

=================
Choose Your Own Adventure
More Holiday Shirt Ideas
With Free SVGS or Print Then Cut Images
=================
Obviously we are on a gnome kick this year..
This particular Hallmark Movie Watching shirt is NOT a free svg
But I do list free versions in the post

I put these gnomes on a different shirt for my daughter.


This is my ugly Christmas Sweater, Free SVG - 
And find pages and pages more like this here:


Find more free svgs inspired by A Christmas Story

I've been using this design on Christmas ornaments, but it would work well on a shirt too - 

And find more free Grinch SVGS here:


=====================
The Christmas Craft Challenge Index

====================
The Christmas Index
Where To Find: Free Christmas SVGS By Theme (Nativity, Grinch, A Christmas Story, Etc), Where To Find Free Christmas SVGS By Project (Gift Tags, 3D Paper, Earrings, etc) and Where To Find Free Christmas Project Tutorials & Gift Ideas.  Including an entire extra index just for making Christmas Ornaments.  Find it all here:


Using Rub & Buff on Glass Etching Projects

"Rub N Buff (RNB) is an easy to use metallic wax that gives your etchings the look of leafing, but without the hassle. It will stick only to the etching and not the shiny glass. It is fairly durable and can be re-applied when it wears away (no topical colorant is permanent)"

The Rub & Buff comes in  surprisingly tiny tubes, be prepared.  But don't despair, a tiny, tiny bit goes a LONG way!