

These Pop Up Love Monster Valentines are from a new to me designer. The svg was not free, but it's a great quick and easy design. My two year old grandson did most of the gluing today, on all 8 of the cards we made.
Find the svg here:

On the first one, I tried using pop dots for the arms, but quickly realized that was not a good idea, it added too much weight and made the monster lean forward too much.

We used glitter cardstock for all of the monsters - but this card is really cute in plain paper too.
I'll likely make a couple more in non glitter cardstock myself - but today my grandson got to choose, and he liked the glitter cardstock.

These fold flat for mailing, however, the finished card is 6.5 x 6.5.
So not only will you need a large envelope, but it will cost extra to mail them.
From the USPS website:

========================
https://www.birdscards.com/box-envelopes/
Birds Cards has a free "box card" svg, which fits onto a 12x12 piece of paper. For hand delivering cards, I'd make the envelope as the box.

For mailing, I folded them flat. The file has all of the score lines dashes, and each line is separate in the file. Here's how to quickly change them all to score, and adjust the file to fit this card. Step by Step:

The envelope will upload at an angle. To resize it and have Design Space understand that it's not actually too large, you will first want to rotate it.

Once you have it rotated so it's a square, in this current version of Design Space, you will HAVE to unlock the size. See the padlock on the bottom left? Click on it so the lock "opens". Now at the top of the screen change both the width and the height to 11.5.
You have to leave the size unlocked. If you lock the size, DS will read it as 16 inches wide, as if it was still rotated, and will tell you the project is incompatible, because it is too large. If you leave the size unlocked, DS will read the size properly and allow it to cut.
Now, lets quickly change all of those score lines. Normally we'd choose each line and change them to score. But there are so many in this project... that would take a good bit of time!
Rather than select each one, choose "Select all". This will select the entire project. That's ok. Now at the top under operation, change it all to score.

Now that the entire project is set to score, scroll all the way to the bottom and find the large shape at the very bottom. Select just that one item, and change that to basic cut. While you have it selected, change it to white, so you can see the score lines.

Now once again choose select all, and attach.

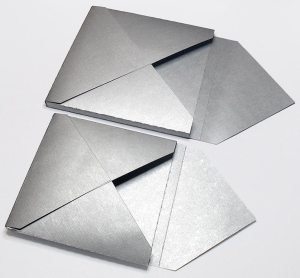
This is the envelope, which is meant to be a box envelope, folded flat. There are probably better svgs out there for truly flat envelopes, but I had this one handy, and it works.
For hand delivering cards, I'll make the envelope in it's intended box form.
===============
As a Design Bundles Affiliate, I may earn a small commission if you purchase this file through the link in this post. This is no way changes or impacts the cost to you.
No comments:
Post a Comment