

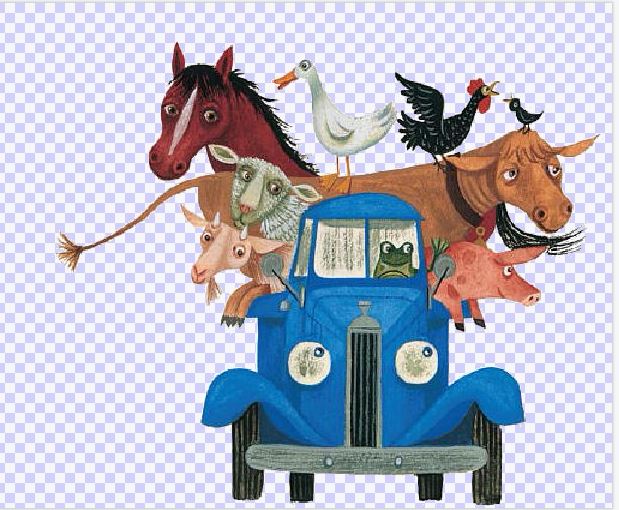
Print & Cut Little Blue Truck Designs, made with cricut, on wal-mart shirts using Avery Transfer Paper
Cliff Note Version:
- Avery Iron On Paper
- Design from Pinterest
- Don't forget to Mirror!
- Cut on Iron on Setting (But cut twice)
- I used a regular iron.
- Tips For Solving Simple Print Then Cut Problems

These are the materials I used. You do NOT need the parchment paper, I used it out of habit. I used the blue mat, a silicone baking sheet inside the shirt, Avery fabric transfer paper, and my iron. Oh - and I also finally used the spatula tool! It wasn't necessary, but it was helpful, in removing the design from the mat.
Print and cut is great when you do not want to layer a lot of vinyl for intricate designs like this. You can print the design, with lots of detail, on iron on transfer paper, and then have cricut cut closely around the outside of the design.
Size to fit your project. I was making two shirts, one for a toddler, and one for an infant. To get them to both fit on one sheet, I had to move them around, select both, and attach - otherwise Design Space would keep moving them to two mats.
The maximum print size for Print Then Cut is 9.25" x 6.75". It does not matter how large your mat is, or how large your paper is, your design is limited to 9.25x6.75 in print and cut.
Using Your Printer
Click Make it, and hook your computer up to the printer (if you printer is not set to work wirelessly) I use a simple old HP Deskjet 3510 inkjet printer. I had it long before I had a cricut. It works well for me.

I choose Advance Option, and change my media to Specialty Paper, Best Quality.

Bleed Or No Bleed?
I always think that bleed should be on, so there is no white line around the design, but every time I use it, I still end up with a thin white line. I'm not sure it really makes any difference, it really didn't in this design.

The image on the top left, which I forgot to mirror, had the bleed on to cut. The image on the bottom right, which I remembered to mirror, had the bleed turned off. There was really no difference at all with this design.
Send To Cricut To Cut

In the past, this setting, Iron on Plus, worked great for me. This design has more intricate cuts, and I could tell it wasn't cutting clear through the design, so as soon as the cut finished, WITHOUT clicking the flashing arrow button to unload, I clicked on the C again, so that it cut a second time. This worked beautifully.

Your design SHOULD print out with a black box around it, as shown here. The black box is the registration marks that Cricut reads, to know where exactly to cut the design.
The maximum print size for Print Then Cut is 9.25" x 6.75".
In most cases. You CAN do larger print than cut designs now, if your printer can handle them.. here's more information from Cricut
Once cut, it's really easy to weed this. I did use my spatula tool to help lift the finished design from the mat.

And yes, my mat desperately needs cleaned...
Iron On The Design
I use a regular iron. I also use an ironing board. All the shirts I have made have held up great, and they are all just tossed in the washer and dryer with regular laundry.

I set my iron between wool and cotton, and I use a silicone baking sheet inside the shirt. I do think the baking sheet helps a lot - it reflects the heat.
Unlike vinyl, you can iron this like you would iron clothing. I don't - I press in bursts of about 10 seconds each, repeatedly. The times are given on the instruction sheet inside the pack of transfer paper, I aim for about 30 seconds total for designs this size.
Then remove the baking sheet, and let cool for a minute or two. (the instructions say 2 minutes). Then peel off the backing.
There will be a paper in the pack of transfer paper with instructions for ironing.

This was another design I used Print Then Cut for. It was much less complex - I just had it print the design and cut the circle - the letters around the circle are all cut from white htv.

==================

==========================

https://fieldsofhether.blogspot.com/2019/03/solving-common-print-then-cut-problems.html
=================
Hi, I have used the Jolees brand light fabrics and it is very easy to weed after cut with my cricut. I have now done 2 pieces of avery light and for some reason it is very difficult to weed. Any suggestions?
ReplyDeleteI haven't done anything intricate with the print and cut.. so it has always just peeled right off for me. If it's not weeding well, maybe have it cut twice? (without unloading the mat, click the C button and it will repeat the cut.) I really don't know though!
DeleteHello, so I kind of notice that your second design (man in black shirt) the logo seems to be a lot bigger than the sizes .25x6.75
ReplyDeleteIs it all in my head or how did you get it to be bigger?
Thank you
The circle in the middle is 6.75 - the text on the outside is separate, making the total design larger. I used print then cut for the circle, then just used regular white htv for the words on the outside of the circle. There is no way around the size limitations on print then cut. :-(
ReplyDeleteMy grandson loves the Blue Truck books...where on Pinterest did you find this..everything I find is for purchase or blurry. Thanks!
ReplyDelete