Raising Chickens In Town


This was written originally in 2001 - when we lived in town, not on a farm.  :-)

My Chicken Diary - our first experience raising chickens


The chickens are here!  We now have 3 barred rocks, and 3 red sex link chickens. We got them the day after they hatched and will raise them as laying hens.

We live in a small town, on slightly less then an acre.  To make the chickens look nice in the back yard we are building a coop with a picket fence, lined on the inside with chicken wire. I'll post more pics of it when it is completed, I still have a few weeks until the chickens will be out there. For now they are living in a rabbit cage on in our laundry room, it works well, keeping them protected form the cats and enabling us to keep them warm (with the help of heat lamps) and draft free.    Soon they will outgrow the pen, then they will move to the shed to live until they are old enough to live outdoors full time.


I've wanted chickens for a long time, but never really looked into what it would take to have them here.  We've been busy with remodeling the house, the children were all really young - there just wasn't time.  In February of this year (2001) My brother in law called and told me that a store nearby was having a seminar on raising poultry - was I interested in going?  Of course I was!
It was a wonderful seminar, very informative, lots of door prizes.  One of the door prizes was 12 free chickens, and I won it.  What a great incentive to get started!  Because I live in a very small rural town, with neighbors nearby, I do NOT want roosters.  I wanted them to be pretty too, and be unlikely to be able to fly very high at all.  My original choice was 6 red sex links, but I really loved the look of the barred rocks, and the store promised me they would be hens, so I chose 3 of each.  (the rest of my gc went towards my brother in laws birds, I didn't want that many chickens here). 
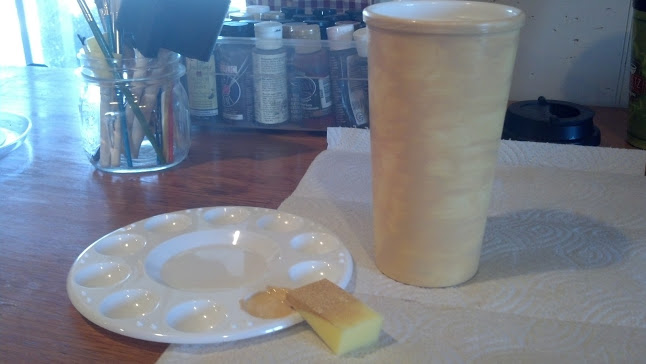
Clarks Ag Center, where we attended the seminar, also gave us all a pack of Vi-tal vitamins, which they highly recommend.  We put a tiny bit in their water each day to help them grow healthy and strong.  
Day One -  4/25/2001


The chickens are here!  They are day old, just hatched yesterday!  We picked them up to bring home in a cardboard box, and the barred rocks were picking on the red sex links.  I was tempted to take them back and get all one kind, but decided to give them some time to get used to each other.  My brother in law picked up his pheasants, they are smaller then the chicks but MUCH more aggressive. We kept them under a heat lamp in a red Rubbermaid container in my brother in laws basement until we were ready to head home.  Home fro us, from there, was a just over 20 minute drive and I was a little worried about keeping the temperature up.  I sat them on the front seat of the van and turned the heat on, they did fine, i don't think I needed to worry as much as I did. 
We are keeping them in a rabbit cage in my laundry room until they are a little older.
I placed brooder guard inside the rabbit pen, to keep them extra protected form the cats and from drafts, this is right near the back door.


So far this is the cheapest "hobby" I have ever pursued...  
Brooder Guard - .15 cents a foot
Red heat light bulb - $7.99
White heat light bulb - $ 3.49
Chicken starter feed - $2.50 for 10lbs
We already had the waterer, and the actual heat lamp.  Later I will buy a feeder too - that will cost another $2-$3.
Day Two 
All did well through the night and seem to be eating/drinking well.  Some take to being held better then others, not split by breed.  They are pecking at everything!!
Day Three
Wings are beginning to feather out a little already!  The 6 of them are eating about 2 cups of food a day.  Cage still looks clean, no wet spots.  Water needs cleaned out twice a day, they get pine chips in it.
Day Seven


They are getting big fast!  One of the red sex links is developing feathers much faster then the others, I am told this is normal  They are all still healthy, eating and drinking well.
Day 10
They are really feathering out now!  One of the red sex links is getting some dark red on her wings and they are really fluttering around their cage!
Day 14
Two weeks old today!  We finished off the first 10 lb bag of food today, and opened a second one.  And today I saw one of the barred rocks on top of the waterer for the first time -  their wings are allowing them to get some height now!  I am anxious to get their pen & coop finished so they can be outside part of the day - the temperatures are in the 80's, they could definitely be out as long as we bring them in at night.
They are all about the same size - the pic makes the barred rock look smaller because he is sitting. They were calmer for their pictures this time - but they still scatter when we reach in the cage to get them.

Day 21


Their tail feathers are filling in nicely!  They are loosing their old downy feathers a little more each day, and the new heavier feathers are coming in well.  
We've moved the out of the house and into the shed - still under a heat lamp though!

Day 25
The chickens are now outside!
The basic chicken coop is finally done and the chickens are outside!  We ran picket fence, then covered the inside with chicken wire. Then we divided the section roughly in half and ran more chicken wire, with a gate, and covered the top with a netting so that hawks and cats cannot get in.  Their house is in the back, that will be raised up later.  

I have broccoli, brussel sprouts, and dill planted in the outer fence area, as the chickens get older and bigger they will be allowed to roam out there during the day.    We let Molly the bunny run in there for a little while today, she loved it!  The heat lamp is still in the hen house - evenings get chilly here yet.
I went out to check on them before I went to bed, they were all in the hen house.  When I had left them earlier they were all outside yet, when it got dark and cold they all went in without us showing them or forci8ng them.  I am very happy!.
Week 5


5 week old Barred Rock

5 week old sex link
The chickens are doing great!  They really look like chickens now.  I shut the heat lamp off a few nights ago, and they are doing fine without it, the nights here are 50 and above.  They love being outside, and especially love it when I open up the fence so that they can be in the outer part of the garden. They have not harmed the garden plants at all, but love the weeds  - there are no weeds on their inside cage, and very few out in the garden area.  They like to perch on anything, can fly a few inches off the ground if chased, and are starting to make a slightly different noise, they even sound more like chickens now.
 The barred rocks are slightly more skittish then the red sex links, it is easier to catch the reds.  This may be partially because Matt has held the reds A LOT but is a little afraid of the black ones, so they haven't been handled as much.


Week 5 1/2
We finally got the chicken coop raised!  Now they have a shaded area to sit during the day, and a board to perch on - they love to perch!


Week 6


Week 6 1/2
I let them out in the extra part of the garden and they flew up and perched on the fence today!!  Not sure what we are going to do about that...  I hate to clip their wings, but I also hate to keep them penned in the small area everyday until they get heavier.  They come running to the gate each morning expecting me to let them out to run.  Since we live in town, I can't risk them jumping over the other side off the fence, one of the neighbor dogs would kill them. 

  That's where the diary ended.  I have pics somewhere of Matt discovering their first egg, it was a big day at our house.  :-)  Almost all of these hens lived to move to the farm with us in 2004. 

Inspiration For Redoing Our Bedroom -


This was our room at the Linck Hill Inn, for the marriage retreat last month.  I am completely in love with this wallpaper and want to find it, or something very similar, to for our bedroom.  It can't really be seen here, but the wallpaper stops about a foot from the ceiling, at a trim.  from the trim to the ceiling it is painted the color you can see to the right.  I want to mimic this as well. 

 Another view of the room:

From Belt Hanger to Utensil Holder

My kitchen utensils do not fit in my kitchen drawer.  I had them in a crock, but it was messy - and I had two crocks, one for wooden spoons, one for metal/plastic utensils.  While cleaning this week, I decided I would like to hang them on the wall, and of course I wanted to do it IMMEDIATELY - patience never being my strong suit.  I stopped at Dollar General while my daughter was at her piano lesson, and found this $2.50 tie & belt hanger


The hanger part popped right off, no tools needed.

There was already a nail in the wall where I wanted to hang this.  Seriously. I have no idea why, but this project was one of my quickest ever!


Joy & Willingness


Weekends exhaust me.  Looking at my schedule, it doesn't appear that they are that much, if any, busier than my week.  I do less cleaning, so there is less work.  We usually have some fun things planned.  So what is it that makes me want to stay in bed and hide while everyone else is shouting TGIF? 

I think it is the lack of schedule.  I am not really a go with the flow person, as much as I want to be. 

Not that our weeks are all that predictable- we had drop in company (in the middle of my spring cleaning mess) a sick teenager, an unexpected spree of running (errands) to solve an unexpected car issue...  not to mention that I was spring cleaning all week.  My yearly ritual of starting at one spot on one wall & cleaning, scrubbing, decluttering, organizing, & then usually cloroxing every square inch of this house- making a list of projects as I go a list so long that I wonder if we will ever make a dent in it.

Add in that we have 8 puppies in the back yard, and when my husband forgot to close a gate, a cow in my front yard...

It is not as if I have some perfect routine here all week long.

So maybe it is more than just the lack of structured schedule?  I think it might also be the sense of failure.  The week is over.

I did not exercise once not once.  (With Matt sick all week, I didn't drive him to the weight room, so I didn't walk the trails while waiting for him.  I didn't take him to PT, so I didn't run the canal while waiting for him.  I didn't use the weight machine in the garage, nor do the 30 day shred even once.  I did do sit ups and push ups before bed at least, most nights)

My in box is overflowing w/ messages that require answers, in a polite society.  We have an event next weekend that I have no details for, and that makes me jittery.  My daughter leaves for a last minute, I know almost nothing about it and do not know if she is prepared, missions seminar at a college this week. I leave for Texas in a week, & I have no idea what I am wearing, what we want to do while there (other than see Luke graduate from basic training, that is why we will be there!) What we need, etc. I did not finish the spring cleaning, I have 4 rooms + 6 cupboards uncompleted.  My to do list (todoist app, love it) has 47 uncompleted items from this week, not including the things I listed here.

So when the weekend hits with all of its chaos, and obligations, I just want to quit.  I started looking for excuses to avoid events first thing this morning.  "Matt has been sick all week, he won't be up to the adopt a hwy clean up" I checked on him, and he of course sat up in bed & said he feels much better & is ready to go... "We haven't run all week, no sense running at the lake today, we can just start fresh next week." Uhm, horrible logic.  Even a walk around the lake will be better than quitting entirely.  I'll spare you the rest of my "logic", but I had excuses to avoid every item of my day.

Then I read my morning devotion.  Which is where I should have started first this morning.  The last verse of today's reading in She Reads Truth Prayer In The Bible (through you version) is:
"Restore to me the joy of your salvation and grant me a willing spirit, to sustain me." psalm 51:12

Oh. That's right. My joy comes from my salvation, not my circumstances. And let's face it, my circumstances are not all that bad. I am very blessed. But I lost my focus, and I was busy feeling discouraged & overwhelmed. And my new prayer for Fridays? While everyone else is shouting TGIF, I will be praying, "God please grant me a willing spirit to sustain me." As I watch my freshly spring cleaned home become littered with weekend chaos & clutter. As I deal with difficult people, somewhat tedious events & difficult requests. As I try to catch up on just a few of the things that didn't get done this week. As I attempt to jog around the lake w/ a pulled tendon, 80 extra lbs that I cannot seem to lose, & my inhaler.  

God please grant me a willing spirit to sustain me. Guard my heart, and guide my tongue. Help me to be uplifting & encouraging to everyone around me. And thank you Lord, for saving me. My joy is in the salvation you have granted me. I am so sorry for not keeping that foremost in my mind.

Angelfood Cake from Scratch

If you have chickens, and you have a kitchen aid mixer, angel food cake from scratch is likely to be a regular recipe come spring time, when the hens are laying more eggs than you know what to do with.  This is so quick and simple to make, the mixer does all the work!  This recipe uses 12 egg whites.  Save the yolks to make homemade pudding.
of course, the time I make this to get a photo for this post, I am rushed and do not let the egg whites get stiff enough, and then the cake doesn't rise nearly as high..  I'll get a better pic another time.  This one still tasted great!
Preheat oven to 350


1 cup of flour
1/4 tsp salt

sift together & set aside

12 large egg whites at room temp
 beat on medium until foamy, then add:

1 tsp cream of tartar
beat until soft peaks form

add 1 1/4 cups of sugar, gradually, beat for about 2 more minutes, until stiff peaks form

add 2 tsp pure vanilla extract
beat just long enough to mix through

remove the mixer bowl from the mixer.  Very gently sift the flour mixture, 1/4 at a time, onto the eggs.
With a spatula, while turning the bowl, fold the mixture. Repeat until all the flour is added

Gently spoon the mixture into an angel food pan.  Bake until golden brown, around 35 minutes.  Run  knife around the edge of the pan to loosen the cake, remove from the pan to cool.

From the Martha Stewart Website:
"Craving chocolate? Replace 1/4 cup cake flour with 1/4 cup unsweetened cocoa powder; reduce vanilla extract to 1 teaspoon."


Finishing up some Dishcloths

Part of my 52 Projects in 2013, where I am trying to use up some of the supplies in my craft closet, finish half finished projects, and finally get to some of the projects I have had in the back of my mind for a long time.


I had some cotton yarn leftovers in the craft closet, so I pulled it out and quickly made up a few dishcloths. In the process, I remembered how much I really enjoy making these.  So quick and easy!


My favorite "pattern" is two rows of double crochet, one row of triple crochet.  Repeat. 

I have a lot of cotton yarn in a pink and green variegated color.  I think it would make nice wash cloths.  Add in some home made bars of soap, and they might be Christmas gifts this year...

I'm looking at pattern ideas here:
and I think I want to try this one:

and this pinterest board has so many great patterns!


Painting a worn out travel coffee cup

I've included this in my 24 days of Simple Christmas crafts, because it would be simple to paint a Christmas theme, or paint one as a gift..  but travel mugs in general make great simple gifts.  Watch for sales at Shutterfly and Ink Garden to make nice travel mugs with your photos on them.  I did one for my husband last year with our family photo (all of us in Steelers jerseys) and not only does he love it, but it has held up really well.


From This: To This:

in 5 easy steps.

(And the after will look even better if you have any actual artistic abilities...  )

Step One:
Use a brillo pad to remove the rest of the existing design.  This was a coffee mug from sheetz that I love.  It has a great lid, a great seal, and it keeps my coffee hot.  But the design wore off where I held the cup all the time.  

Step 2 - Base Coat

I used a paint named "camel" and sponged it on.  

Step 3 - Paint on your Design
(this is an after pic, I didn't get a pic of the just painted step, so it will not be this shiny at this point)
I know that painting and drawing are not my strong suits.  I could stenciled, I could have traced a design on and painted it in, or I could have even used decals or stickers.  But I love Fraktur, and I liked the idea of painting this imperfectly freehand.  

Step 4 - Modge Podge

The next thing I did was spray a clear coat onto the cup.  And then i watched all the paint (and sharpie - I used sharpie to write on the verse at the bottom) run down the cup.  Learn from my mistake.  Paint on a coat of modge podge to seal the paint on the cup.  I probably could have stopped there, or added a couple more coats and left it at that..  but I chose to add the clear coat, which made the cup shiny and smooth.

Step 5 - Clear Coat


No Sew - Recovering the footstool


This embarrasment has sat in my kitchen for the last year.  Ok, maybe two.  I would often toss a throw blanket across it to hide the tear...  but that was as far as I got.

Why?  Because I was convinced there was some great, exciting, perfect new technique that I would want to try on it, and I didn't want to do something less than spectacular.  So instead I settled for embarrassing.  I know it makes no sense, but it's how I often work.  Or don't work.

Recently I bought the exact same color, same type, of fabric, planning to slipcover this until I found something more exciting to do with it.  (Because my dog sleeps on this, and I put my feet on it after coming out of the garden, fancy embroidery was not a good idea. Not that I DO  fancy embroidery, but I had ruled that one out anyway)


So today I finally pulled out the material, changed the thread on my sewing machine, and...  got sidetracked by cleaning out the craft closet. Then I walked past this and decided I should cut the extra material off the bottom before I covered it.

THEN I remembered the black spray paint I found when I cleaned out the cleaning cabinet today.

 Which reminded me of this fabric that was in my craft closet, meant for a tote bag and bible cover I never made.  And since I use a bible app on my phone these days, probably never would make.  I didn't sew a bit of this - not one thing.  Folded over edges, and a staple gun.  The bottom edge is the salvage.  Took me about 15 minutes, after the paint dried on the legs...  It is not perfect, it is not fancy, and it does not match the chair it sits in front of..  but I was planning to recover the chair anyway.  And this looks soooooo much better than the before!  :-)


One of my goals for 2013 is to complete 52 projects - mostly completing projects I already have started, and using up supplies in my craft closet.  I have a pinterest board where I am posing all of the completed projects, to keep track of my goal progress: