How To Make Stickers
Tips, Tricks, & Tutorials
Step 1 - add your image & any text
Step 2 - Select all, add an offset.
Step 3 - Select the offset, Choose Contour, "Contour All"
Step 4 - Select all, Flatten
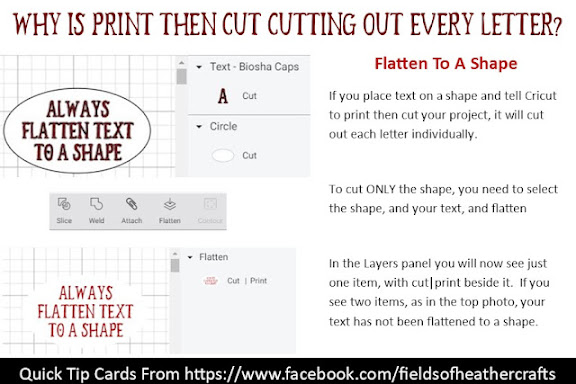
The key with flattening text is to always make sure the text is flattened TO A SHAPE.
If you just flatten text, it will still cut every letter individually. To cut it as one piece, you need to flatten to a shape. Offset typically creates a background shape.
Choosing Your Sticker Paper
I've used both Avery Sticker Paper [I found packs at our thrift store!] and a glossy sticker paper from JandJ Packaging that I like a lot.
Disclaimer - I am an affiliate for Amazon, if you click on a link in this post and make a purchase, I may possibly earn a small commission. It does NOT effect the price you pay in any way.
|
|
|
Is Any Of It "REALLY" Waterproof?
I don't think so, personally. Water resistant, yes. Waterproof? Nothing I have tried yet. But I don't make tons of stickers, this is not my specialty!
The above stickers are from a trial I did back in 2021. This was my facebook post at the time:
"Back in January someone recommended this sticker paper from JandJ Packaging. I ordered it, but never made the time to actually use it. Today I pulled it out - and wow. Gorgeous prints. I just use an HP Envy printer, nothing special.
These are test stickers. I put them on the old soda bottles I use to feed one of the baby goats (her mama is very old and doesn't produce quite enough milk on her own). On one bottle, I used the half sheet of self laminating plastic that I'm told makes stickers waterproof. On the other bottle, I left it just as is. In a week or so we'll see how the two compare. "
Ok, so most of you are probably not going to use your stickers on baby goat bottles that are frequently left to sit in piles of snow. My life is a bit different that most, but we work with the lives we have. :-)
Unfortunately, I cannot find my after photos. This was a few years ago. I can tell you that after a few weeks, the black ink ran. The colors held up a bit longer.
So far I have tried:
- Waterproof Sticker Paper
- Self Laminating sheets over the sticker [basically contact paper over the sticker...]
- Clear Spray paint over the sticker
The clear spray paint held up best. In the above photo, that's an old Tide Pod container that I made into a goat treat container. I made this in the spring, so it wasn't subjected to as much snow... but it held up for more than a year, maybe closer to two, before the container broke and I tossed it.
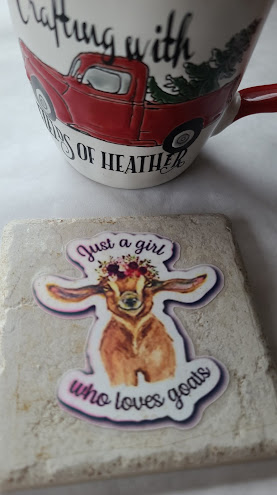
On my desk I stuck a sticker on a tile, then covered it in the top of a laminating pouch. This protective film covers way past the edges of the sticker, unlike the others, I did not cut the clear cover to shape. It held up for a month or so, but slowly, the ink began to run. This has never been washed, and has never gotten truly wet. Some occasional condensation from a cup, but even that would be pretty rare here.
==============
ABOUT THE INK
===============
In my experiments, I noticed the black ink was more likely to smudge than the colors. Some research brought up the following information:
"An ink cartridge that uses ink which is water-based, is not waterproof or water-resistant. Because the ink is made from a base of water, if the ink is wet after printing, the ink will run and the print can be damaged or ruined. Inks which are pigmented or oil-based inks, however, are made to be water-resistant; meaning your prints shouldn’t run, smear or smudge if they get wet. The best way to ensure your prints are waterproof is to use the right ink or opt for a laser printer instead."
So - for the best results, purchase special inks for your inkjet printer, or purchase a laser printer.
When printing any print then cut project, there will be "Registration Marks" that print around the design. Those are important, the machine will read these to know where to cut.
=====================
CUT SETTINGS
====================
There are generally two types of sticker cuts. "kiss cut" cuts the top, sticker layer, of paper, leaving a full backing sheet behind the stickers. This gives you a sheet of stickers. The second option is to have cricut cut through both layers, giving you individual stickers, each with their own backing, rather than on sheet of backing.
Cricut updates their app almost every week - so what works one week may not work the next. But in general, the Sticker setting on Maker machines does NOT work well. Or at all.
It will vary by the sticker paper you use.
These are settings that I, and others, have had luck with in place of the Sticker setting
|
Cuts through the material and liner around your design, leaving individual stickers.
|
Kiss-cut Cuts through the printable layer but leaves the liner intact, allowing all the stickers to stay together on a full sheet.
|
=============================
MORE STICKER MAKING TUTORIALS
|
|
|
|
MORE RESOURCES
If you are looking for free planner stickers, be sure to check out MomEnvy. She has tutorials too!
===============
ADVERTISEMENT - WITH A COUPON
I HAVE NOT YET USED THE ABOVE SITE MYSELF
But this may be easier, if you want bulk weatherproof stickers.
But this may be easier, if you want bulk weatherproof stickers.







No comments:
Post a Comment