Cliff Notes:
- Box Template Free SVG Here - http://thecraftchop.com/entries/svg/exploding-box-template
- Use card stock for the base pieces and the lid, decorate with scrapbook paper if you'd like
- 1 - 11.5 "Cross" out of card stock
- 1 - 11.5 "Cross" out of patterned paper (then glued to the outside of the card stock)
- 1 - 5.2 x 5.2 Lid
- 1 - 10.319 "cross" our of card stock
- Optional - 3.2 squares to decorate the inside & outside of the outer layer (4, or 8)
- Optional - 3.0 squares to decorate the inside & outside of the inner layer (4, or 8)
- Optional - 3.7 square to decorate the lid
Starting With the Box Form:
This is the time consuming part. But once you have this all uploaded and saved in design space, you can use it over and over!
http://thecraftchop.com/entries/svg/exploding-box-template
There's no need to have a dropbox account (although it's a great place to back up your free svgs & fonts!) you can close the pop up and on the top right choose "direct download"
This will upload as solid black. I chose select all and changed it to white, to better see the lines. It didn't help a lot, but it was better. Later I realized that the score lines were sent to the back. By ungrouping and selecting the cross shape, I was able to send the shape to the back, and the score lines were then visible on top.
Then Select all the lines in the bottom section and change them to score.
With the score lines visible -
This is sized to all fit on one 12x12 sheet. Each inside box is 2.972.
I wanted to start with a slightly larger size.
So my next step was to ungroup, ungroup, and ungroup some more.
Then I selected the cut lines and attached them to my score lines, and then attached my score lines and my cut lines to the shape.
Then I moved the "lid" behind the "Cross" so I could see how they are sized. The 4 little squares in the corners of the lid should show around the "cross" piece. I then chose select all, and resized to 11.5 x 11.5
That made the lid 5.2 x 5.2
Next I selected the cross piece, made it black, and then chose "duplicate" and made the new copy white. That way I could see how they will look stacked.
The new cross, in white, is sized 10.319 x 10.319
Now be sure to save all of this - this is the "base' for your explosion box cards.
USE CARDSTOCK - Avoid My First Fail -
Without thinking this through, I decided to cut this in scrapbook paper.
Not only did my score tool rip the paper, but it's really not sturdy enough to hold up nicely.
Re-cut in card stock, it worked beautifully. I glued the scrapbook paper to the outside of my card stock, so I got the pretty paper, with the stability of card stock.
Decorations:
This is where we get into those "optional" sizes.
- Optional - 3.2 squares to decorate the inside & outside of the outer layer (4, or 8)
- Optional - 3.0 squares to decorate the inside & outside of the inner layer (4, or 8)
- Optional - 3.7 square to decorate the lid
You can decorate these SO many different ways! But this is what I used to make mine today:
Love SVG (FREE SVG) Balloon Options
I resized to 3 high, and deleted the strings
I really liked the shape of these balloons, but I wanted to add writing, so the cut outs needed to go. The Contour Button (bottom right in design space) allowed me to remove those easily. Cut two of these, glue flower wire between two balloons, then tuck into a slit in the middle of the smaller cross. Tape securely, before gluing the smaller cross to the larger one.
1st birthday
I Wish You A Sweet Sweet Birthday
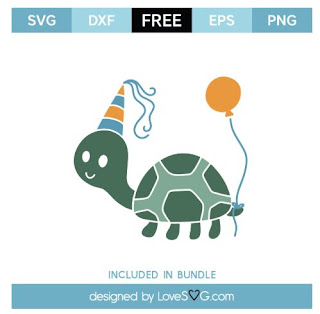
Birthday Turtle
The PNG works perfectly for print then cut!
Adding Photos -
Remember, for print then cut, if you are adding text, or adding it to a shape, be sure to flatten! I used sticker photo paper for my photos - just because I happen to have a few packs of it that I picked up at our thrift store. Any paper would work fine - although photo paper is better - then just glue them fast!
====================
==========================
======================
Where To Find Free Card Making SVGS
========================
FREE fonts that work as writing fonts in Cricut
https://fieldsofhether.blogspot.com/2017/11/6-single-line-fonts-that-will-write.html
https://fieldsofhether.blogspot.com/2017/11/6-single-line-fonts-that-will-write.html
==========================
Find More Cricut Project Tutorials Here:
https://fieldsofhether.blogspot.com/2019/04/cricut-step-by-step-project-tutorials.html
==========================


No comments:
Post a Comment