


- Faux leather from a local fabric surplus store. (But you can buy it at any craft store, and many fabric stores.) Roughly $3 a sq foot appears normal,
- I used the Cricut Air 2, & the regular blade that came in the machine, & also a deep cut blade. Almost always the regular fine point blade did MUCH better than the deep cut.
- I used the purple mat, and a brand new green mat. A sticky mat is SO important, be prepared to wash it after every cut or at least every other.
- Long list of free svgs for faux leather earrings, here: http://fieldsofhether.blogspot.com/2018/09/free-svgs-for-faux-leather-earrings.html
- How to make print & cut or write and cut earring display cards, here: http://fieldsofhether.blogspot.com/2018/11/making-earring-display-cards-with-cricut.html
- Free SVGS For Faux Leather Bows

- Look for local fabric stores, especially those that sell upholstery fabric. In fabric stores, it will frequently be called Vinyl - ask for their vinyl fabric section.
- Our local wal-mart has a couple of bolts in the fabric section
- Hobby Lobby has it by the spool, in the ribbon aisle (no Hobby Lobby here, so I have not tried this - but I've seen the prints, and they are pretty!
- Amazon, Etsy, etc.

http://fieldsofhether.blogspot.com/2018/09/free-svgs-for-faux-leather-earrings.html
What Size Should I Make?
My favorite size personally is around 1.2 W by 2H - but that will vary a lot depending on the person, and the design.
Here are a few suggestions:
1.3” W x 1.6” H
That's the "finished project size" of the teardrop earrings in cricut design space.

Small measures 2.25 inches long
Medium measures 2.50 inches long
Large measures 2.75 long by 1.75 wide
Round designs are often 1.5 inches in diameter

It completely depends on the material. I'm going to show you step by step what I used and what my results were. So far the regular, fine point, blade has worked best for me.
Basic Tips:
- Best Settings For Most Cuts - Custom/ Faux leather/ paper thin, Fine cut blade (I was surprised to find that most of the time, the deep cut blade did not cut nearly as well!)
- A sticky mat is crucial. I've used both green and purple - as long as they are sticky, both work.
- Clean your blade after every cut. You can stab it into a ball of tinfoil, I just wiped it off.
- Do not put your design too close to the edges of the material. The closer to the edges, the more likely it is to move around when cut.
- If your material has a super fuzzy background, or a texture that does not stick to the mat well, or a texture that makes your mat dirty.. stick cheap dollar store contact paper onto it before placing it on the mat. (this has reportedly worked for others, but did not help me today.)
1. Thin Faux Leather, Canvas type back (not fuzzy at all)

The first material I tried today is one I have used before and know cuts well. It is thin, with a sort of canvas backing. The faux leather part is firm, but not as stiff as a metallic.

- Brand new green mat
- I placed this upside down this time, to help keep my mat clean longer. I've cut this material right side up with similar results.
- Fine Cut Blade (the one that came in the machine)
- Custom/ Faux Leather, paper thin Default pressure
Results - Beautiful. (see first photo above)
2. Thin Faux Leather, Canvas type back, a little more pliable than #1
A Material VERY similar to #1 above, but a little bit softer. Not quite as soft as real leather, but a lot closer to it. Still with the light canvas type backing.
Trial & Error -
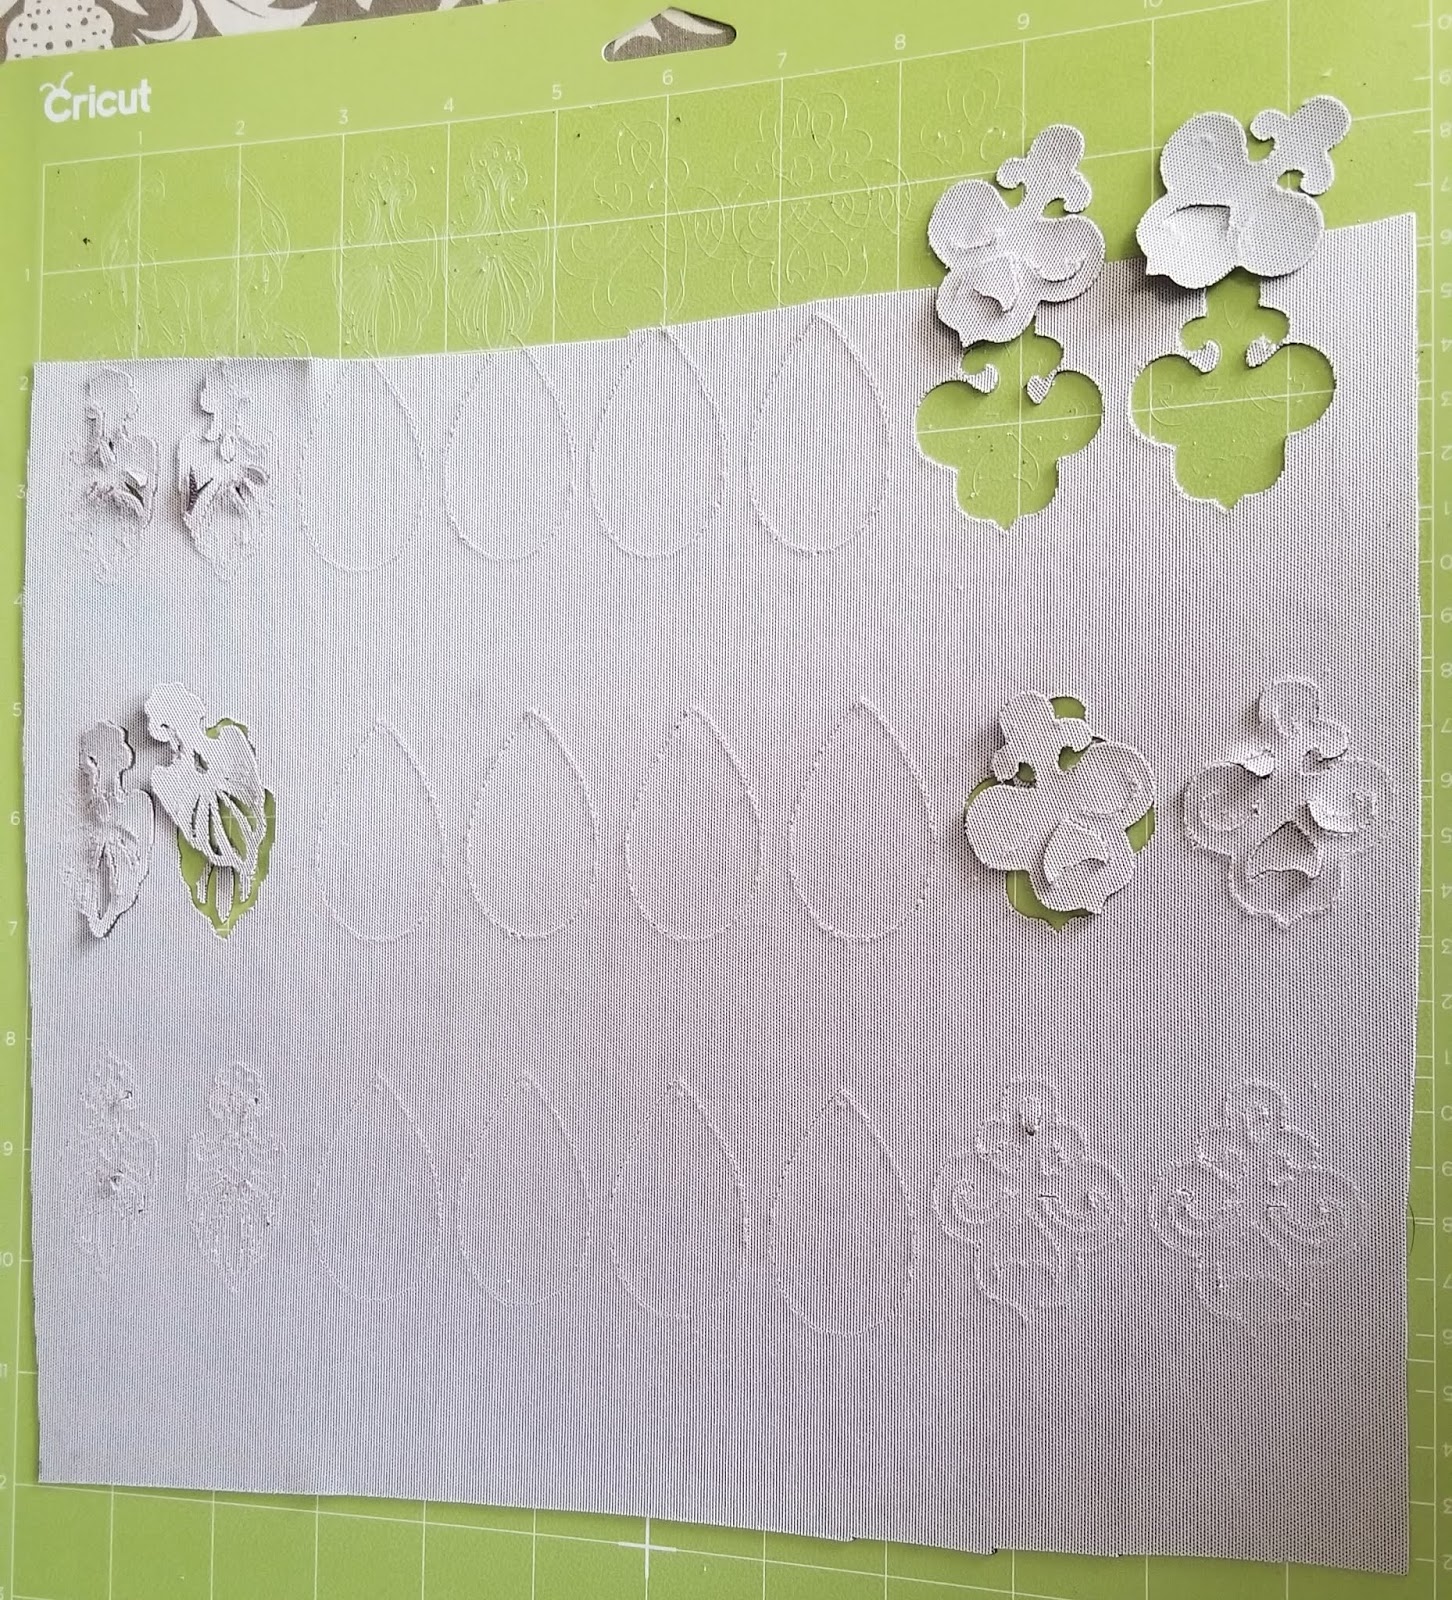
I think I had two issue on the first cut -
1. WAY too close to the top of the material.
2. My blade needed cleaned off.
Settings (that worked with a clean blade!)
- Brand new green mat
- I placed this upside down this time, to help keep my mat clean longer. I've cut this material right side up with similar results.
- Fine Cut Blade (the one that came in the machine)
- Custom/ Faux Leather, paper thin Default pressure

Definitely use the fine cut blade, NOT the deep cut blade!
(I just noticed on the bottom row , second earring from the right, there is a piece I didn't week before I took this photo. It DID cut, I just did not pop it out. On the pieces on the top row - deep cut blade - , it just did not cut at all - they can't be fixed)
(I just noticed on the bottom row , second earring from the right, there is a piece I didn't week before I took this photo. It DID cut, I just did not pop it out. On the pieces on the top row - deep cut blade - , it just did not cut at all - they can't be fixed)
#3 Textured thin Faux Leather, more plastic in texture, with a slightly fuzy backing. A bit thicker than the first two materials.

On my first attempt, I placed the material upside down, as I did for the first two. As soon as the first earring cut it moved all around - the texture did not allow it to adhere as well to the mat. What I am learning is that the mat is even more important than the blade for these. The material needs to be held in place - the mat needs to be sticky!
Try #4 - I randomly tried a deep cut blade with the Foil Acetate setting, and I think it worked! Well - it sort of worked. The material did not move, but it also did not cut all the way through. I could "pop" these out, they were cut, just not cut loose, if that makes sense. I realized when I saw them that I hate the intricate cuts on this material - so I am not going to fuss with trying to make it work anymore. I like the plain teardrop shapes in this material, but not the designs.
I'm walking away from this one for now.
Settings (not the best, but basic cuts worked)
- upside down
- purple mat (freshly cleaned)
- custom/foil acetate
- deep cut blade
Results - Eh. Fine for tear drops - basic shapes
#4 - Shimmer, or Metallic Faux vinyl.

Even though I cut this shiny side down, it made a mess of my mat. :-(
Settings:
Try #1
- Faux Leather Shimmer
- fine point blade
- shiny side down
- purple mat
Try #2
- Faux Leather, Metallic
- deep cut blade
- shiny side down
- purple mat
Results - Not great. But ok for basic shapes. No noticeable difference between the two settings with this material. Neither gave a really clean cut, and neither did well with details - although the fine point blade always handles details better than the deep cut blade. The difference here was negligible.
#5 Textured vinyls - A little thicker.
For these materials, I am not looking for anything ornate. It might be possible, but it's not really a look I am wanting. I'm happy with plain teardrops in these textures.

- Custom/Faux Leather paper thin
- deep cut blade
- Pressure changed from default to "more"
Results - good.
Alternate settings:

For more detailed - but not overly detailed - designs I used -
- Custom/Faux Leather paper thing
- Fine Cut Blade
- Pressure default
- When the cut finishes, instead of pressing the arrow to remove the mat, push the C button again, so that the machine repeats the exact same cut. Make sure you do NOT move the mat - just ignore the blinking arrow and push the C button.
Results - Good.
For Thicker Leathers and Patterned Leathers -
I have not tried this yet - but was given this suggestion:
" Try the deep cut blade on genuine leather setting. Change it to only cut twice."
For Thicker Leathers and Patterned Leathers -
I have not tried this yet - but was given this suggestion:
" Try the deep cut blade on genuine leather setting. Change it to only cut twice."
For some of mine, I added small holes (the circle shape, sized very small) to cut - but for most, I just poke a thick needle (upholstery sized works great - but I'm currently using an old needle from my sewing machine. It was no longer sharp enough to sew well, but it works great for this!) and then poke the jump ring through. Attach the earring hardware to the jump ring. Quick and simple!

There's a post here on how to make the Joanna Gains inspired "folded" earrings -
Making Cards to "Display" Them on

http://fieldsofhether.blogspot.com/2018/11/making-earring-display-cards-with-cricut.html
=========================


An Index Of All Of My Cricut Related Blog Posts
An Index Of Project Tutorials
===========================

Facebook Page - For Tips, Tricks, & Free SVGS
https://www.facebook.com/fieldsofheathercrafts/
Facebook Group- For Questions, Support, Sharing Projects,
and LOADS More Free SVGS in themed posts with links in the comments
https://www.facebook.com/groups/1121399284857845
Facebook Group- For Questions, Support, Sharing Projects,
and LOADS More Free SVGS in themed posts with links in the comments
https://www.facebook.com/groups/1121399284857845
Thank you for this! Have you tried cork? How about plain fabric with an iron on stabilizer?
ReplyDeleteI've cut fabric with stabilizer - but never for earrings. What a great idea though - especially for the backing! I've never cut cork...
DeleteYOU ARE AMAZING! I cannot believe how many free svgs and information you give <3 Thank you!
ReplyDeleteThis is great! thanks! Have you tried the glitter on canvas material? I've made quite a mess of the particularly thick stuff. Any tips?
ReplyDeleteI haven't! But I can imagine the mess. :-) Let me know if you find a good setting!
DeleteDid you share the SVG for the chandalier looking earrings that are on the left in your picture? I love them!
ReplyDeleteI mistakenly bought cricut faux suede. Do you think that will cut the same? Or should I just return it and get the leather?
ReplyDeleteI have different kinds of leathers. the ribbon roles at Hobby Lobby are so thin. Everything i cut doesn't seem to lay stiff enough. ideas?
ReplyDeleteWhat earring hooks and jump rings would you recommend? I would like some that are good quality and somewhat affordable. Thank you! :)
ReplyDeleteThis was an awesome read and very helpful! Thanks so much!
ReplyDelete