
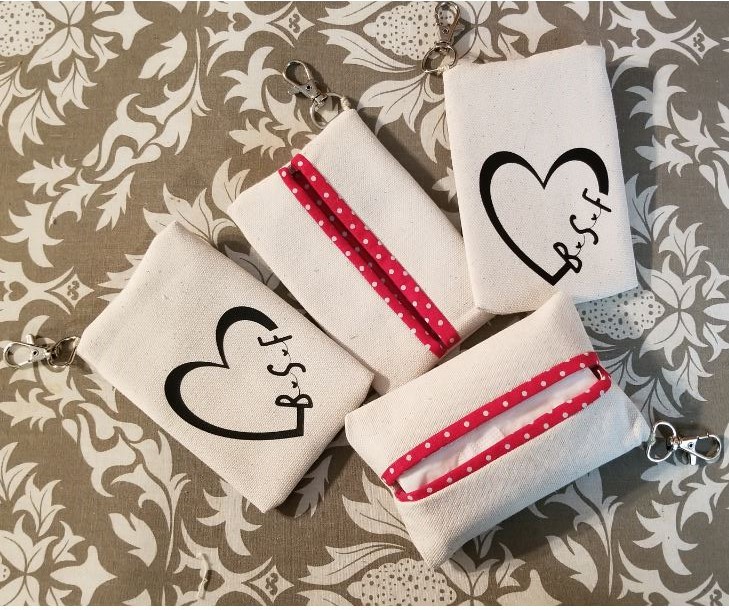
Travel Tissue Holder Keychains
If you are a beginner sewer, this is another great project to start with. It's just a few straight seams, quick and easy! And then you can add designs with your cricut and some htv.
The ones above were made for my BSF group back in 2018. The keychains are a nice addition when clipping to tote bags.
Cliff Notes -
- 5.5 X 6.5, & 5.5 X 7.5
- Lobster Keychain Clasps are from Amazon
- You can cut the material with cricut, but it's so much faster to cut by hand.
This is another super simple sewing project. Absolute beginner level - it would be a great first sewing project if you have never sewn before.

You'll want two pieces of fabric. I like to use plain off white for the outside, and a pretty pattern for the inside. For these, I used the scraps of off white material leftover from making pillow covers. It's a lightweight canvas, a little thicker and muslin. Plain cotton will work just fine! I'm just using up some fabric scraps for these.
- For the outside (the part I'm applying cricut vinyl to) cut a rectangle 5.5 by 6.5.
- For the patterned inside material, cut a rectangle 5.5 x 7.5 (yes, the inside material should be an inch longer than the outside material)
You absolutely can cut the material for these with the cricut. I do not recommend it, it takes more time that way, but it can be done. For the Air machines, just iron on a bonding first.
I completely get the need to use the cricut for everything once you have one, so here's a suggestion - use paper to cut a pattern for these. You can use the cricut, and it will be much faster and more practical than cutting the material one mat at a time for making these. (I was making 15 at once, I used my rotary cutter)
Place the pieces right side together.
Sew the end (short) seams, leaving 1/4 inch seam allowance. (sew about 1/4 of an inch in from the edge of the material.)
I sew these all at once... no need to cut the thread between each one. Just feed them through like a train, then snip the threads connecting them once they are all sewn.


The patterned material will "bubble" a bit, since it is longer - that's what you want
The black toile on in the background here is one of the ones I made many years ago, long before I knew what a cricut was.
Once the ends are sewn together, turn the fabric so the patterned side is now out, and the seams are inside.

Iron, to press them flat.


Again, I just sew these right in a row, without cutting the thread until they are all sewn. 1/4 inch seams.

Then flip right side out:


I used a regular iron, as always, to iron on the htv. It took about 15 seconds with my iron set between cotton and wool. These adhered quickly, and easily - even with the seams behind the design!

The last step was to attach these small clips. I had bought these for another project, and they were a bit too small - but they are perfect for these. I just attached them with embroidery thread.

100 of these cost $10 on amazon.
Quick and easy, and cheap to make!
==================

For more Tips, Tricks, Tutorials, and Free SVGS,
Find Me On Facebook here:
Love this idea. Thank you.
ReplyDelete