Heart Shaped Pierogies for Valentines Day

Heart Shaped Pierogies For Valentines Day
Pronounced ‘puh-row-gee', Pierogies are a polish dish, consisting most commonly of a mashed potato mixture inside of a flour based dough.

You could not drag me kicking and screaming into a restaurant on Valentines Day.  WAY too crowded, and usually overpriced, for me.  I would rather stay home and cook.  My favorite menu is prime rib, or steaks, and heart shaped pierogies.

I use a simple heart cookie cutter to cut out the dough, place a spoon of mashed potatoes (Into which I have already mixed some sour cream, cheese, garlic, and sauteed onions ) and top with another heart of dough.  Then I use a fork to crimp the edges.

I usually boil these lightly, then toss in melted butter and more sauteed onions, and serve with sour cream.

For the Dough:

2 cups of flour
2 eggs (room temperature, and lightly beaten with a fork)
1/2 t salt
1/2 cup of room temperature water

Mix until the dough is well mixed and firm.  Let sit in a covered bowl for a few minutes.  (I usually let it sit while I mix up the potatoes)

For the Filling:
half an onion, sliced thin, sauteed in butter
mashed potatoes - you can even use instant
a little sour cream, to thin the potatoes

mix all together. 

Cook in boiling water until they float. Optional, after boiling, pan fry in butter and seasoning [garlic pepper is our favorite]

 For "regular" [not heart shaped] pierogies, cut 3 inch circles, fold in half after adding the filling.


Filling suggestions:
Sauerkraut
Bacon
Sausage
Mushrooms
jalapenos
spinach


===============
An Index Of My Cooking & Recipe Posts Can Be Found Here:


Pavlova - inspired by The Husbands Secret by Liane Moriarity


I recently read The Husbands Secret, by Liane Moriarty.  There are so many reasons why I think this would be the best book club book ever, but among the top was that the pavlova mentioned would make a great book club snack.  (I really want to form a book club now...)

I looked up the recipe and couldn't believe how simple this is.  It is simply a meringue, topped with whipped cream and fruit.  You bake it on parchment paper on top of a baking sheet, no special pan needed, and clean up is a breeze.  


For the meringue:

4 egg whites
1 pinch of salt
1 cup of sugar
1 T cornstarch
1 t lemon juice

Beat the egg whites on high speed until soft peaks form.  Add the sugar gradually, while it continues to mix.  lightly fold in the cornstach and lemon juice.  

Most recipes tell you to draw a circle on the parchment paper - trace a plate, or something to that sort.  I just plop it down in a circle without drawing anything.  You want to form a loose bowl shape, with a slight indentation in the center.


Bake at 300 degrees for one hour.  After one hour, turn off the oven, but let the meringue in there for another 30 minutes or so.  It should be hard on the outside, and slightly moist on the inside.  (Note - the first one I made I overcooked and it was extra crisp, my husband really liked one - so use your own judgement)  The "perfect" pavlova should be completely pale, not browned at all - but all of mine have ended up lightly browned.  I could turn the oven temperature down..  but I haven't.  


For Whipped Cream, you can buy it premade, or mix half a cup of confectioners sugar with 1 1/4 cups of heavy whipping cream and a  dash of vanilla.  Whip until thick, place on top of the meringue, then top with fruit.

You can easily make these in individual serving sizes too.

Topping Ideas:
I use a frozen Three Berry Mix, because I had it on hand
When raspberries and strawberries are on this year, I'll make this with whichever fruit is in season at the moment.  More ideas:
  • Strawberries and bananas arranged in an overlapping circular pattern
  • Add some melted chocolate to the whipped cream
  • Cook apples or pears until soft, in some butter for the fruit topping
  • lemon curd, raspberries and whipped cream


Foodie Friends Friday

What Am I Reading - Jan 20 2014


To see what I have completed in 2014, for the empty shelf challenge, go here:


Currently Reading:
For Fun:
This is what I read before bed each night - and during our morning reading time (homeschoolers) when I am caught up on all of my bible studies and family book club reading.  This is NOT my normal "Fun" Selection.  (My last "Fun" Selection was The Husbands Secret

this actually started out as something I was reading for our Sunday school class - I thought our class was going to be using this book in a 6 week study, but we only did one week of it, then switched teachers and went to a study in Philippians.  Normally I'd have this under a bible study heading, but now I feel the need to finish it before I start a "for fun" fiction read, so it's here.  (I started the Made To Crave Study, or I'd be reading this in my lunch time devotional time)  :-)  It is REALLY, REALLY good, and I wish our Sunday School class had done the full 6 week study.

For Education:
I typically listen to non-fiction audio books when I walk in the afternoons.  With fiction my mind wanders, but with non fiction I can usually pay attention well.  This time I'm trying fiction - 
I'm having a little trouble keeping up with the audio, but when I get home from my walk I usually google the characters and story line, so I'm probably absorbing more this way  - it's not a bad way to learn.  I wish I had taught my children from this book when they were young, it is well done.


For Bible Study: (With The Proverbs 31 Ministry )
(the picture says dvd - but I'm reading this one.  I'm also doing the companion devotion through YouVersion.)  This is my lunch time devotion.

Our Family Book Club Read For January:
(We have older teenagers, and we homeschool.  Each month we choose one christian living book to read as a family - this is the book our 16 year old son chose for this month)
https://www.goodreads.com/book/show/13218347-how-to-ruin-your-life-by-30

==========================================
These books I will take 52 weeks to read, in 2014:


Muffin Pan Fritatta's from the Biggest Loser

I saw these on the Biggest Loser this week, and cannot wait to try them!  I don't know why I never thought to make fritattas in a muffin pan before?  Dolvett made two different kinds on the show.  I'm posting both recipes here for my reference, and will update when I try them..  I'll probably make a less healthy version for my boys too.

Update - mine are not nearly as large as in the photo here, but they are good!


Mexican Turkey Fritatta

Nutritional Information:
Calories 100 Fat 3.5g
Protein 15g Cholesterol 30mg
Carbohydrates 2g Sodium 140mg
Fiber 0g Saturated Fat 1.5g
Sugars 1g

Ingredients
1 (20-ounce) package JENNIE-O® Extra Lean Ground Turkey Breast
¼ teaspoon cumin
1 tablespoon vegetable oil
1 green pepper, chopped
2 cups sliced small mushrooms
1 tablespoon chipotle peppers in adobo sauce, finely chopped
2 cups egg substitute or 8 eggs
¼ cup milk
¼ cup chopped fresh cilantro
1 cup shredded low-fat Mexican blend cheese
⅓ cup green onions
Mexican Turkey Frittata (Continued) 3 of 3

Directions:
Heat oven to 350°F. Mist 12 muffin cups with cooking spray. Cook ground turkey as specified on the package. Always
cook to well-done, 165°F. as measured by a meat thermometer. Sprinkle with cumin; stir to mix.
In large skillet over medium-high heat, add oil, green pepper, mushrooms and chipotle peppers. Cook 5 minutes, stirring
occasionally, until mushrooms are cooked.
In large bowl, whisk eggs, milk and cilantro until well mixed. Stir in turkey, cheese, mushroom mixture and green onions.
Spoon mixture into muffin cups, filling approximately ¾ full. Bake 20 minutes or until set.

Veggie Fritatta with Turkey Bacon

Nutritional Information
Calories 70 Fat 3g
Protein 8g Cholesterol 15mg
Carbohydrates 3g Sodium 190mg
Fiber 1g Saturated Fat 1g
Sugars 2g

Ingredients
1 (8-ounce) package JENNIE-O® Uncured Turkey Bacon
1 tablespoon vegetable oil
½ cup finely chopped red pepper
½ cup finely chopped green pepper
1 cup thinly sliced mushrooms
1 cup finely chopped asparagus
2 cups egg substitute or 8 eggs
¼ cup milk
1 tablespoon chopped fresh parsley
1 cup shredded low-fat Swiss cheese
⅓ cup thinly sliced green onions

Directions:
Heat oven to 350°F. Mist 12 muffin cups with cooking spray. Cook turkey bacon as specified on the package. Cut into
½-inch pieces and set aside.
In large skillet over medium-high heat, add oil, red and green pepper, mushrooms and asparagus. Cook 5 minutes,
stirring occasionally, until vegetables are cooked.
In large bowl, whisk eggs, milk and parsley until well mixed. Stir in bacon, cheese, mushroom mixture and green onions.
Spoon mixture into muffin cups, filling approximately ¾ full. Bake 20 minutes or until set.


WiiFit Cycling Tips & Cheats

 My fitbit, which works really well any other time, does not record steps when I do the wiifit island cycling.  


Wii Records - See everyone's best scores in different wiifit activities:


 A really blurry photo of my new bike
The last time I played I got a message congratulating me for unlocking the entire map.
So when I was done, I started a new game, just a basic one, and sure enough, this was the message at the start of the game.


"Secret Bike- The GPS on the bike has a built in grid-map of the island. It displays a map of the island, which is shown as a grid of squares. While all squares are darkened at the start, but if you visit a darkened square, it will be fully brightened. once you have visited a square, it is permanently lit. if you manage to bike to all the accessible squares, then the whole map will be lit up, and you will unlock a new bike. while it is not known whether the new bike handles better, it has a shinier look."

(IThere is nothing telling you how close you are, you have to just keep riding around until you unlock every part, THEN it will tell you.  I've read that some of the sections can be hard to locate)


Press A, and the dog will run ahead and get the flag for you.  (You can't be too far away from the flag though) To have cats appear, not just dogs, add a cat to your mii profiles on your wii menu.  This can shave some distance off and help you get closer to 4 stars.


lift up the wii remote and pop a wheelie to go over curbs.


Press 2 to brake.


Maps of the islands, and if you want, maps with the flags numbered to show you which way to go to get the best score.  (I've been trying different routes on my own for almost 3 years now, and still can't get over 3 stars!)
http://www.gameyum.com/wii-fit/111978-the-plus-island-cycling-map-guide-to-the-different-courses/
*I tried one of these and STILL only got 3 stars! But I did get my shortest distance yet..  so I'm getting closer.

There are "distance reduction techniques" to help get to 4 stars.  They may be too much for my feeble mind to process while actually in the game, this will take some time http://fitgameforum.com/wiki/index.php/Island_Cycling


For instance, the above site has this entire section on "death plummets".   I'm so confused - I'll need to try them WHILE playing, and with one of my childen reading me the instructions.  :-)


"I call this type of cheat a "Death Plummet Cheat". "Death" for obvious reasons, "Cheat" because everyone knows these are cheating, and "Plummet" for reasons that should be obvious to anyone who saw Gonzo the Great in the parachuting scene behind the credits of The Muppet Movie.
There is a way to predict where they can be found, which is derived from how they appear to me to work. This way of predicting their location also indicates why some of them are easy to execute, and some are not.
Basically, it appears that you can find them on any cliff where there is something non-cyclable far below, nearer to the bottom than the top, although the definition of "nearer" is not 100% clear. Call this thing the "target". If from the top you can plummet so that you free-fall not to the cyclable zone below, but to the target, and you then fall from there to the cyclable zone, you respawn below rather than above."

Where to find them

  1. On the Mountain behind the castle above the highest green going counter clockwise jump off to hit the camel rock, it drops to the dry lake bed aiming at the flag,
  2. Just before the tunnel going down stay left over the side and stay near the cliff, drops to the road outside the Ruins,
  3. across from duck lake at the start of green jump off road toward large rock, it drops to the exit to the plateau from the tunnel with the metal ramp.
  4. Across from the Dry Lake Bed tunnel jump off to the right of the fence - drops down to the "s" shaped ledge with ball.
  5. In the field across from the ruins that if you go straight over the cliff after hitting the balloon, you reincarnate on the road (same level).

You can jump off the side of the Red Iron bridge - this youtube video shows you how:

http://youtu.be/-MHGB7ak9aQ  (Essentially, just ride through the hole in the side  - be careful not to land in the water.
* the first time I tried this, I couldn't do it, I just bounced off.  The trick is to pop a wheelie.  The second time, I went through too early and landed in the water.  The 3rd time I tried it I landed it.  :-)  


If you bike into the town last, go to the fountain, then up the ramp and there will be a blue ramp that will launch you right to the finish line.

There is a hidden beach you can cycle on - but apparently it's very hard to get to?

 http://www.youtube.com/watch?v=43Ji5-sHVf4
*I've tried a couple of times, I always just land in the water.

In free ride, you do not die - this is a great time to try jumping off of everything.  You can ride on the tops of the buildings - but it's tricky.  Brake as soon as you land on top of the building. There are more tips for riding on top of the buildings here: http://www.fitgameforum.com/wii-fit-plus-island-cycling-easter-egg-spoiler-alert-t520-10.html


if you manage to pop all twenty balloons in free course within 30 minutes, then your time will be put on a secret scoreboard for the fastest time to pop them.


*************************************************************************************

This worked for me!  Even with a few mistakes, and backtracking once, I got 4 stars and my shortest distance yet.

NOT written by me - found in a forum.  How to go through the Expert course and get 4 stars:


From where you start:


#1: Go forward and get the one on the road right in front of you.


#2: Go toward the lighthouse, and it's behind the lighthouse.


#3: Go in among the windmills, one right in the middle of the them.


#4: Take road on the left--the road looks like pavement. There's a flag right under a very small tunnel.


#5: Keep on cycling on that road until you come around to the next flag.


#6: From where you got #5, take a left turn into the mountain peaks--you can go in between the 2 large peaks, keep on cycling around until you get to a ramp that leads upward into what looks like a very old temple. The flag is right in front of you when you go up the ramp. Take the same road back down to where you found flag #5.


#7: When you leave the area, take a left and head down through the man-made cave/tunnel. When you're through, you'll see the resort to your left, and the huge mountain is to your right. Keep on going down until you hit the beach. You can see a flag in front of you when you hit the beach.


#8: Keep on going along the beach, there's another one under a natural cave/tunnel (Camel Rock) that you'll hit.


#9: Go on past the previous flag and around the next plateau-ish rock on the beach is third and final flag on the beach.


#10: Go back along the path you just took and all of the way off the beach. As you are riding on the beach, for a long time, you should see a path leading up the mountain--it's a dirt/tan path. Go up this path, and you'll see one right there in front of you.


#11: From the previous flag, take a immediate right turn into a long cave/tunnel--on your map, you'll see the middle of the huge mountain (MaKa Wuhu) to your left, and it's shaped like a star/pentagon (If I remember correctly). Go into a circular sandy area and the flag in the middle.


#12: Take the same path out of the sandy area and you'll come out to flag #10's spot. From there, take a right, and follow the path. If I remember correctly, there's a flag right before you get onto the bridges.


#13: Go all the way through the bridges, and once you get off, take an immediate right. You should see the stone henge like construction before you take your right turn. There should be a flag on the green terrace. You'll see the road that you took after getting the flag among the windmills to the left. You'll end up there if you fall off the terrace, so don't do that.


#14: Now, there's a red ramp really close to a tunnel if you look to the right. I don't use the ramp to jump, instead I just ride with some decent speed and head right up the slope into the cave. The cave is a man-made cave, with a spiral steel ramp down it's middle. There's a flag at the bottom of the spiral steel ramp.

   Turn left, there is nothing to your right.

#15: From this last flag, keep on going forward and you'll end up in a small clearing really at the same elevation as about where you started. You'll see a flag in front of you. To your right but way above your head should be the bridges, and the flag you actually see is behind the waterfall, or so.


#16: Keep on the path behind the waterfall and continue onward. You'll cross a small stone bridge inside this cave. Keep on going until you see the flag in the middle of this cave.


#17: From this previous flag, you'll see an obvious exit to this cave to the left and a not so obvious exit to the right. Just take the one on the left, as the one the right doesn't lead anywhere. You'll come out, and just keep on cycling until you get to the next flag on the edge of Duckling Lake (the lake that is the source for the waterfall).


#18: Keep on circling around Duckling Lake until you see a castle with purple roofs in front of you. You can either take a path that crosses through the courtyard of the castle or you can take a little bridge to the right of the castle to get to the other side of it. The road that runs behind the castle is a large loop. I don't know which side is closer to the castle--as to minimize distance (I haven't clocked it yet using the Free Ride Course). But there's a flag way on the other side of Maka Wuhu's (the large mountain) peak. You'll see it if you just keep on cycling around. If you go up on the left side behind the castle and come around to the right side as you come back down, there's no way you'll miss it.


I think that if you turn around once you get the flag and come back the way you came, it is shorter distance, but I'm not positive.  I've also read that on the way to the castle you can stay to the left of the rock, following the edge of the lake, instead of on the path, and save a good bit of mileage..  but you have to be VERY careful not to fall into the lake.


#19: Once you're at the castle again, just cycling back along old routes until you're back down the mountain and through it so that you come out through the path under the waterfall. Come out and pass under the massive boulder/gate thing and turn left over that little stone bridge. Now make your way along that road to the large red bridge. There's a flag right on the big red bridge.


#20: Keep on going past the bridge and come into the city, there's a flag right in front of your eyes in the middle of the city.


Back to Start: From the flag in the middle of the city, take an immediate right up a ramp, then you'll be at the upper level of the city--where you'll see a blue ramp that will shoot you right into the circle where you started the whole bicycle ride.


Denim Chenille Quilt Made From Old Jeans


I made this about 9 years ago, but accidentally deleted the post from my blog when I was cleaning up and reorganizing.  I found the photos of the process recently, and decided to repost them.  

This is a heavy quilt, great for picnics, and can easily be made in a week-end.

 With three boys, we had plenty of outgrown/worn out jeans.  Even the ones with the knees ripped out and stained worked for this - the backs of the jeans were still good material.

See the t-shirt off to the right in the photo above?  It was our youngest FAVORITE t-shirt when he was 5.  You know the one, the one that you can barely get through the wash before he has it back on...  it had a denim airplane on it that I thought would make a great center design for this quilt.

You can choose the size for your squares - just make sure they are all the same. 
I think these were 6x6

 
The t-shirt design cut out for the center

Next I laid the squares out to find a design that I liked.

The back of the quilt, and what makes the "chenille" for this, is flannel.  You need one flannel square for each denim one.  To start sewing, you layer FOUR pieces.

Layer 1.  one denim piece upside down
Layer 2.  one flannel piece right side up
Layer 3 - A second denim piece right side down
Layer 4 - A second flannel piece right side up

So you are sewing one side, through four pieces of fabric at one time - just one seam.
At least half an inch seem allowance.

If you look at the photo above, you can see the pieces sewn together - first you will have just two squares together, like the bottom row.    

It goes together quickly from here. 


Once I had all the squares sewn into blocks of two, I used the strip quilting method to sew them into 4 rows, as shown above. Then it was simply sewing the 4 rows together.


Once it is all sewn together, you need to snip through the denim & flannel that are standing up, about 1/4 to 1/2 an inch all the way around every seam. 

 I did not measure.  This is not an exact science, just start snipping, being careful not to cut through your seams.

 A closer look at my cuts.
After this is done, through the blanket in the washing machine, wash, and dry.  It will come out similar to this:

It's the washing that gives you that "chenille" look.


A view of the back:


=======================================================
 Rooted In Thyme 

Yesterfood     


Brown Paper Lunch Bag Valentines

I made these in 2014, for our children and my husband.  I think they all still have them - I keep finding them in drawers when I clean.  :-) They are really simple to make, with some scrapbooking supplies and brown paper lunch bags.


This site has step by step instructions, with photos, for how to make them..  but it's not difficult.  Lay brown paper lunch bags flat, sideways.  Fold in half.  Punch holes, then run ribbon through all the bags to hold them together.  Decorate. Stick small candy bars in the pockets.


  ==============
Find an Index Of My Craft Posts here:
https://fieldsofhether.blogspot.com/p/crafts.html


Winter Goat Diary - January 15 2014


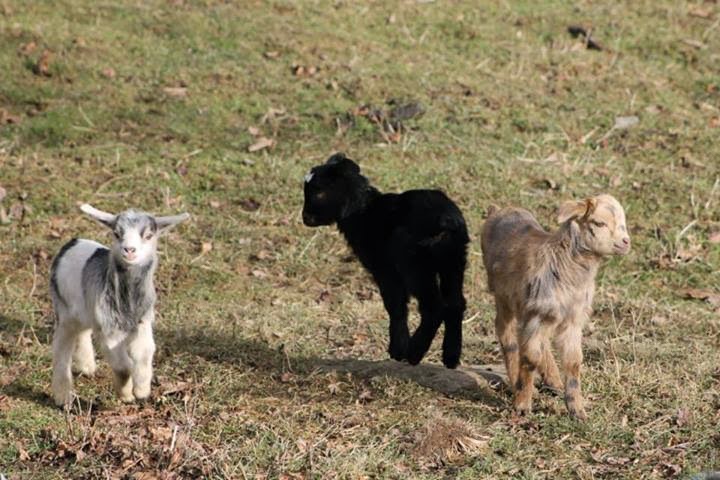
Three of the four babies (two sets of twins) born the 1st & 2nd of this year. 
They were so easy, everything went so well, even through this cold snap, that today came as a surprise.  Although it shouldn't have.  It's not like we are new to this, and no birthing season ever goes completely smoothly...

3:15  - alarm goes off.  Wake up youngest son, who is helping cover the morning milking at the dairy barn next door while the owner recuperates from knee surgery.

3:30am - go back and wake son up AGAIN, make sure his feet actually hit the floor this time.

Go back to bed.  Next alarm goes off at 6.

7am - walk out across deck to survey the goat pasture, nearly fall on my butt.  It's much icier than it looks.  All looks fine - the 4 baby goats (two sets of twins) out in the front pasture are running around, they are almost two weeks  old now.   Notice that one goat is hanging back by the shelter, while the others are all out wandering around. Send a photo to husband at work, ask if she is one expected to have a baby soon..  she's not the one I thought would be next. Walk down to the pasture, find the gate has iced over and is frozen shut.  Not concerned enough to climb the fence, head around back to check on the twins born the night before, at midnight.  They look good - the one is very vocal, but has been since birth, so I don't think too much of it, she's even been hollering WHILE eating.  (Yeah, looking back, I should have saw that as a warning sign)
Ana, Standing in front of the shelter while all the others were off at the hay trough.  A sure sign that a baby is on the way..  but in this case, her baby was HERE, and another mom, also in labor,  had already taken over and was cleaning it up...

9am - Go into the goat pasture and find that the goat I watched hanging around the shelter gave birth awhile ago - and didn't finish cleaning the baby.  Another goat is now in labor, and she's cleaning up the baby that is not hers.   It is possible that the second nanny "took over" and the first one was not aggressive enough to take charge of her own baby.  I suspect this was her first birth, most of these goats are new to us this year, a bunch we bought last summer from a friend of ours who had to return to Greece and couldn't keep them all.

Move the 1 day old babies from the backyard pen to the front with the others, move the baby born this morning to the back yard pen with her mom...  Hoping that the mom will bond.  Hold the baby up so she can eat off her mom.  Mom isn't thrilled, but after a minute or two, cleans the baby up.

Note - I was supposed to be at BSF this morning, but Dan's wouldn't start and I thought he had taken mine.  Turns out he had taken the farm truck, but I'm glad I thought i couldn't go - I really needed to be around to keep and eye on things today.  Even if I did miss some things I should have caught quicker.
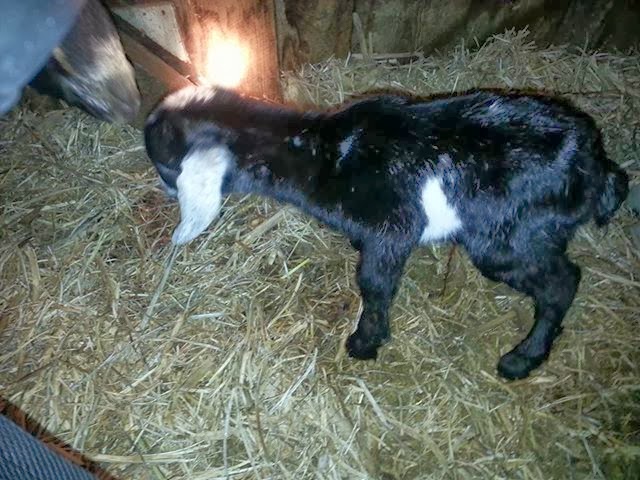
Ava with her brand new baby boy. 
 This is the mom that tried to steal Ana's baby this morning.

10:30am - Second Nanny gives birth, one baby boy.  She had been dramatically walking around, pawing the ground, laying down, all morning - mostly in the pasture.  I was relieved when she gave birth IN one of the shelters.  I think some of her walking around was her looking for the first baby, that was not hers, I think she really did believe it was hers.  Her baby is larger, much larger, than the baby born this morning.  He's up, walking around, eating within an hour of being born - healthy and doing well.

At this point, we're thinking if mom #1 doesn't take up interest in her baby, #2 might take her - both nannies only had one baby today.

But when I check on the mom and baby in the back yard, the baby is standing up, obviously has eaten, and the mom is laying contentedly beside her.  I leave them alone.

Yesterdays twins are sleeping in their barrel, all looks well.
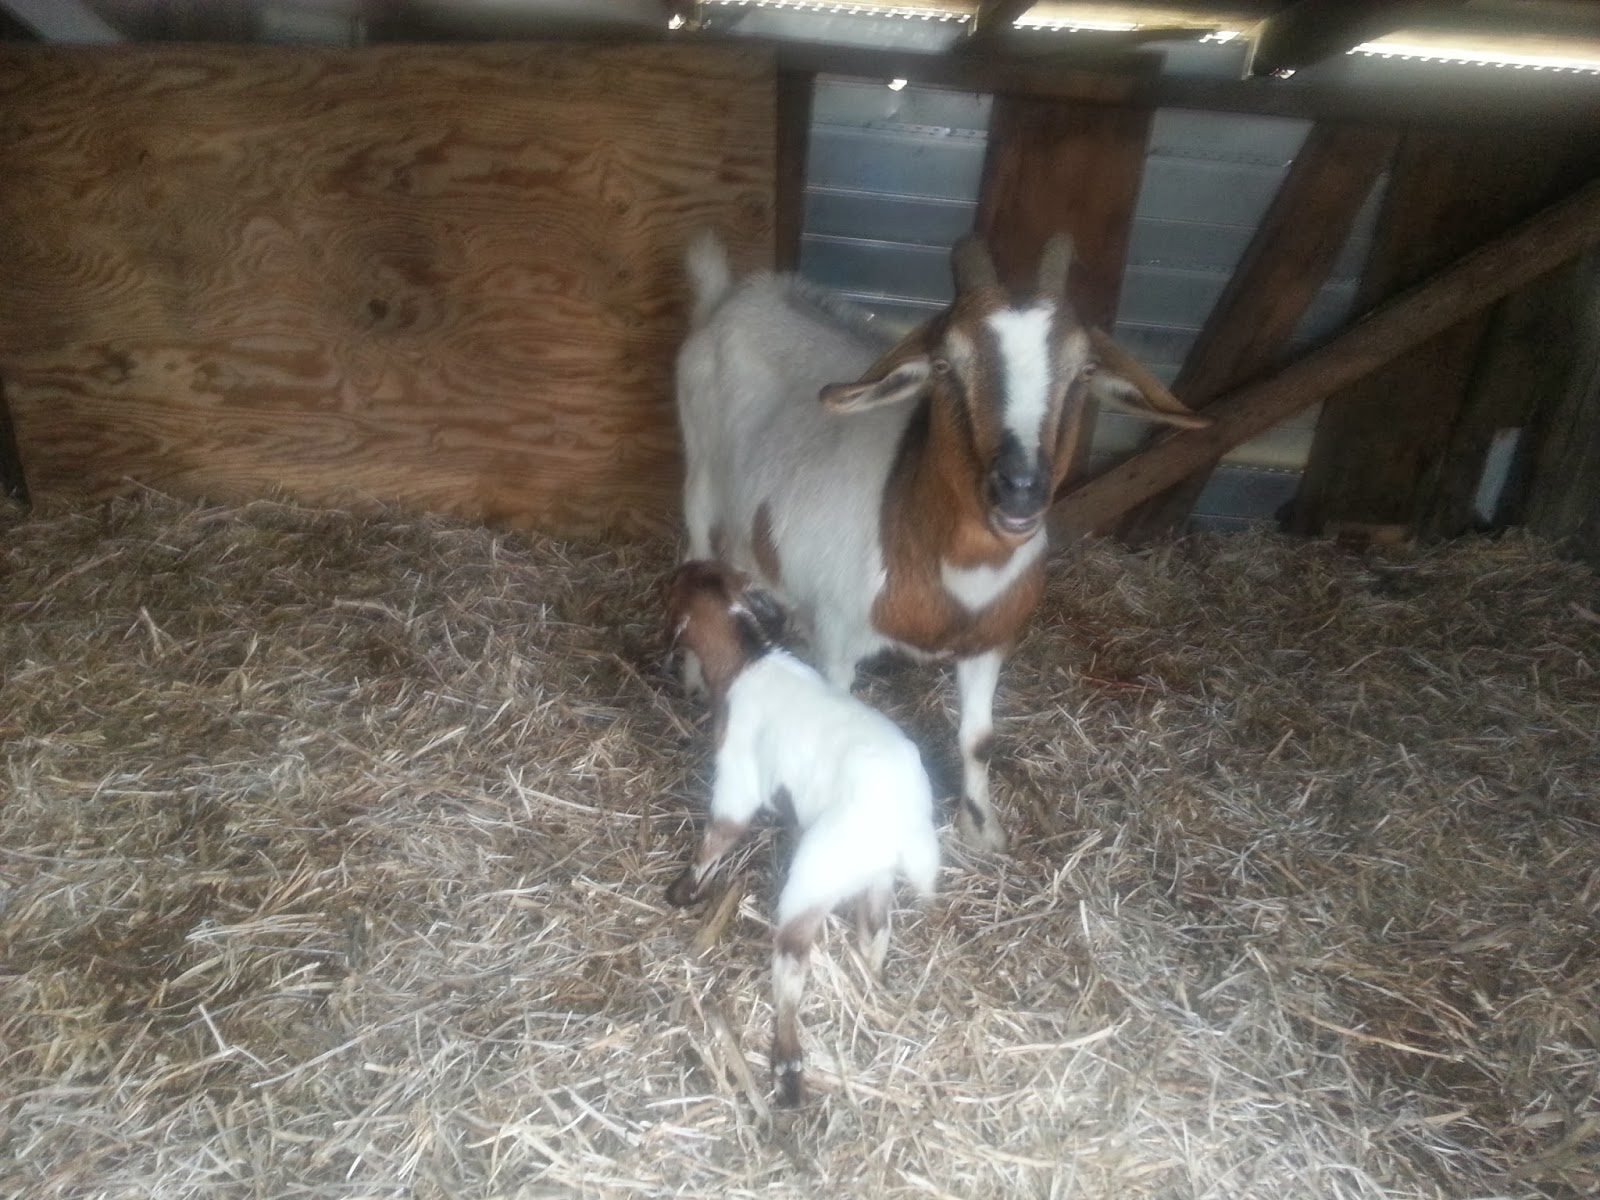
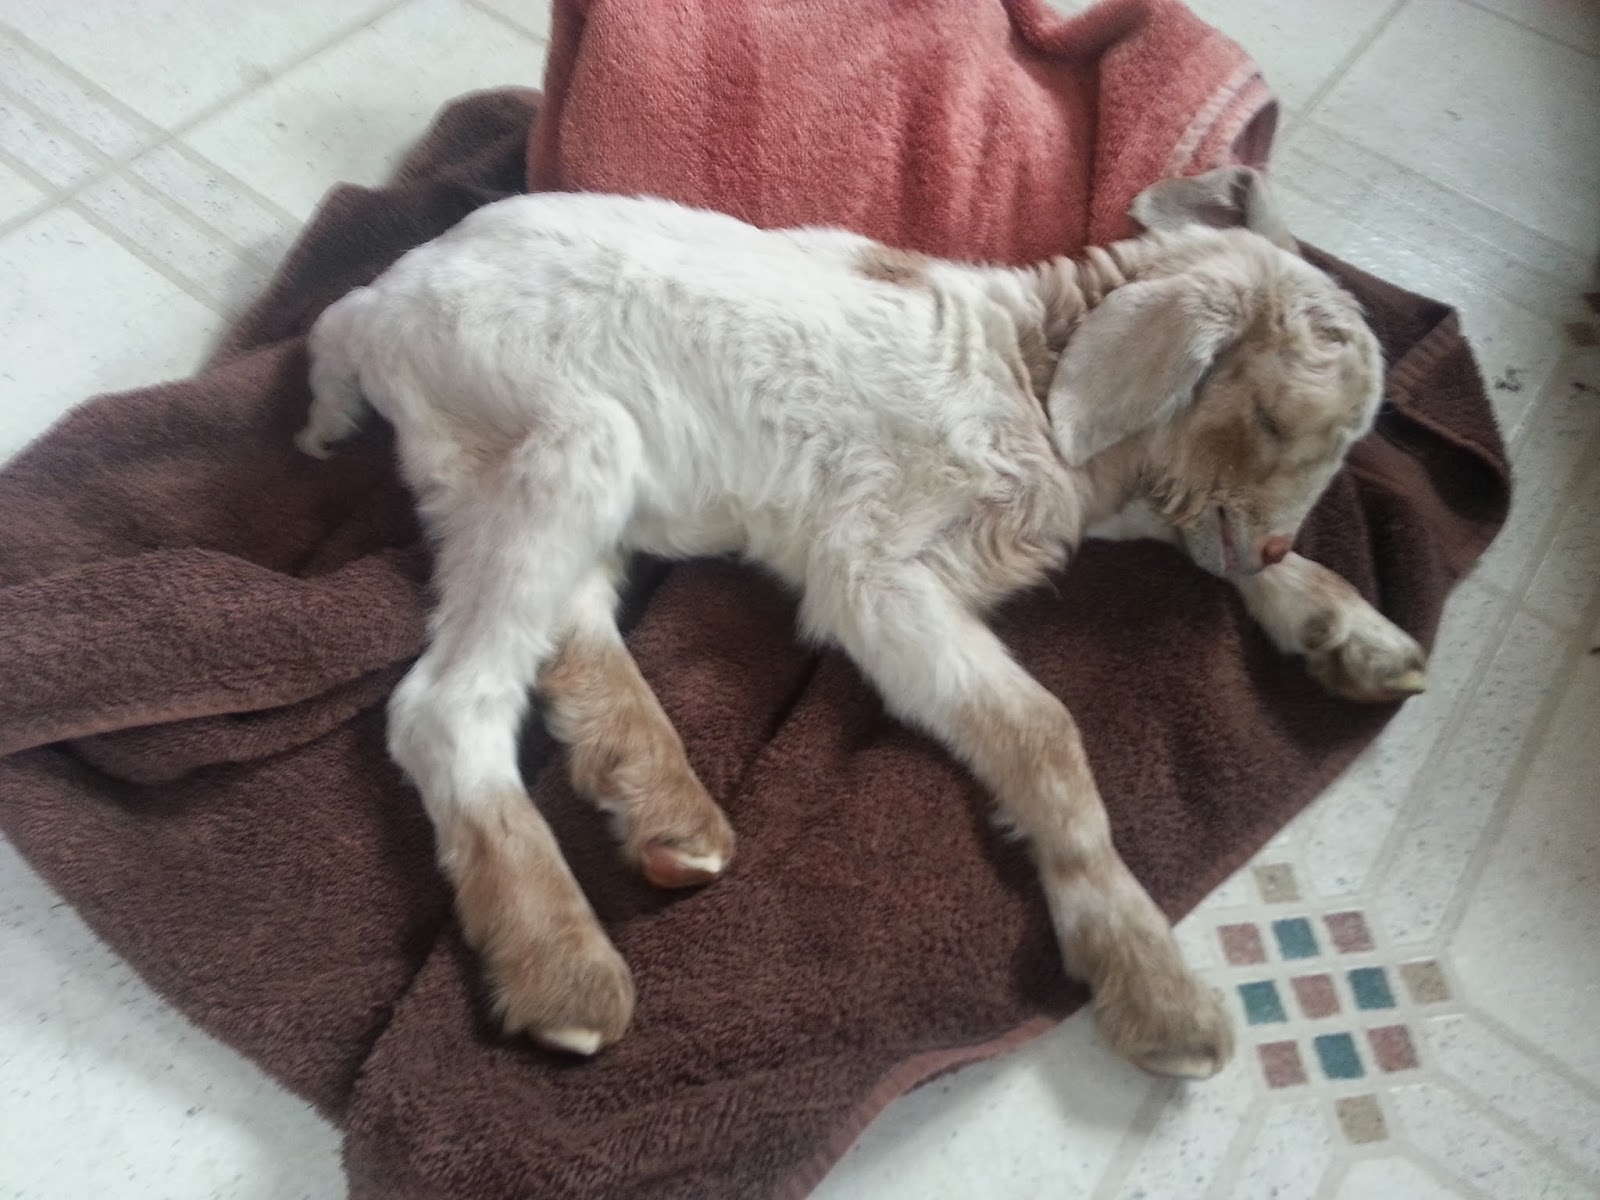
Anna, with her newborn baby girl.  For a single baby, she is small.
This is actually the calf pen in our back yard, this is where i keep newborn calves that are bottle fed in the spring and summer, but in winter, its just a "problem" pen - where we can put anyone that is having trouble.  It's attached to the side of the garage, and behind the house, so almost all wind is blocked back here.  
  
11:30am 

Anna's baby (born this morning, in the back yard pen) has wiggled into the space between her barrel and the calf shelter.  I move her into the shelter with her mom, he belly seems full - but she is a little wet and cold.  (It's been raining off and on all day)

Liza's babies - yesterdays twins - are eating off their mom.

The new baby boy is doing great, his mom has him walking around outside the shelter with her already.


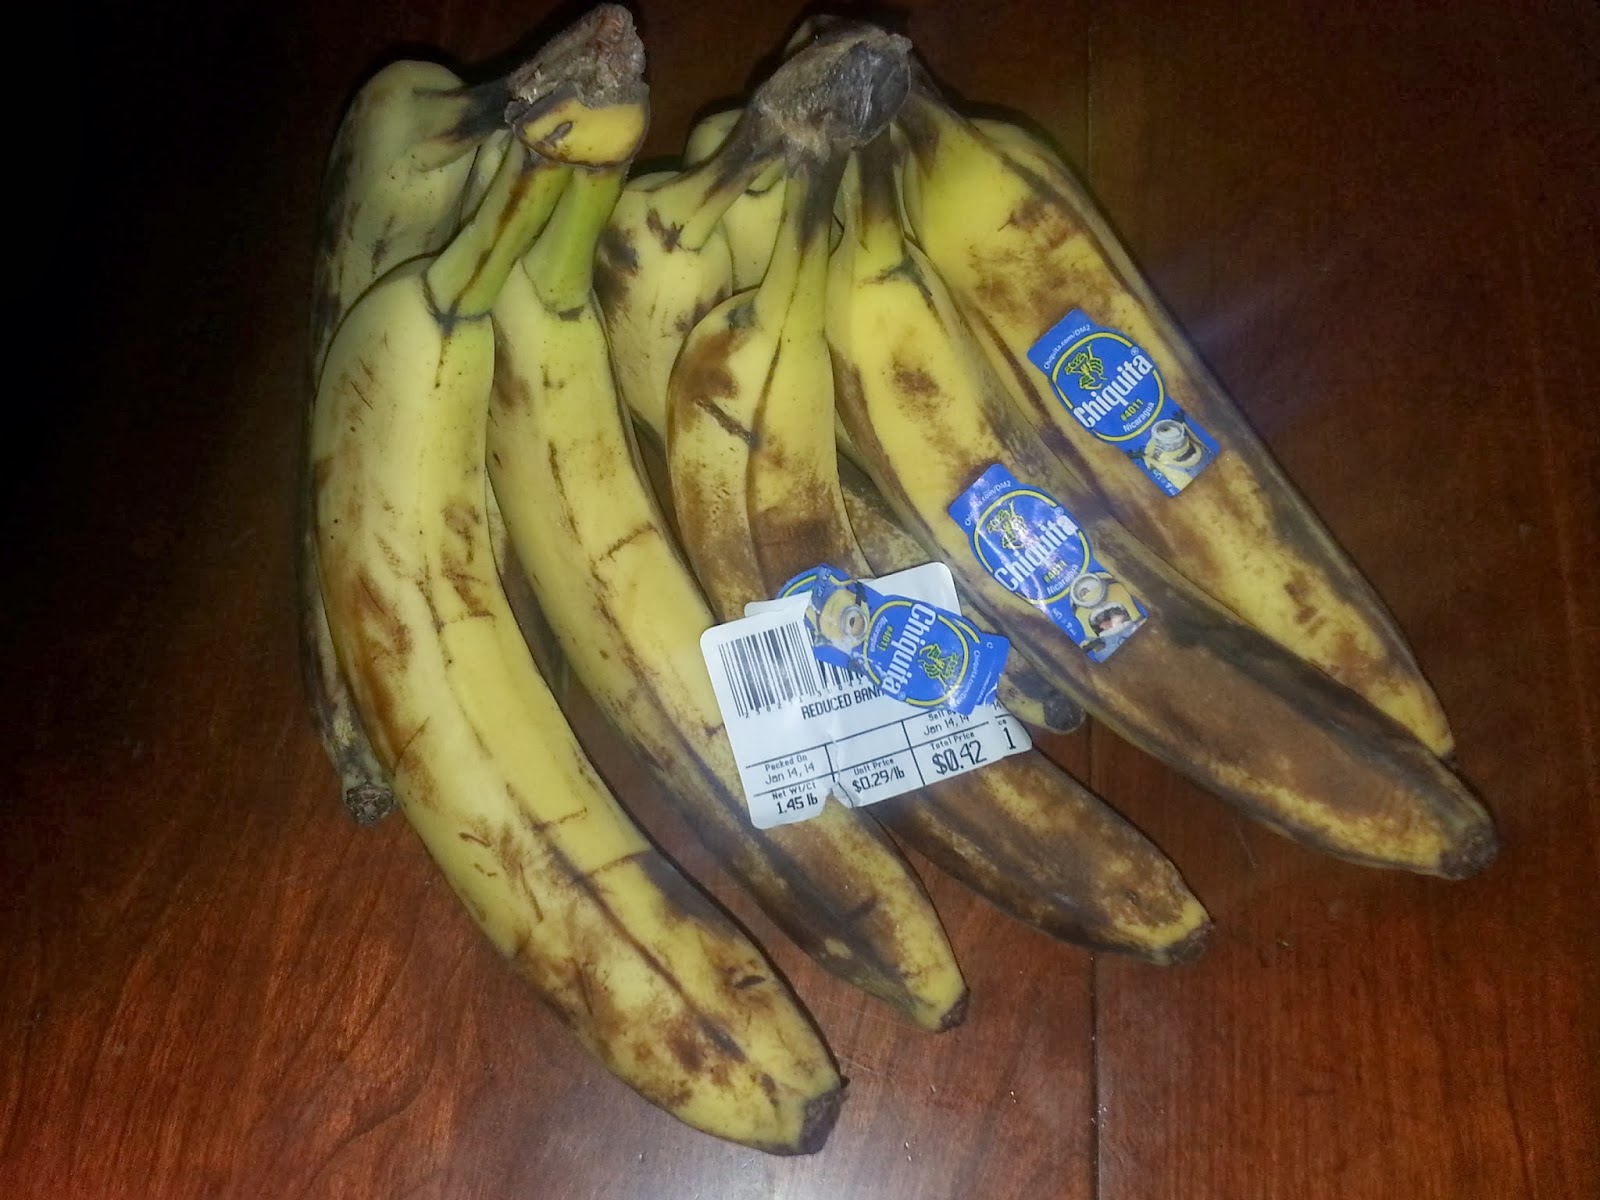
Ran Meg to her piano lesson, and while she was there I ran into the grocery store in town, they have great mark down items on Wednesday's when I am in.  I grabbed a couple of bunches of marked down bananas for the goats, the goats love bananas.  And for the kids, marked down subs.

1 day old - their mom, Liza, has mastitis ??  Not sure she does - we used the udder balm on her, but she is giving milk that is normal consistency, just not much of it, even though she has a very full bag.  We're massaging her with Udder Comfort.

12:30pm 
Take the bananas to the goats.  Liza has been a little skittish, not nearly as friendly as Piper and Sandy, who gave birth almost two weeks ago.   Piper and Sandy are some of the friendliest goats on the farm.  I have a theory that friendly goats make some of the best moms..  they aren't high strung.

Liza takes the banana from my hand, and lets me pet her.  Her babies are in separate areas out in the grass, hunched.  I notice that Sandy's twins have stolen their barrel, so I put them both in thinking they just got a little chilled.  We have a heat lamp in that barrel, so I was confident they would warm up quick.

Anna's baby looks good - I haven't seen her eating, but she looks like she is being fed, and I'm trying not to interfere with their bonding.

New baby boy looks really fantastic.  No worries there.
Liza, with her babies around 10:30 am. 
 I am irritated with myself for not seeing the problem (mastitis??) sooner, but everything appeared fine.

2:00pm
Liza's babies are not doing well.  Weak.  The girl is floppy.  We put Liza on the stanchion and her milk bag is hard, and hot.  Even massaging it with hot compresses, we do not get much milk from her.  Meg and I fed the babies bottles - the boy perked right up and sucked his down, the girl ate in spurts, but started to hold her head up. We put them back under a heat lamp, and ran to the feed store for medicine.  A shot, and some balm for her bag.

The goats want to know if I brought them more bananas, and enthusiastically jump up on me.  I am slipping and sliding in the mud.  Spring has never been my favorite season, and even less so when it comes in January, without the flowers.

5:30pm
Another bottle for the babies -- who look MUCH better. The girl even stands and eats on her own.  The boy was trying to eat off his mom while we were out there, I put the girl on her too.  They aren't getting much milk from her, but every drop helps, and I want them to stay bonded to their mom.

The brand new baby boy is out in the mud, and is soaking wet.  we lead him and his mom to a shelter and put him in a barrel.  He still seems healthy - but I would prefer he stay warm and dry.

Ana is standing, her baby eating, with no prodding or help from us.  Very good sign.


9pm
Liza's babies are standing in their barrel and walk out to us when they hear us.  I think we caught it in time!  They both ate well.  We massaged Udder Comfort into Liza's bag - she's already letting down a little more milk.

Ava's baby is in the shelter, but not in his barrel, I tucked him into the barrel.

Ana's baby was sleeping, with a full feeling belly.

Dan was getting ready to head into work, so I backed the car out of the garage for him and let it warm up, then brought our son's truck down and put it in the garage so it would be warmer when he gets up for the 3:30am morning milking next door.  When I walked up to his truck, I could hear
 water running..  one of our boys forgot to shut off the hose after watering the horses this afternoon.  As if it wasn't muddy enough, the entire area is completely flooded and likely to ice over over night...  UGH!  BUT, I'm really glad I walked up to move the truck, or that hose would have run all night long,

Thursday

3am - Gave Liza's babies a bottle - everyone looked good.  Babies took the bottles enthusiastically.

7am - Liza's babies have no interest in another bottle.  Both have full bellies.  All babies look good.  Ana, out back, is doing a great job as a mom and should be able to rejoin the others soon.  Her baby is still much smaller than the others, so I will give her a couple more days if we do not need the pen for anyone else - just to be sure.

11am - We put Liza's babies with her, they ate well off of her and then had no interest in a bottle.

3pm - Liza's girl does not seem perky, but she's eating, just not enthusiastically.  I'm concerned.  The boy is doing very well.  We think Liza is giving more milk now, but we'll continue to offer bottles for the next 24 hours, just to be sure.

8pm - all is well.  Bellies seem full, no interest in bottles.

11:30 pm - Liza's girl is dead, in the barrel, under the heat lamp,  :-(

7am - Liza's boy is weak, and has trouble eating.  Fed him milk replacer using the long syringe like thing that is one step before intubation.


9am - at this point, I'm fairly certain he will not survive, so it's just about keeping him comfortable.  I hate this so much.  We feed all of our goats the same thing.  They all get supplements, they all have their shots.  All of the nannies are healthy.  The temperatures are mild this week - the babies born the first week of the year are thriving, and they survived the "polar vortex" here in the northeast with ease.  The other two babies born a day later than these twins are doing great (even the one I was afraid would not survive - she's so tiny, and her mom wasn't taking care of her..  but now her mom is doing a great job with her and the tiny little girl is out there running and jumping around...)

Liza, the nanny, has shown little maternal instinct.  She feeds the babies and cleans then when I take them to her,  or her to them, but the rest of the time she seems to forget they existed.  She does not ever sleep near them - at night I'd find her sleeping out by the hay trough (a favorite area for our goats) and her babies over in the shelter under the heat lamp where I had left them.  The nannies do not ALWAYS stay with their babies, but all of the others show more interest, and can be found with them regularly.  Sometimes the mommas won't spend time with babies they know aren't going to live - but I don't think that was the case here.  Her milk production was low, but she has milk.  I wonder if we had kept her and her babies in their own pen for another day or two if this could have been avoided.

To be honest, I knew when I started writing this post that babies would die.  I suspected Liza's girl would not make it from the start, and Ana's baby in the back yard, I was pretty certain she would not survive either - have I mentioned how tiny she is?  She however, has surprised me, and I'm pretty confident she will be fine.  Liza's little boy surprised me.  He went from running and jumping, warm with a fully belly, to lethargic in just a few hours time.

This is farm life.  I can't save them all - something I learned a few years back.  We've saved a LOT of them.  Two of the babies out there right now are born to a goat that was an orphan we bottle fed when we first started.  She's one of many success stories.  But we have just as many failures too.

Friday - 
 Around 11pm, last goat check of my night - I find this.  :-)  A brand new little girl.

Tuesday, January 21
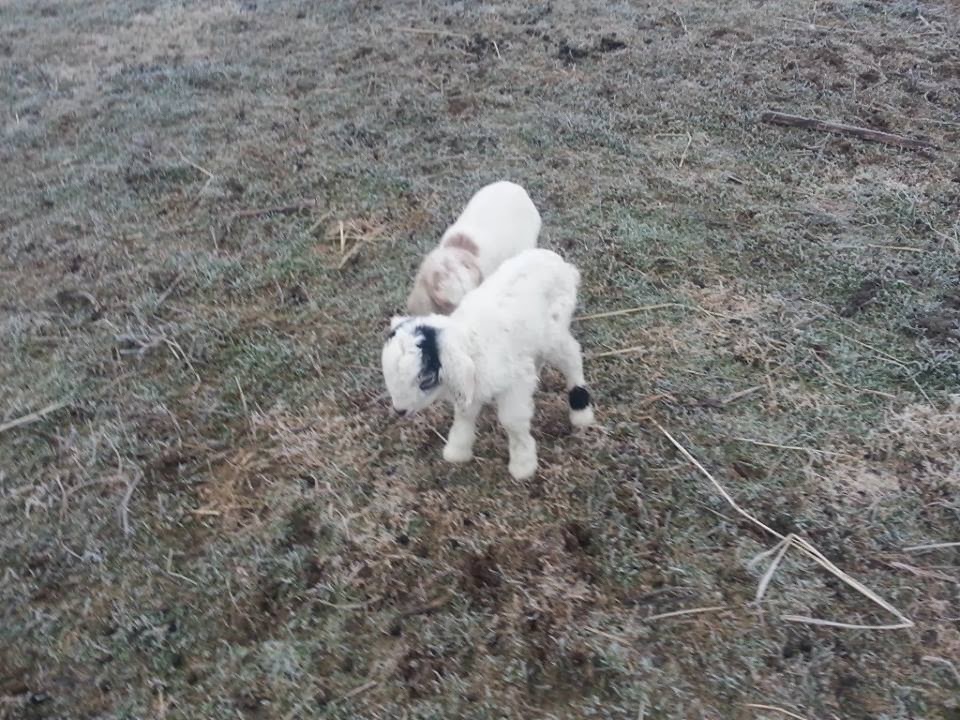
  Another set of twins!  It's another super cold week - tomorrow our temps are not expected to be more than around 10 degrees.  As the high.  We moved Ana and her little baby to the front pen with the others, and put the new twins and their mom in the back yard.  Again, one was almost frozen before she could completely dry.  (This happened with Pipers babies too - it's so cold that their fur ices up before they are dry.  We put them under a heat lamp, and Pipers babies are big and healthy, almost a month old now, no problems)  

Wednesday January 22
I could hear the new babies crying this morning, but by the time I got to their pen they were both eating - both standing and tails wagging.  I'm nervous from Liza, so once it warms up a bit (it was 1 degree when I was out) I'm going to check her milk.

A week later with Liza, she still does not produce much milk when we milk her.  Her bag is still high and tight, but her milk is not clumpy and seems "normal".  We don't know what the problem is- it does not really seem to be mastitis.  It's so heart breaking to hear her crying for her babies.