
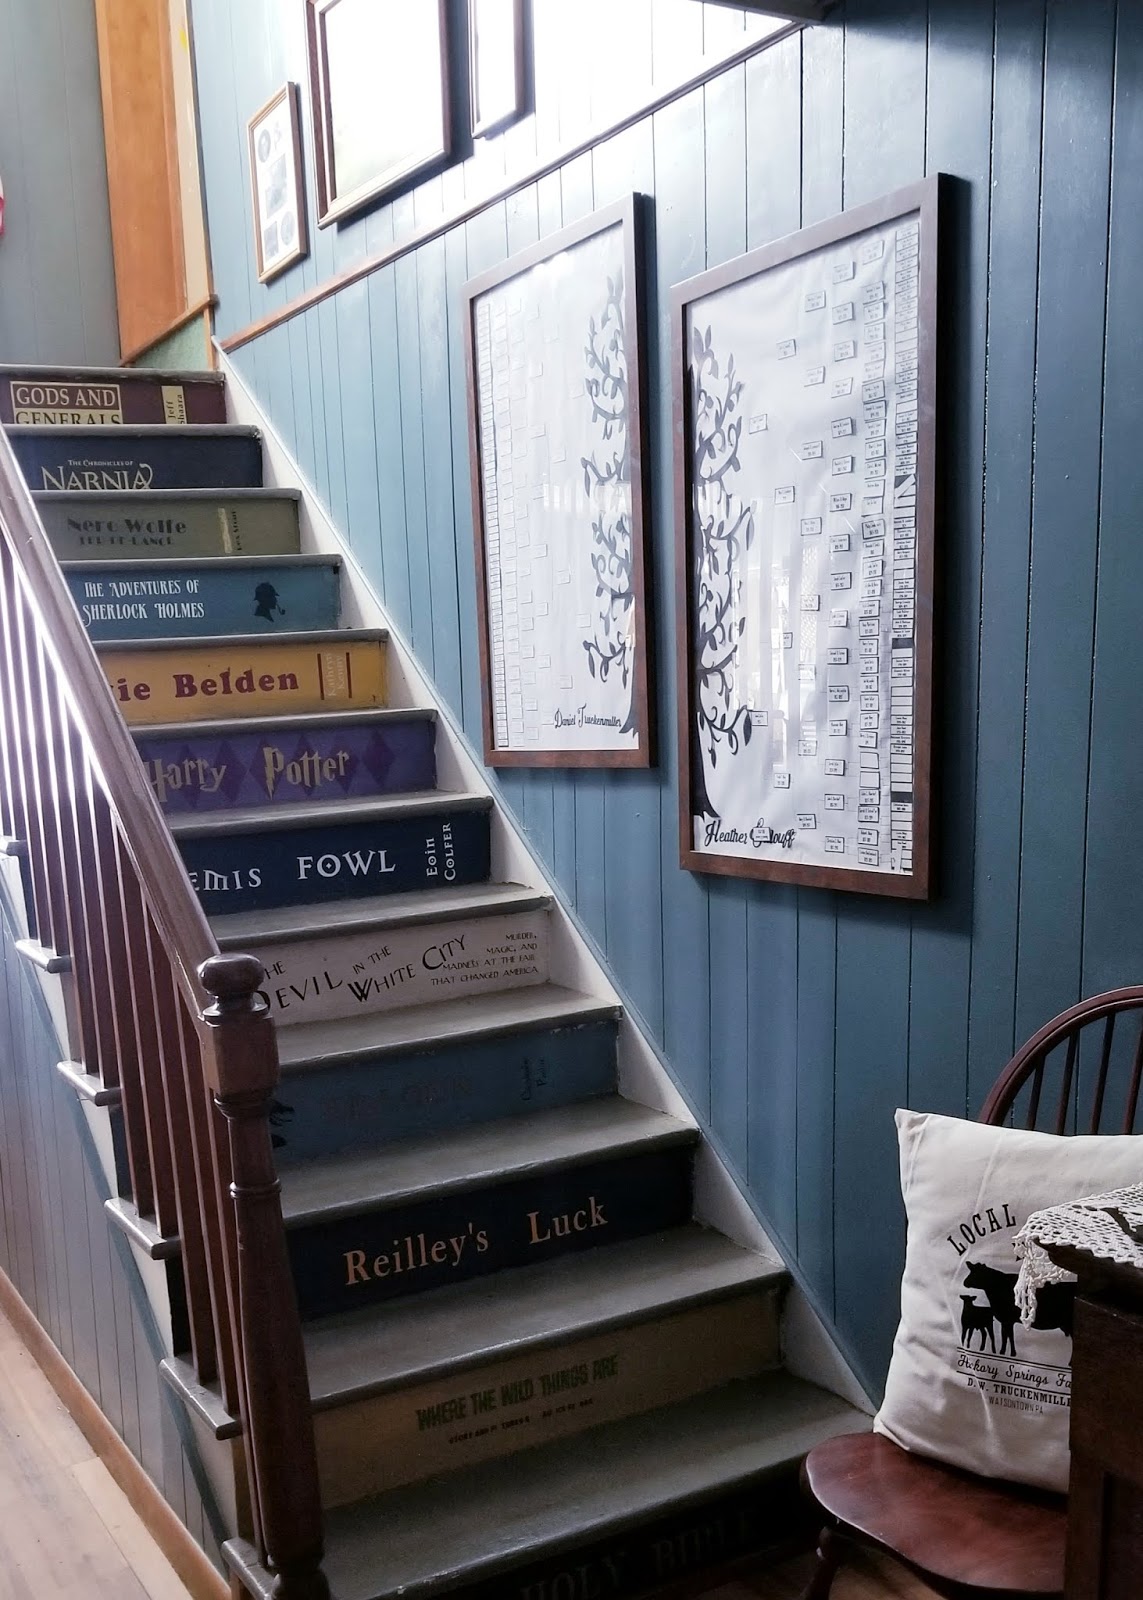
Two of my favorite Cricut Projects are right here in this hallway - the stairs decorated as books, and the family trees that hang on the wall. See how to make the family trees here.
Note - this was all done before we gutted the hallway, removing the paneling, horsehair plaster, and entire ceiling, to expose the 200+ year old rough hewn beams and original trim. That makes it sound so much prettier than it is.. while I love it, it's a very rough, unfinished, mess, these days. A definite work in progress. We never meant to leave the ceiling exposed, but once I saw it... there was no covering it back up. :-) Still, as much as I hated that paneling, I have a little nostalgia for the "finished", lack of mess in these photos...
Anyway, I've been removing the vinyl that was on the steps. Not because I didn't still love it, but because they got so dinged up in the remodel. It has NOT been easy to remove the vinyl. So much "not easy" that I haven't decided if I will redo them like this. :-(
Quick Tips:
- Sketch out a basic plan for the books & order. (I asked all of my kids what their favorite books were growing up, each of their favorites are on here.)
- Paint the steps with craft paint - the 50 cents a bottle stuff from wal-mart. Mix colors together to get the right shades. Often I add brown or grey or black - just a drop - to get the shade I want.
- Measure each step. Especially if you have an old house. Not only are ours not all the same size, but sometimes one step isn't the same size the whole way across. :-)
- I used Dollar Tree Contact paper as my transfer tape
- I used vinyl. Orcal 651.
- No, I did not seal any of this. This farm has been in the family for generations, and hopefully will be for generations more. My daughter in laws (or grand daughter in laws) will have enough reasons to curse me without me sealing vinyl to the steps. In my experience Orcal vinyl holds up VERY well all on it's own anyway.
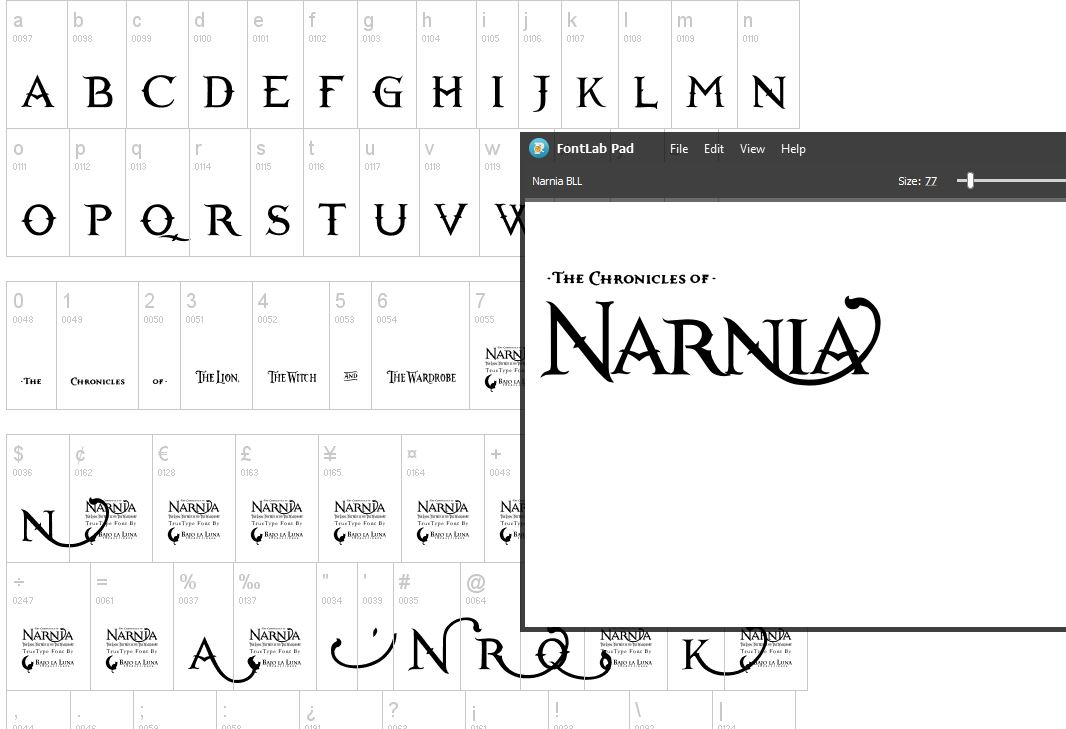
- Fontlab pad is WONDERFUL for this project! You do not need to install all the fonts. Just download them, choose Open in the Fontlab pad and browse to the zip file.
- How To Clean Up Simple Clipart In Design Space


Literally step by step -
the fonts and graphics I used:

- font is book antiqua
- For the center, I created a beige rectangle, then created another rectangle and sliced it out of the top. Added text.
- For the author plate, a black rectangle, a beige rectangle, and then I attached the text of the authors name to the beige box. This will cut the letters out of the beige box - a quick short cut for the slice option.
- I have a TON of black scraps. I know I could piece them all together and place everything on the matt to cut.. but I find it faster to just change the color of each black piece in design space, so that it sends each piece to a different mat. Then I feed a new mat in with the correct size scrap.
Our tiny local library had Jeff Shaara come visit as part of a book tour in our area. Because he was also at the larger libraries around us, very few people showed up at our tiny country library. Our family got to spend so much time with Mr Shaara, and they learned so much from him! One of our boys became a huge fan of his books as well!
Note - I ended up taking this down and redoing all of the colors - these colors were too dark on the dark step and could not be seen.
Note - I ended up taking this down and redoing all of the colors - these colors were too dark on the dark step and could not be seen.

- Font for Narnia is Narnia BLL
- Font for CS Lewis is Perpetua (I made it bold)
- Font for the flourish (under CS Lewis) is Bergamot Ornaments (the W)
For this one, and several others, I did not even install the fonts I was using. Did you know that if you use fontlab pad, the fonts do not even have to be installed? Not even unzipped. Simply choose open, and browse to the zip file. This is great for fonts like this one, that I love, but do not need cluttering up my fonts list most days. (More about using Fontlab Pad with design space)
I kept the Dafont website page open so I could see the font key, and typed:
012
NAR$IA

My favorite book series of all time. I read all of the books while on bed-rest, pregnant with the twins. (Who are now 25...)
- Font is Broadway (I have no idea where I got it - it was one of my system fonts, I don't see it on Dafont)
- For the yellow lines, I made a stencil and painted them on
- For the graphic, I took a silhouette off one of the book covers and cleaned it up a bit in design space.


- Sherlock Font is Verve
- clipart is from a google search

- Trixie Belden font is Cooper Black
- Kathryn Kenny font is Book Antiqua

- JK Rowling is in the Cricut Sans font
- Harry Potter is Harry P from Dafont
- I used purple vinyl for the diamonds, because I have a LOT of purple vinyl for some reason.
- I used Gold foil Orcal for the letters. I tried cricuts gold foil first, and had to throw it out - I couldn't work with it. The Orcal was great - no problems at all.
- When I placed this on the steps, I decided I liked the design done a bit differently - so I spaced the Harry Potter across the diamonds, and put the JK Rowling on the side.
- The "visible space" for this step was 6 inches tall - but I made the diamonds 5.75. I'm happy with that.

- Devil in White City Font is Upper West Side

- The Artemis Fowl Fonts can be downloaded here: https://www.artemis-fowl.com/artemis-fowl-fonts/

- Eragon Font is Inheritance
- Remember that you do NOT need to install fonts to use them in fontlab pad! Simply download the zip file, then open fontlab pad and choose "open" and browse to the zip file. Save as svg when done.


- The monsters are google images. Google Where The Wild Things Are svg and lots of silhouettes will pop up - easy clean up!
- Where The Wild Things Are is also a google image cleaned up -I couldn't find a font that was close enough for me to like it.
- "Story And Pictures by" are in Obelix Pro
Update - I used cricut vinyl for this one, because I liked the shades I happened to have from a starter pack I bought early on. The next morning I came down the stairs to find half the letters and one of the monsters had fallen off. I do NOT recommend Cricut vinyl for this project. (Three years later, I can't think of any time I would recommend cricut vinyl. It's more expensive, and there are better options.)
I replaced all of the cricut vinyl with Orcal and 3 years later, the orcal is holding strong.
=====================

A list of my favorite vinyl brands, where to buy them, and the price guidelines I use
A list of my favorite vinyl brands, where to buy them, and the price guidelines I use
==================

==========================
No comments:
Post a Comment